When is the Best Time to Apply Patio Sealer?

how does patio sealer work Joint-It Premium Seal (2)

Protecting your patio with a quality sealer is one of the easiest ways to extend its lifespan, prevent stains, and guard against damage from the elements. But for maximum effectiveness, timing is crucial. In this guide, we’ll explain the best time to apply patio sealer and why Joint-It Premium Seal is the ideal choice for long-lasting protection.

Why Sealing Your Patio Matters

A sealed patio is easier to maintain, looks better, and withstands harsh weather. Joint-It Premium Seal offers:

  • Waterproofing: Prevents water absorption that can cause cracks or frost damage

  • Stain resistance: Protects against dirt, oil, and algae buildup

  • Enhanced colour: Deepens the natural tones of stone or paving

  • Long-lasting protection: Reduces the need for frequent cleaning and repairs

Sealing your patio at the right time ensures these benefits last for years.

The Best Time of Year to Seal a Patio

The key factors when choosing when to apply a sealer are temperature, moisture, and weather conditions.

1. Temperature Matters

  • Ideal temperatures are between 10°C and 25°C

  • Avoid sealing in freezing conditions or extreme heat, which can affect adhesion

2. Dry Conditions Are Essential

  • Ensure the patio is dry before application

  • Avoid sealing after heavy rainfall or when rain is forecast within 24 hours

3. Season Recommendations

  • Spring or Early Summer: Surfaces are dry, temperatures are ideal, and you’ll protect your patio before heavy rain or summer stains

  • Late Summer or Early Autumn: Another excellent window, allowing protection before winter frost and damp conditions

Sealing at these times ensures the product penetrates properly and provides optimal performance.

How to Apply Joint-It Premium Seal

Applying Joint-It Premium Seal is straightforward:

  1. Clean the Patio: Use Joint-It So Clean or sweep thoroughly to remove dirt, algae, and moss.

  2. Dry the Surface: Wait at least 24 hours after cleaning for the patio to dry completely.

  3. Apply the Seal: Use a brush, roller, or sprayer to evenly coat the patio. Avoid puddling.

  4. Allow to Cure: Let the sealer dry for 24–48 hours before walking or placing furniture on the patio.

Following these steps ensures long-lasting protection and a beautifully sealed surface.

Patio Sealer - sealed vs unsealed stone

Signs It’s Time to Re-Seal Your Patio

Even with high-quality sealers like Joint-It Premium Seal, patios need maintenance over time. Reapply if you notice:

  • Water soaking into the stone instead of beading on the surface

  • Dull, faded colours or loss of shine

  • Increased dirt accumulation or staining

Regular maintenance keeps your patio looking its best and protects your investment.

The best time to apply patio sealer is during dry periods in spring, summer, or early autumn when temperatures are mild. Using Joint-It Premium Seal ensures your patio is protected from stains, weather damage, and frost, while enhancing its natural beauty.

By sealing at the right time and following proper application steps, you’ll enjoy a strong, vibrant, and low-maintenance patio all year long.

How to Apply Joint-It Elite: Step-by-Step Guide

joint-it elite buckets

A perfectly finished patio relies on more than just quality tiles; the jointing compound plays a crucial role in the overall look and durability. Joint-It Elite is a premium, air-curing jointing compound designed for porcelain and natural stone patios. Applying it correctly ensures strong, weed-free joints and a professional finish. In this guide, we’ll walk you through how to apply Joint-It Elite step by step, so your patio looks pristine and performs beautifully for years to come.

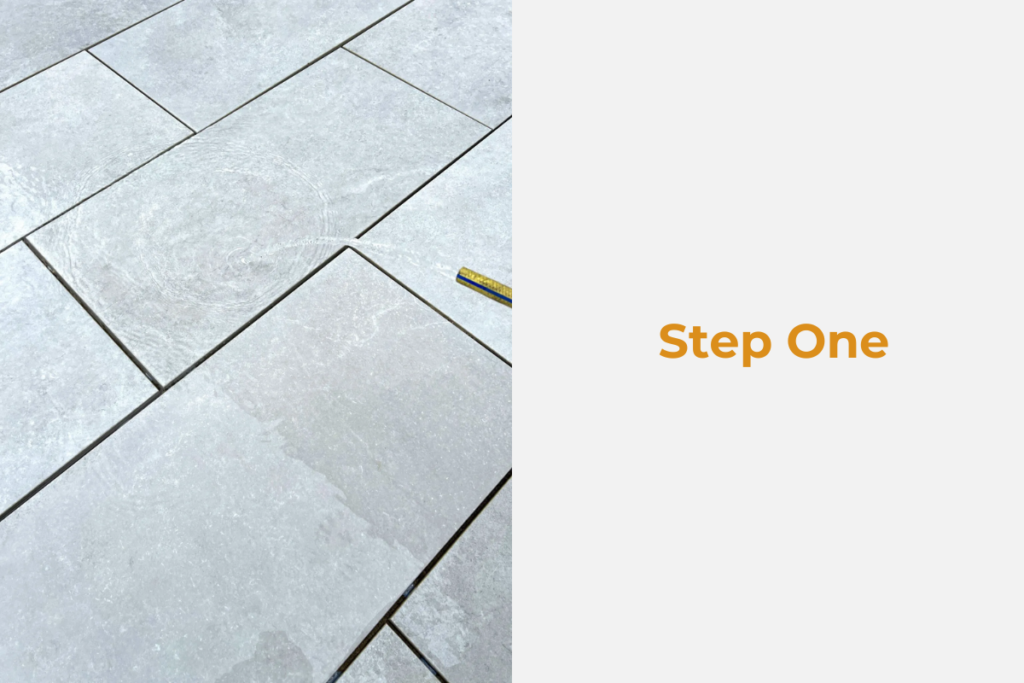
Step 1: Prepare Your Patio

Preparation is key. Before applying Joint-It Elite, make sure your patio is clean and ready:

  • Remove any dust, debris, or loose particles from the paving surface.

  • Lightly mist the paving with clean water using a spray bottle or garden hose. This helps the product bond better with the joints and prevents it from drying too quickly.

Proper preparation ensures a smoother application and prevents gaps or uneven joints.

step one Joint-It Elite

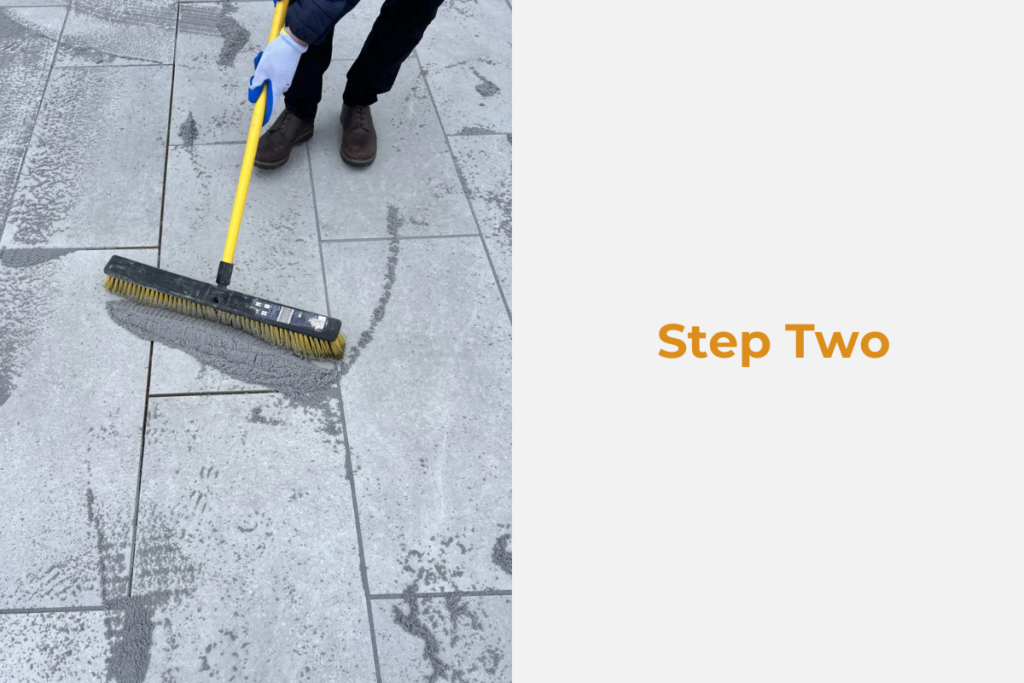
Step 2: Spread and Sweep the Product

Once the patio is prepped:

  • Empty the contents of the Joint-It Elite bucket onto the paving surface.

  • Mist the paving lightly again with clean water to activate the product.

  • Using a brush or squeegee, sweep the compound into the joints. Make sure all joints are completely filled and that the product is evenly distributed.

Sweeping ensures the compound settles correctly, providing a strong and consistent joint across the patio.

step two Joint-It Elite

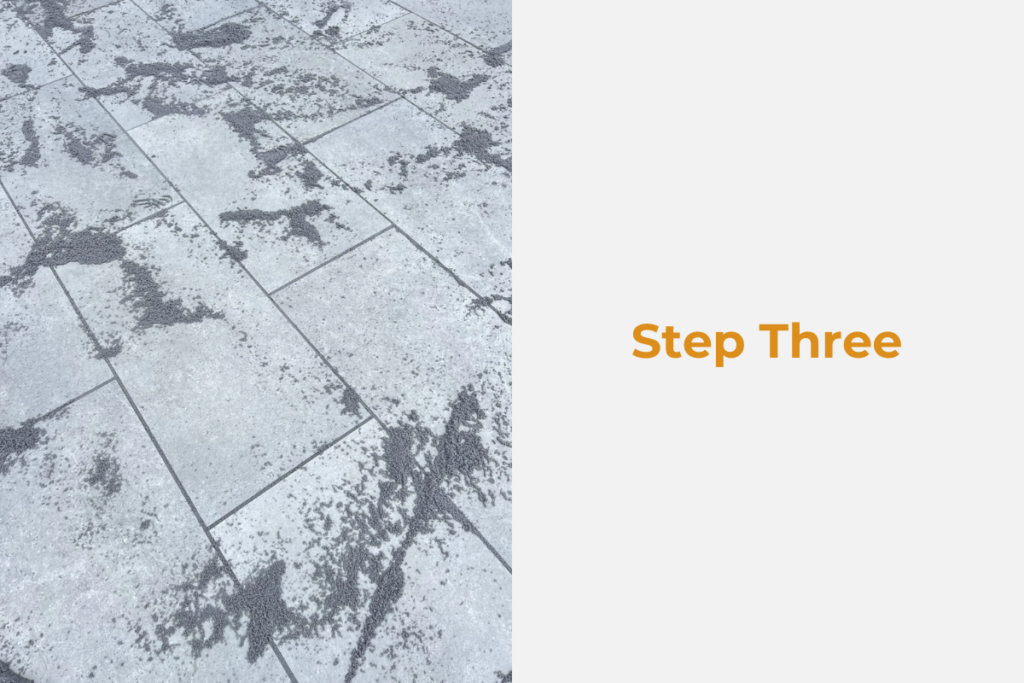
Step 3: Allow the Product to Set

After filling the joints:

  • Lightly mist the paving again with clean water to help the compound settle.

  • Wait 15–45 minutes, depending on weather conditions, for the product to begin drying.

During this period, the compound starts to bind within the joints. Avoid walking on the patio or disturbing the joints while the product begins to set.

step three Joint-It Elite

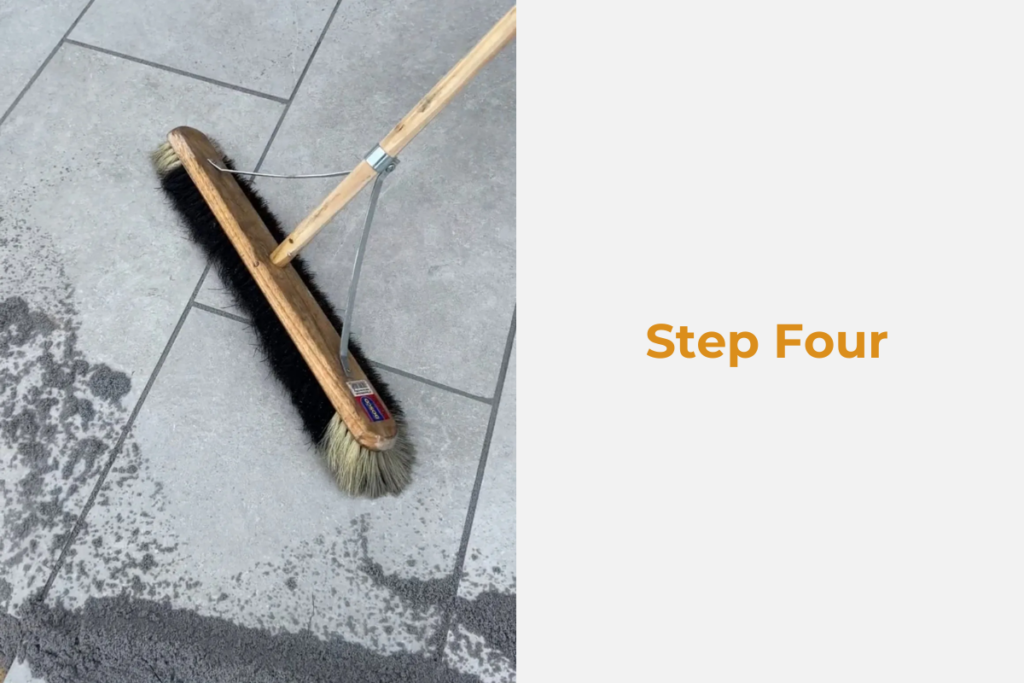
Step 4: Finish and Clean the Patio

Once the compound has started to dry:

  • Use a soft-bristle brush to top off the joints, ensuring they are fully filled.

  • Sweep away any excess product from the surface of the tiles.

  • If loose grains remain, clean the brush and continue sweeping until all excess Joint-It Elite is removed.

Proper finishing prevents staining and ensures your patio surface looks clean and professional.

Tips for Best Results

  • Work in small sections to maintain control over the application.

  • Adjust misting and drying times depending on temperature and humidity.

  • For narrow joints, use a smaller brush or squeegee to ensure the compound fills evenly.

  • Always clean tools thoroughly to prevent hardened product buildup.

Knowing how to apply Joint-It Elite correctly is essential for achieving a durable, smooth, and weed-free patio. By following these steps, you’ll enjoy a flawless finish that enhances both the appearance and longevity of your paving.

How to Use Tile Spacers for Porcelain Patios

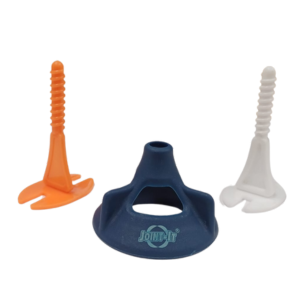
tile spacers

Laying a porcelain patio takes precision. Unlike natural stone, porcelain slabs are manufactured with exact dimensions, which means any unevenness in joints or lippage will be noticeable. That’s why tile spacers and levelling caps are essential tools. They help you maintain consistent joint widths, keep slabs level, and achieve a professional finish every time.

In this guide, we’ll walk you through the step-by-step process of using tile spacers for porcelain patios, highlighting how the Joint-It Tile Spacers & Levelling Caps system makes installation faster, easier, and more durable.

Why Use Tile Spacers for Porcelain Patios?

Porcelain patios are loved for their sleek, modern look, but this also makes precision critical. Uneven spacing or lifted edges not only ruin the finish but can cause long-term durability issues.

Using tile spacers ensures:

  • Uniform grout joints across the patio
  • Secure, stable slabs with no slippage
  • A perfectly flat surface when combined with levelling caps
  • Professional results, whether you’re a DIYer or contractor

Step-by-Step Guide: How to Use Tile Spacers

Step 1: Position the Spacers

After bedding your first slab, slide tile spacers directly beneath the exposed edges. Make sure they’re in full contact with the tiles and not sitting in the adhesive. Adjust placement depending on the size of your porcelain slabs and chosen joint width (Our spacers are available in 3mm and 5mm sizes).

Step 2: Add the Adjacent Slab

Lay the next porcelain slab firmly against the spacers already in position. This ensures a consistent joint gap, making grout lines even and professional.

Step 3: Secure the Slab in Place

Tap the slab gently with a rubber mallet, or slide it back and forth slightly, to bed it firmly into the adhesive and achieve contact without disturbing the spacers.

Step 4: Fit the Levelling Cap

Once your tiles are aligned, twist a Joint-It Levelling Cap onto the spacer. Tighten it until both slabs sit flush, eliminating any risk of lippage. Repeat along each joint until the entire row is level.

Step 5: Remove after Curing

Allow the mortar to set fully according to manufacturer’s guidance. Once cured, gently release and remove the levelling caps as they can be reused. Finally, snap off the tile spacers in line with the joint. The result: even joints, a flat finish, and a porcelain patio that looks like it was laid by a professional.

Pro Tips for Perfect Results

  • Always check levels with a spirit or laser level as you go.
  • Work in small sections so your adhesive doesn’t set before you’re finished.
  • Use extra levelling caps on larger-format porcelain slabs for maximum stability.
  • Stick to the recommended joint width for your slabs, often 2–3mm for porcelain.
Joint-It Tile Spacer and Levelling Caps

Why Choose Joint-It Tile Spacers & Levelling Caps?

The Joint-It system combines strength, durability, and ease of use. Designed with reinforced fibres for extra toughness, our tile spacers deliver consistent joint widths, while the reusable levelling caps prevent lippage. Suitable for porcelain, ceramic, and natural stone, they make every patio project easier and more reliable.

How to Grout Porcelain Paving

how to grout porcelain paving

Porcelain paving is one of the most stylish and durable options for patios and outdoor spaces, but to get that professional finish, you need to grout it correctly. This step is crucial for keeping your paving stable, preventing weed growth, and protecting against weather damage.

In this guide, we’ll walk you through how to grout porcelain paving using Joint-It Porcelain Epoxy Grout, a high-performance, stain-resistant solution designed for outdoor use.

Why Grouting Porcelain Paving Matters

Unlike indoor tiles, outdoor porcelain paving is exposed to rain, frost, and heavy foot traffic. Without the right grout:

  • Water can seep into the joints and cause frost damage

  • Dirt and debris can collect, leading to staining

  • Weeds may grow through the gaps

  • The slabs can shift or loosen over time

Using the right method, and the right product, will protect your investment for years to come.

Tools & Materials You’ll Need

Before you start, gather the following:

  • Joint-It Porcelain Epoxy Grout (colour of your choice)

  • Anti-bonding wax

  • Application gun

  • Protective gloves

  • Finishing tool

  • Scraper

Step-by-Step: How to Grout Porcelain Paving

Step 1: Prepare the Surface

  • Make sure the paving is completely clean and dry.

  • Remove any debris from between the slabs.

  • If the surface is dusty, sweep thoroughly before grouting.

Step 2: Apply Wax

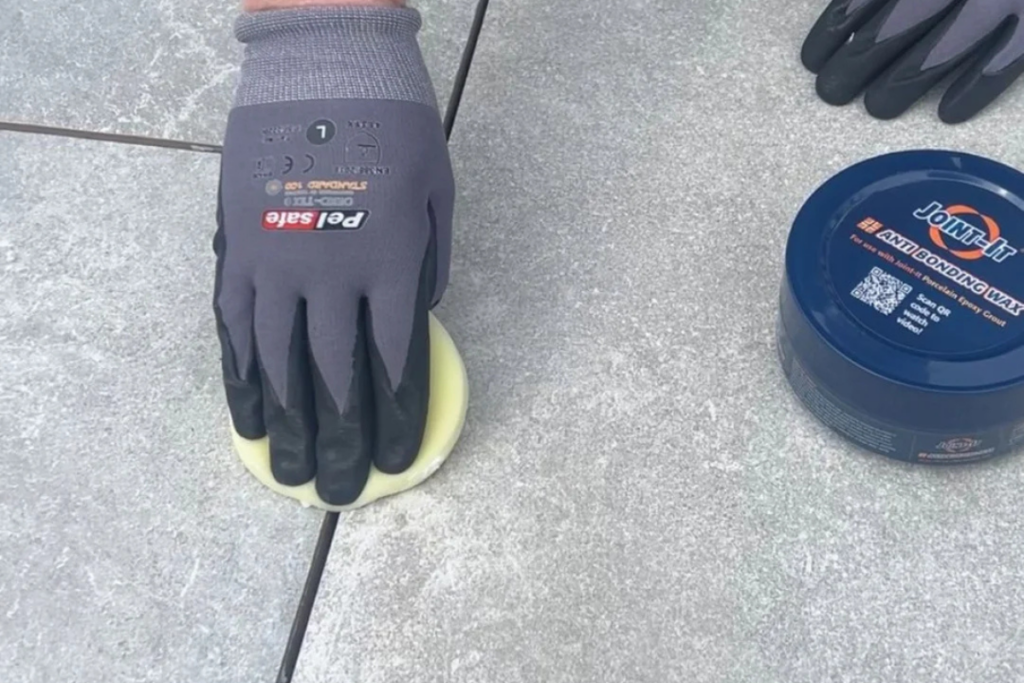
Apply a generous film of Joint-It Anti Bonding Wax to the top of the paving slabs along both sides of the joint.

applying porcelain wax

Step 3: Apply Product

Using the application gun, slowly squeeze the product into the joints covering above the level of the tiles.

Step 4: Smooth Grout

Pull the round finishing tool along the joints to create a smooth finish.

smoothing porcelain grout

Step 5: Scrape

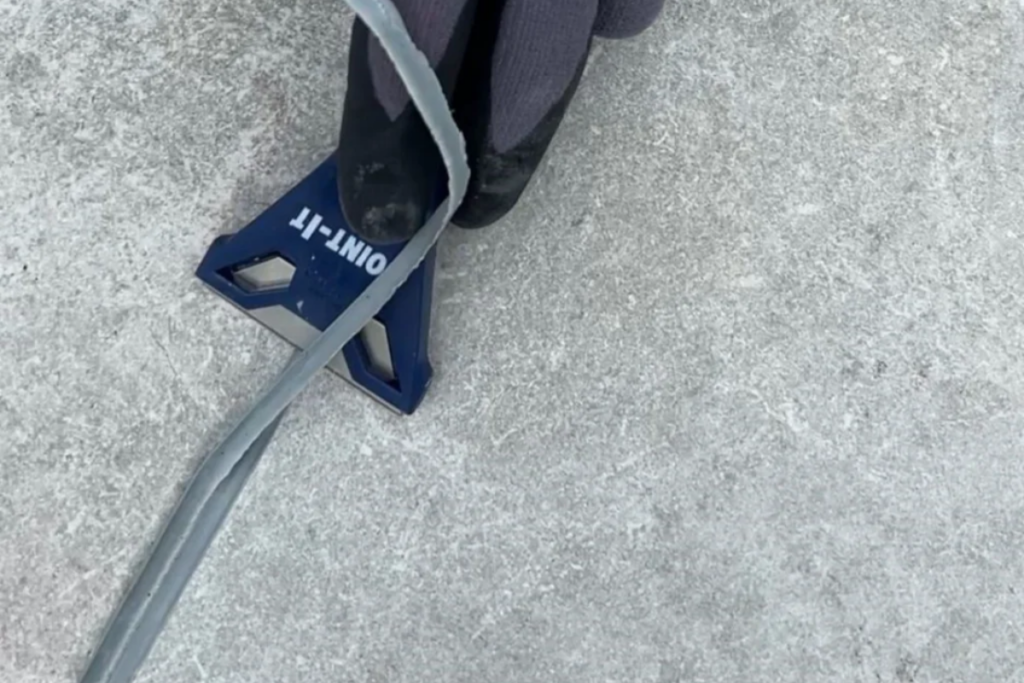
When the joints feel hard to touch, use a blade to peel off excess product. 

Scraping off porcelain grout

Tips for Perfect Porcelain Paving Joints

  • Work in small sections so the grout doesn’t set before you clean up.

  • Always check the weather. Avoid grouting in rain or extreme heat.

  • Use Joint-It Porcelain Epoxy Grout for narrow joints (2–5mm), ideal for porcelain paving.

Can You Use Porcelain Epoxy Grout on Natural Stone?

No, Joint-It Porcelain Epoxy Grout is formulated for the fine, narrow joints in porcelain paving, not the wider gaps found in most natural stone installations. If you have natural stone, use a jointing compound designed for that material, like Joint-It Simple. Read more about this in this article: “Can You Use Joint-It Porcelain Epoxy Grout on Natural Stone?”

The Best Choice for Porcelain Patios

If you want a durable, weatherproof, and stain-resistant finish, choose Joint-It Porcelain Epoxy Grout. It’s designed to withstand frost, UV rays, and heavy use, keeping your patio looking like new for years.

Can I Apply Patio Sealer Myself?

applying patio sealer

Sealing your patio is one of the best ways to protect your paving and enhance its lifespan, but many homeowners ask: “Can I apply patio sealer myself or should I hire a professional?”

The short answer? Yes, you can apply patio sealer yourself, especially if you follow the right steps and use the right products. But there are a few situations where hiring a professional might be the better option.

In this article, we’ll walk you through both options so you can make the best choice for your home, budget, and DIY confidence.

Can I Apply Patio Sealer Myself?

Absolutely — most modern patio sealers, including Joint-It Premium Seal are designed for easy DIY application. If your patio is in reasonably good condition and you’re comfortable with basic home maintenance tasks, it’s a straightforward process.

Benefits of Applying Patio Sealer Yourself:

  • Cost-effective: no need to pay labour fees

  • Flexible timing: seal at your own pace

  • Most sealers come with clear instructions

If you’re wondering, “Can I apply patio sealer myself with no experience?”, the answer is yes, if you carefully follow instructions and prepare your surface properly.

DIY Patio Sealing: What You’ll Need

Before you apply patio sealer yourself, gather the following:

  • Patio cleaner (like Joint-It So Clean)

  • Algae remover (for moss/green build-up)

  • Pressure washer (if needed)

  • Roller or garden sprayer

  • Protective gloves and mask

  • Dry weather window (24–48 hours)

Preparation is key. Don’t skip the cleaning step. Sealing a dirty patio will trap stains and reduce sealer performance.

When Should I Hire a Professional?

While you can apply patio sealer in most cases, you might consider hiring a pro if:

  • Your patio is very large or uneven

  • There are existing sealers or residues that need stripping

  • The paving is badly stained, damaged, or crumbling

  • You’re sealing expensive or rare stone, and want guaranteed results

  • You want to save time and ensure even coverage

Professionals have the tools, experience, and speed to get the job done perfectly, especially for more complex projects. You can locate local professionals on Houzz.

Apply Patio Sealer Myself vs Hiring a Pro: Pros & Cons

OptionProsCons
Apply Sealer YourselfCost-saving, flexible, rewardingTime-consuming, risk of uneven coverage
Hire a ProfessionalFast, efficient, polished resultMore expensive, less personal involvement

Why Sealing Your Patio Matters

Whether you apply patio sealer yourself or hire someone, sealing your patio offers long-term benefits:

  • Prevents water, frost, and algae damage

  • Reduces weed growth and joint erosion

  • Makes cleaning easier and faster

  • Keeps your paving looking newer for longer

Patio sealing is not just about appearance, it’s protection that pays off.

DIY-Friendly Products from Joint-It

At Joint-It, we design our patio sealing products with both homeowners and professionals in mind.

Our sealers are:

  • Easy to apply with roller or sprayer

  • Eco-friendly and breathable

  • Available in natural finish (no artificial shine)

  • Suitable for sandstone, limestone, granite, and concrete

They’re perfect if you want to apply patio sealer yourself with confidence.

sealing my patio

Can I Apply Patio Sealer Myself?

Yes in most cases, you can apply patio sealer yourself without needing a professional.


With the right products, good weather, and a bit of prep, you can protect your paving and extend its life while saving money. If in doubt, start small or reach out to a local expert for advice. Either way, don’t skip the sealing, your patio will thank you in the long run. For more information, read “What Happens If I Don’t Seal My Patio?”

How To Fill Gaps Between Patio Slabs Without Cement?

Looking to refresh your garden patio but want to avoid using cement? Whether you’re concerned about flexibility, drainage, or ease of application, learning how to fill gaps between patio slabs without cement can make your outdoor maintenance much easier and cleaner. In this guide, we’ll explore the best non-cement options, why they’re popular across the UK and Ireland, and how to apply them step-by-step.

Why Avoid Cement When Pointing a Patio?

Cement has long been a traditional choice for pointing patios, but it comes with drawbacks:

  • It can crack over time due to ground movement.

  • It’s not permeable, causing water to pool.

  • It’s difficult and messy to apply.

Homeowners across the UK are now turning to cement-free jointing solutions for a cleaner, longer-lasting, and more eco-friendly alternative.

Best Alternative: Joint-It Simple - A Cement-Free Patio Jointing Solution

If you’re looking for a professional-grade, easy-to-use product, look no further than Joint-It Simple. Specifically designed for the UK climate, this brush-in paving compound is:

  • Weather-resistant

  • Weed-inhibiting

  • Permeable for drainage

  • Ready to use with no mixing required

It works with most types of paving, including natural stone, sandstone, granite, concrete, and slate.

stop patio going green Joint-It Simple

Tools You’ll Need

Before you get started, gather the following:

  • A hard bristled brush

  • A soft brush

  • A garden hose 

  • Joint-It Simple paving jointing compound

Step-By-Step: How To Fill Patio Slab Gaps Without Cement

1. Clean the Patio

Use a pressure washer or stiff broom to remove dirt, moss, and debris from the joints. Ensure the surface is wet.

2. Open and Pour Joint-It Simple

Open the tub and pour the compound directly onto the wet surface. The product is pre-mixed and ready to use.

3. Brush It In

Use a stiff broom to sweep the compound into the gaps. Keep moving the product over the surface until all joints are filled.

4. Compact the Joints & Soak Again

Use a pointing tool to press the compound down into the gaps for a strong bond. Soak the entire area again with water.

5. Final Brush-Off

After 15-45 minutes depending on the weather, use a soft brush to sweep away the excess. Lightly spray the patio with water to activate the binder and lock the jointing compound in place.

brushing in jointing compound Joint-It Simple

Benefits of Using Joint-It Simple

  • No Cracking or Shrinking
  • UV-Resistant & Weatherproof
  • Fast Application – Saves Time
  • Weed Resistant
  • Suitable for Driveways & Patios

Ideal For British & Irish Gardens

With unpredictable UK weather, you need a jointing solution that can handle rain, frost, and temperature changes. Joint-It Simple is formulated to perform in all seasons, making it ideal for the British market.

Frequently Asked Questions

Can I use Joint-It Simple in the rain?

Yes! In fact, the surface needs to be wet for application. Avoid heavy downpours immediately after, but light rain is not a problem.

Does it stop weeds from growing?

Yes, the product creates a tight seal that inhibits weed growth, keeping your patio low-maintenance.

Is it safe for natural stone?

Absolutely. Joint-It Simple is compatible with natural stone, concrete, and most patio materials.

Final Thoughts on How To Fill Patio Slab Gaps Without Cement

Filling gaps between patio slabs without cement has never been easier. With a high-performance, eco-conscious option like Joint-It Simple, you can achieve a beautiful, durable finish that lasts for years – without the mess and hassle of cement.

How to Apply Jointing Compound in Hot Weather

patio in hot weather

Applying jointing compound in hot weather can be a challenge — if not handled correctly, the heat can cause premature drying, poor compaction, and reduced durability. Whether you’re laying a new patio or refreshing existing paving, following best practices for warm weather application is essential to get professional, long-lasting results. In this guide, we’ll explain how to apply jointing compound in hot weather, using tips trusted by contractors and homeowners alike.

Why Temperature Matters When Grouting Patios

Hot weather speeds up the curing and drying process of jointing compounds. While that may sound like a benefit, it can actually result in unwanted colour enhancement on the paving surface, and premature drying before the project is completed. That’s why it’s crucial to adapt your application technique when working in warmer conditions.

1. Choose the Right Time of Day

If possible, avoid applying jointing compound during the hottest part of the day (usually between 11am and 3pm). Instead, aim for early morning or late afternoon when temperatures are lower and the sun is less intense. This helps prevent rapid moisture evaporation, allowing the compound to compact and cure properly.

2. Pre-Wet the Paving Surface

wetting patio before grouting

Before applying Joint-It Simple jointing compound, always wet the surface of the paving stones thoroughly with clean water. In hot conditions, this step is even more important. A pre-wet surface helps prevent unwanted colour enhancement of the slabs and slows the absorption of water from the compound into the stone, giving you more working time.

3. Keep the Area Damp During Application

To prevent the compound from drying out too quickly, lightly mist the area as you work. Use a hose with a fine spray or a watering can to keep the surface damp but not flooded. This helps maintain the right moisture balance for proper curing.

4. Work in Small Sections When You Apply Jointing Compound in Hot Weather

In hot weather, it’s best to work in manageable sections. Apply and compact the jointing compound over a small area before moving on. This ensures you can properly sweep and compress the material before it begins to dry, giving you strong, clean joints.

5. Avoid Direct Sunlight if Possible

If your patio is exposed to full sun, consider creating temporary shade with a tarp or working in shaded areas first. Joint-It’s compounds are formulated to perform in varied conditions, but avoiding direct sun during application can prevent rapid curing and patchy results.

6. Rinse the Surface Thoroughly

patio grout

After applying and compacting the compound, rinse the paving surface thoroughly using a light spray to remove any residue. In warm weather, this step must be done promptly to avoid a hazy finish or residue drying on the stone. 

7. Allow Proper Curing Time

Although hot weather may speed up drying, it’s still essential to allow the compound to cure fully. Avoid walking or driving on the area until it’s completely set — usually 24 to 48 hours depending on temperature and humidity levels.

Why Joint-It Products are Ideal for Warm Weather Applications

Joint-It’s professional-grade jointing compounds are designed with performance and flexibility in mind. Unlike traditional sand or cement-based grouts, Joint-It Simple can be used in damp conditions and offers excellent resistance to weather extremes — including high temperatures. Its quick sweep-in application and long-lasting finish make it a top choice for patios, driveways, and garden paths in all seasons.

Common Mistakes to Avoid When You Apply Jointing Compound in Hot Weather

  • Skipping the pre-wet step: This leads to staining and poor curing.

  • Working too slowly: Plan ahead to avoid applying compound to areas you can’t finish in time.

  • Not rinsing thoroughly: In the heat, residue dries fast and can be difficult to remove later.

  • Applying in peak sun: Leads to patchy, uneven results.

Applying jointing compound in hot weather requires a few extra steps, but the results are well worth the effort. By choosing the right time of day, keeping surfaces damp, and working in small sections, you can ensure your patio or paved area stays strong, clean, and weed-free all summer long.

For best results, trust Joint-It jointing products. For information on why you should choose a Joint-It grouting product rather than traditional methods, read Jointing Compound vs Sand and Cement: Which is Best?

Why Joint-It Exterior Tile Grout Is the Best Choice

Joint-It Porcelain Epoxy Grout being applied in patio joints with an application gun

When it comes to grouting outdoor porcelain tiles, choosing the right product is essential for durability, aesthetics, and long-term performance. Joint-It Porcelain Epoxy Grout is the ultimate solution for UK homeowners looking for a high-quality, weather-resistant, and easy-to-apply exterior tile grout. In this guide, we’ll explore why Joint-It’s grout stands out from the competition and how it can transform your porcelain patio.

What Is Exterior Tile Grout and Why Does It Matter?

Exterior tile grout is specially designed to fill the gaps between outdoor tiles, providing a strong, waterproof, and weather-resistant bond. Unlike interior grout, it must withstand rain, frost, and temperature fluctuations—common challenges in the UK climate. Choosing the wrong grout can lead to cracking, discolouration, and weed growth, making maintenance a nightmare.

Why Choose Joint-It Porcelain Epoxy Grout?

Joint-It Porcelain Epoxy Grout is the perfect solution for porcelain patios and other outdoor tiling projects. Here’s why it’s the best choice for UK homeowners:

1. 100% Weatherproof & Frost Resistant

The UK’s unpredictable weather can wreak havoc on exterior grout. Joint-It Porcelain Epoxy Grout is specifically formulated to withstand heavy rain, frost, and extreme temperature changes, ensuring your patio remains flawless all year round.

2. Highly Durable & Long-Lasting

Unlike traditional cement-based grout, which can crack and crumble over time, epoxy grout offers superior durability. Joint-It’s advanced formula creates a permanent, non-porous bond that resists wear and tear, keeping your patio looking pristine for years.

exterior tile grout

3. Waterproof & Stain-Resistant

Water absorption is a major concern with outdoor tiles. Thanks to its non-porous properties, Joint-It Porcelain Epoxy Grout prevents moisture penetration, protecting against stains, algae, and mould—perfect for low-maintenance outdoor living.

4. Easy to Apply for Professionals & DIYers

One of the biggest challenges with grouting exterior tiles is the application process. Joint-It Porcelain Epoxy Grout is designed for easy mixing and smooth application, making it ideal for both professionals and homeowners tackling DIY patio projects.

5. Resistant to Cracks & Shrinking

Cement-based grouts can shrink and crack over time, leading to costly repairs. Joint-It’s exterior tile grout stays flexible and strong, adapting to natural movement without breaking apart.

6. UV-Resistant Colours That Stay Vibrant

Unlike traditional grout, which can fade under prolonged sun exposure, Joint-It Porcelain Epoxy Grout retains its original colour. Whether you prefer neutral tones or bold shades, you can trust that your grout will stay vibrant for years to come.

How Joint-It Porcelain Epoxy Grout Compares to Traditional Cement-Based Grout

Feature
Joint-It Porcelain Epoxy Grout
Traditional Cement-Based Grout
Durability
Long-lasting, crack-resistant
Prone to cracking and crumbling
Waterproof
100% waterproof, non-porous
Absorbs moisture, prone to stains
Weather Resistance
Frost and UV-resistant
Can degrade in extreme weather
Maintenance
Low-maintenance, easy to clean
Can require regular repairs

An Exterior Tile Grout Perfect for Porcelain Patios & Outdoor Tiling

Porcelain tiles are becoming increasingly popular for UK patios and outdoor areas, thanks to their sleek finish and durability. However, using the wrong grout can lead to discolouration, cracking, and water damage. Joint-It Porcelain Epoxy Grout is specifically engineered for porcelain tiles, ensuring a flawless and long-lasting result.

Where to Buy Joint-It Porcelain Epoxy Grout

Ready to upgrade your outdoor tiling with the best exterior tile grout? Visit our store locator to explore our range of stockists to find one near you. Alternatively, find an online retailer.

For UK homeowners looking for a premium, long-lasting, and weatherproof exterior tile grout, Joint-It Porcelain Epoxy Grout is the best option. Its superior durability, easy application, and stain-resistant properties make it the ultimate choice for porcelain patios. Say goodbye to cracked, stained, or fading grout—choose Joint-It for a flawless finish that lasts.

How to Remove Algae from Patio Slabs

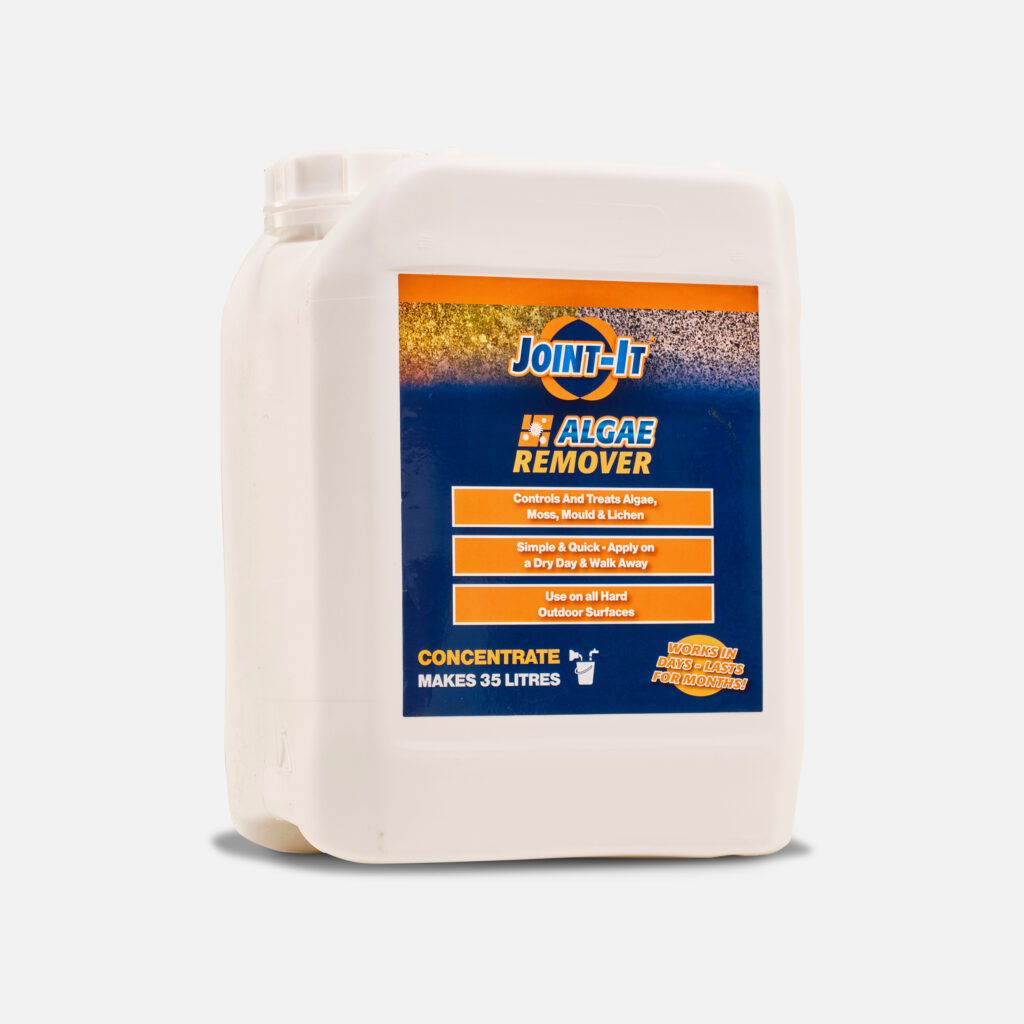
How to Remove Algae from Patio Slabs - Joint-It Algae Remover

Algae growth on patio slabs is not just an eyesore—it can also make surfaces slippery and potentially hazardous. If you’re tired of dealing with green, slimy patios, this guide will walk you through simple, effective steps to remove algae from patio slabs. For a hassle-free solution, we’ll also highlight the benefits of using Joint-It Algae Remover, a trusted product designed to restore your outdoor space to its pristine condition.

Why Does Algae Grow on Patio Slabs?

Algae thrive in damp, shaded areas where moisture collects. Your patio may be the perfect breeding ground due to:

  • Poor drainage.
  • Frequent rainfall or overwatering nearby plants.
  • Lack of sunlight in shaded spots.

Understanding the cause can help you prevent future algae outbreaks.

How to Remove Algae from Patio Slabs

Manual Cleaning Methods

Manual cleaning is an effective way to start, especially if the algae buildup is light. Here’s how:

  • Sweep and Scrub:
    Begin by sweeping your patio to remove debris. Use a stiff-bristled brush and warm soapy water to scrub the algae-covered areas.

  • Pressure Washing:
    A pressure washer can blast away algae effectively. Use medium pressure to avoid damaging the slabs.

  • Natural Remedies:
    Mix equal parts water and white vinegar, then pour it over the affected areas. Let it sit for 30 minutes before scrubbing with a brush.

Chemical Solutions

If manual methods aren’t enough, consider using specialised products. One standout option is Joint-It Algae Remover, designed to target stubborn algae without damaging your patio.

Patio cleaners remove algae - Joint-It

Why Choose Joint-It Algae Remover?

Joint-It Algae Remover is a powerful, easy-to-use solution for removing algae from patio slabs. Here’s why it’s a popular choice among homeowners and professionals:

  1. Fast and Effective:
    Its professional-grade formula works quickly to break down algae, moss, and lichen, restoring the natural beauty of your slabs.

  2. Long-Lasting Results:
    Regular use not only removes existing algae but also helps prevent regrowth, keeping your patio clean for longer.

  3. Easy Application:
    Simply dilute the product as directed, apply it to the affected area, and leave it to work. There’s no need for scrubbing or rinsing in most cases.

Step-by-Step Guide Using Joint-It Algae Remover

  • Prepare the Area:
    Remove any debris and sweep the patio surface thoroughly.

  • Dilute the Product (if you have purchased a 5L concentrate):
    Follow our guidelines to mix the appropriate amount of Joint-It Algae Remover with water. Instructions are on the packaging. 

  • Apply the Solution:
    Use a sprayer, watering can, or brush to evenly apply the product over the algae-infested areas.

  • Wait:
    Allow the solution to work its magic. Most algae will dissolve within days.

  • Optional Rinse:
    For heavily soiled areas, rinse with water or lightly scrub for best results.

Tips to Prevent Algae on Patio Slabs

Once your patio is algae-free, keep it that way with these tips:

  • Ensure Proper Drainage:
    Eliminate standing water by ensuring your patio has adequate drainage.

  • Regular Cleaning:
    Sweep and wash your patio regularly to prevent algae from taking hold.

  • Sunlight Exposure:
    Trim overhanging branches to increase sunlight exposure, which helps keep surfaces dry.

  • Apply Preventative Treatments:
    Use Joint-It Algae Remover as a preventive measure to discourage algae regrowth.

Removing algae from patio slabs doesn’t have to be a time-consuming chore. With tools like Joint-It Algae Remover, you can tackle even the most stubborn growth easily and effectively. By following the steps above and adopting preventive measures, you’ll enjoy a clean, safe, and visually appealing patio all year round. If you’re struggling with issues like your concrete going green, read our guide on how to stop concrete going green here.

Ready to rejuvenate your patio? Try Joint-It Algae Remover today and see the difference!