Blending Aesthetics with Functionality in Garden Design

Garden design - blending aesthetics with functionality

Creating a breathtaking outdoor space isn’t just about looks—modern garden design seamlessly combines visual appeal with practical features to make gardens not only beautiful but also highly functional. Whether you’re a homeowner seeking a relaxing sanctuary or a professional landscaper designing standout outdoor spaces, blending form and function is the key to a truly remarkable garden.

We’ll explore innovative garden design concepts that balance elegance with usability—plus, how premium jointing compounds can ensure your designs stand the test of time.

Multi-Functional Pathways: Beauty with Purpose

A thoughtfully designed pathway is more than a way to navigate your garden—it’s a design statement. Using natural stone jointed with high-quality compounds ensures paths remain stunning, weed-free, and low-maintenance for years.

Ways to Enhance Pathways in Garden Design:

  • Permeable Jointing: Opt for permeable jointing materials to manage water runoff effectively, preventing puddling and erosion.
  • Integrated Lighting: Embed LED strip lights along the edges for nighttime ambiance and enhanced safety.
  • Curved Designs: Break away from straight lines with gentle curves that create a more organic, flowing garden layout.

Pro Tip: Combine natural stone with gravel borders for a softer, eco-friendly look.

Outdoor Living Spaces: Extending Your Home into Nature

Modern garden design transforms backyards into full-fledged extensions of the home, perfect for entertaining, relaxing, or dining under the stars. To ensure longevity and elegance, opt for natural stone surfaces paired with weather-resistant jointing compounds.

Functional Features for Outdoor Living:

  • Zoned Patios: Use different stone patterns to define areas for dining, lounging, and cooking.
  • Built-In Stone Seating: Construct stone benches with hidden storage for cushions and outdoor essentials.
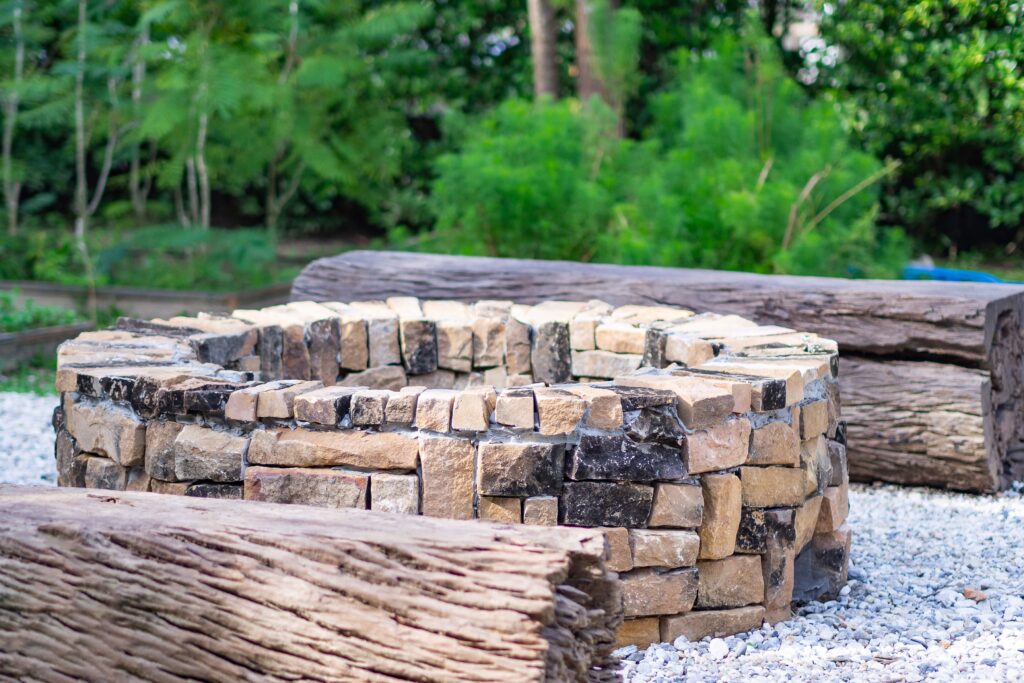
  • Central Fire Pits: Use heat-resistant jointing for a durable, crack-free fire pit design.

Pro Tip: Combine neutral stone tones with vibrant plant borders for a balanced aesthetic.

Edible Landscaping: Practical Beauty in Your Garden Design

Why choose between beauty and utility when you can have both? Edible landscaping merges ornamental plants with fruits, herbs, and vegetables, making your garden design productive and visually captivating.

Ideas to Incorporate Edible Plants Creatively:

  • Raised Stone Beds: Frame vegetable patches with jointed natural stone for a polished, professional finish.
  • Vertical Gardens: Use jointed stone bases to anchor trellises for climbing plants like beans or tomatoes.
  • Herb Pathways: Line walkways with fragrant herbs like rosemary and thyme for sensory appeal.

Pro Tip: Use contrasting stone colours to create a striking visual effect in raised garden beds.

Water Features: Adding Serenity and Sustainability

Water features bring a sense of tranquility while serving practical purposes such as irrigation and sound masking. The right garden design ensures these elements are both visually striking and functional.

Functional Water Feature Ideas:

  • Decorative Stone Channels: Guide rainwater into garden beds using artistic stone water channels.
  • Self-Sustaining Fountains: Use jointed stone reservoirs for continuous water recycling.
  • Reflective Pools: A shallow, stone-bordered pool can reflect surrounding plants and sky for a stunning focal point.

Pro Tip: Combine water features with native plants for a natural, eco-friendly effect.

Wildlife-Friendly Stone Gardens: Supporting Nature with Style

A forward-thinking garden design can support biodiversity while maintaining elegance. Incorporating stone elements with pollinator-friendly plants creates a harmonious balance between nature and design.

Wildlife-Friendly Ideas:

  • Pollinator Pathways: Jointed stone pathways surrounded by lavender, foxglove, and wildflowers to attract bees and butterflies.
  • Rock Gardens: Use jointed stone formations paired with moss and ferns for a naturalistic habitat.
  • Bird-Friendly Features: Create stone birdbaths or feeding stations integrated seamlessly into the design.

Pro Tip: Choose native plants to attract local wildlife while reducing maintenance needs.

Why Quality Jointing Matters in Modern Garden Design

The secret to long-lasting, beautiful garden design lies in the finer details—like the quality of your jointing materials. Premium jointing compounds:

  • Prevent Weed Growth: Keep your stonework pristine with minimal maintenance.
  • Enhance Durability: Protect stone features from shifting, cracking, and weather damage.
  • Improve Water Drainage: Permeable compounds help prevent water pooling and erosion.

At Joint-It, we develop and manufacture professional-grade jointing compounds designed to enhance both the appearance and longevity of your stonework. Whether you’re installing pathways, patios, or vertical gardens, our solutions ensure flawless results.

Transform Your Garden Design into a Lasting Masterpiece

A well-crafted garden design doesn’t just look good—it functions beautifully. By blending natural stone with premium jointing compounds, you can create stunning, low-maintenance landscapes that thrive for years.

Ready to transform your outdoor space? Explore our premium jointing compounds today and bring your garden vision to life with elegance and ease!

How to Choose Between a Patio, Decking, or Tarmac

grey patio Joint-It Simple

When planning an outdoor space, homeowners often face the question: which surface is best for my needs—patio, decking, or tarmac? Each option has its own aesthetic appeal, practical advantages, and maintenance requirements. In this guide, we’ll explore the benefits and drawbacks of each surface and offer tips on how to make the right choice for your outdoor area. Plus, if you choose a patio, we’ll show how Joint-It’s premium range of patio products can help create a beautiful, durable surface for years to come.

1. Patios: Durable and Versatile

Advantages of a Patio

A patio is a classic choice, offering a flat, durable surface perfect for dining areas, seating, and landscaping features. With options like natural stone, porcelain, or concrete slabs, patios can complement any design style, from modern to rustic. Patios are particularly durable and low-maintenance, especially when installed with quality grouting and sealing products that resist the elements.

Maintenance Requirements

Patios are generally easy to clean, but weeds and weather can sometimes wear on the surface if not properly maintained. This is where Joint-It products come in. Our range of professional-grade patio jointing compounds, like Joint-It Simple, ensures a strong, weather-resistant finish, protecting your patio from moisture, mould, and weed growth. The right grouting compound can extend the lifespan of your patio, keeping it pristine even with regular use.

Ideal Settings for Patios

  • Urban Homes: Adds a touch of sophistication and can easily integrate with landscaping features.
  • Family Spaces: Offers a flat, stable surface for outdoor furniture, play areas, and BBQs.
  • Long-term Homes: Durable and lasting for years, especially with the right maintenance products.

Why Choose Joint-It for Your Patio?

  • Our products are developed for easy DIY application, so homeowners can achieve a professional-grade finish.
  • Joint-It offers long-lasting protection against weeds, mould, and moisture, ensuring your patio stays beautiful and low-maintenance for years to come.

2. Decking: Warmth and Aesthetic Appeal

Advantages of Decking

Decking can bring a warm, natural feel to your outdoor space. Ideal for slightly sloped or uneven ground, decking creates a raised platform that can be particularly useful in garden areas. Wood decking comes in various types, like cedar, redwood, or pressure-treated pine, each providing a different look and feel. Alternatively, composite decking offers the aesthetic appeal of wood but with added durability and lower maintenance.

Maintenance Requirements

Wooden decking requires regular maintenance, including sealing and staining, to protect against rot, mold, and fading. Composite decking requires less upkeep but can still be prone to some weathering.

Ideal Settings for Decking

  • Sloped Gardens: Decking is easier to install on uneven ground, allowing you to make the most of the space.
  • Relaxation Zones: The softer aesthetic of wood creates a cozy and inviting outdoor area, ideal for lounging and relaxing.
  • Seasonal Homes: Decking can be ideal for spaces that are used less frequently, as maintenance can become a consideration with regular use.

3. Tarmac: Practical and Low-Maintenance

Advantages of Tarmac

Tarmac is a practical and affordable surface, most often used for driveways but also suitable for minimalistic outdoor areas. It provides a flat, weather-resistant surface that can withstand high traffic and heavy loads, making it ideal for driveways, parking areas, and functional outdoor zones. While tarmac lacks the aesthetic variety of patios and decking, its durability makes it a reliable choice for low-maintenance spaces.

Maintenance Requirements

Tarmac is one of the easiest surfaces to maintain, but it can wear over time under heavy use. Cleaning is minimal, but occasional resurfacing may be needed to keep it looking fresh.

Ideal Settings for Tarmac

  • Driveways and Parking Areas: Tarmac provides a strong surface ideal for cars and heavy loads.
  • Utility Spaces: Suitable for areas where functionality takes priority over aesthetics.
  • Rainy Climates: Tarmac’s quick-drying surface is ideal for areas that experience heavy rainfall.

Choosing the Right Surface for Your Home

When deciding between a patio, decking, or tarmac for your outdoor area, consider your needs, climate, and how you plan to use the space. Here’s a quick breakdown:

  • Choose a Patio if you’re looking for a long-lasting, elegant space for socializing, dining, or relaxing.
  • Choose Decking if you want a warm, inviting look with the ability to accommodate uneven ground.
  • Choose Tarmac for a durable, low-maintenance solution, especially if your focus is on functionality over design.

How Joint-It Products Enhance Your Patio

If you’re leaning towards a patio, Joint-It’s range of patio products is here to help you create a stunning, low-maintenance surface that lasts. Here’s how Joint-It can make a difference:

  1. Joint-It Simple: Our flagship jointing compound, Joint-It Simple, is designed for ease of use, filling patio joints quickly and effectively to resist weather and weed growth.
  2. Joint-It Premium Sealers: Our sealers provide an extra layer of protection, helping maintain your patio’s natural beauty and making it easier to clean.
  3. Eco-Friendly Solutions: Joint-It products are environmentally friendly, free from harsh chemicals, and safe for families and pets.

Whether you choose a patio, decking, or tarmac, the right surface can elevate your outdoor space. With Joint-It’s patio products, creating a beautiful, long-lasting patio has never been easier. Our range of jointing compounds and sealers will keep your patio looking its best, letting you enjoy your outdoor space without the hassle of constant maintenance.

Invest in a patio with Joint-It, and enjoy a durable, stylish outdoor area you’ll love for years.

How to Prepare the Ground for Patio Installation

Prepare the Ground For Patio Installation

A successful patio or driveway starts with meticulous ground preparation. Like any well-executed project, the key to a long-lasting, attractive patio is in the groundwork. Preparing the ground properly is crucial to avoiding common issues that arise from improper base construction. Let’s explore the essential steps for getting your patio project off to a solid start.

When paving projects fail, it’s rarely an issue with the materials themselves—whether flagstones, block paving, or setts. Most problems arise from the groundwork, specifically the layers beneath the paving. Understanding the basics of a patio’s build-up can help you avoid costly and frustrating issues, whether you’re taking a DIY approach or hiring a professional installer.

Avoiding Common Pitfalls in Patio Construction

Step 1: Remove all Vegetation

The first rule of ground preparation is to start with a clean slate. Vegetation, including grass, weeds, shrubs, or even the remnants of old flower beds, should be completely removed. Organic materials decay over time, which means any vegetation left beneath your patio will break down, causing the ground to settle unevenly and your paving to shift or sink.

Tip: Clear an area that’s slightly larger than your planned patio size to provide working space. For example, if your patio will be 4m x 5m, extend your cleared area by at least 250-300mm on each side.

remove vegetation patio preparation groundworks

Step 2: Remove Topsoil

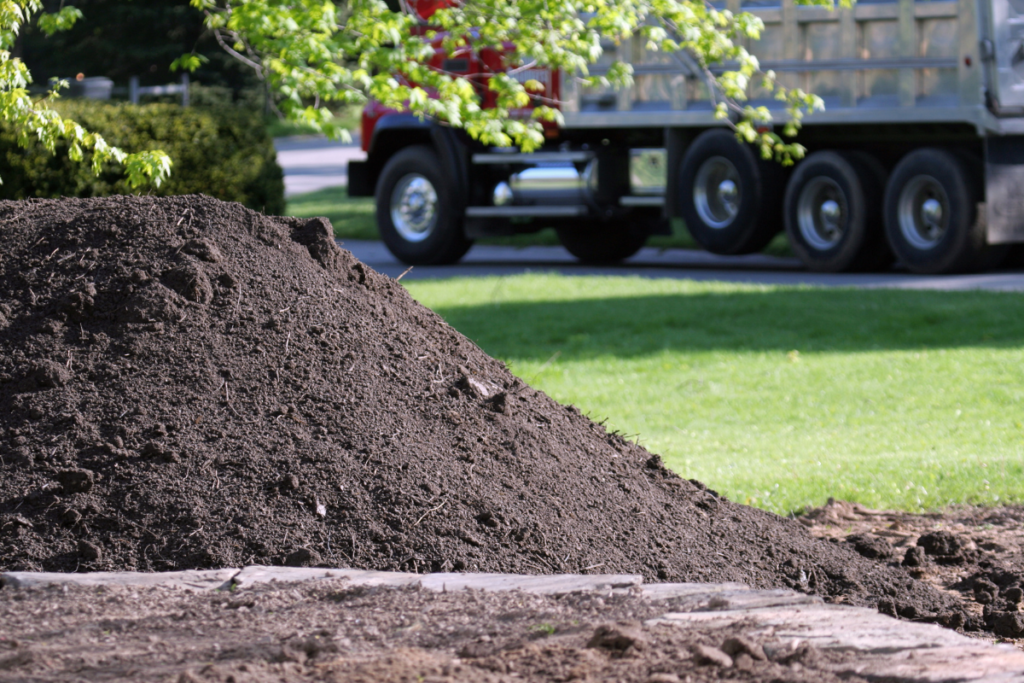
Topsoil, while great for growing plants, is a poor foundation for paving due to its high organic content. Over time, the organic material in topsoil will break down and shrink, leading to a soft, unstable base for your patio. As you remove vegetation, continue digging to remove all topsoil within the extended patio area until you reach the subsoil layer below.

Identifying Topsoil vs. Subsoil:

Topsoil is usually dark brown to black due to organic matter, while subsoil is typically lighter and denser. The subsoil layer, free of decomposing material, provides a much firmer, more stable platform for patio installation.

topsoil patio groundworks

Step 3: Check the Stability of the Sub-Grade

After clearing vegetation and topsoil, you’ll be left with the subsoil layer, also called the sub-grade. This layer needs to be firm and stable, so inspect it carefully for any soft, muddy, or loose spots, and dig these out as needed. A solid sub-grade is essential to support the patio without future sinking or shifting. The exposed sub-grade should be even, without high or low points, to ensure consistent patio stability.

Step 4: Measure for Depth and “Formation Level”

To accommodate a patio’s necessary layers, you’ll need to ensure enough depth in your foundation. Here’s how the layers typically add up for a sturdy patio foundation:

  • Sub-base (crushed aggregate): 100mm minimum
  • Laying course (sand or mortar bed): 25-40mm
  • Paving layer (flags, stones, or pavers): generally 20mm

Adding up these layers, a basic patio build-up will require at least 150mm of depth below your desired finished level.

Setting the Formation Level:

The formation level is the depth to which you excavate to start the patio’s build-up. For most patios, the formation level should be at least 150mm below the planned patio surface, or 300mm below the damp proof course (DPC) of any nearby structures. If your patio will be flush with indoor flooring near bi-fold or patio doors, additional waterproofing measures will be required to prevent moisture issues.

Step 5: Prepare for the Sub-Base Layer

Once the site is excavated and leveled, you’re ready to lay the sub-base. This layer, typically made of crushed stone or gravel, forms the foundation on which all other layers sit. A minimum of 100mm of compacted sub-base material will provide the strength and stability required for a durable patio.

The Right Preparation Means a Lasting Patio

porcelain patio

Taking these foundational steps seriously will help ensure that your patio stands the test of time. From clearing all vegetation to establishing a stable sub-grade and properly measuring depth, a little extra effort now will save you time and repairs down the road.

This article was written Joint-It, a leading provider of professional jointing and stone care products. For more landscaping tips and product recommendations, explore Joint-It’s range designed for patios, driveways, and more.

How to Choose a Size and Shape For Your Patio

We’ve teamed up with The Paving Expert, Tony McCormack, to discuss how to choose a size and shape for your patio.

 
It can be difficult to choose a size and shape for your patio. You need to consider the size of your garden, patio furniture, current trends and intended uses before you make your decision. The Paving Expert, Tony McCormack discusses below how to reach these decisions so that you can enjoy your patio for many years to come. Tony McCormack is a highly knowledgable paving consultant and offers lots of excellent resources on his website https://www.pavingexpert.com/. 


Does a patio always have to be square or rectangular?

There’s an assumption that a patio shape has to be a simple square or rectangle of paving directly outside the rear doors. The problem is that this rarely works effectively. All too often it’s too small to be of any practical use. At the other extreme, it completely dominates the garden. This can leave you with seemingly acres of paved empty space and a few items of over-priced outdoor furniture scattered at random. There usually is an optimal size for a patio, but it’s not something that follows a mathematical rule. It’s based on how the patio will be used, combined with the preferred style of those users.
 
Grey Patio with Garden Bench jointed with Joint-It Simple paving grout


How to Choose a Size for your Patio

At a basic level, there should be room to accommodate a table. Is that a bistro-style table for two, or a party-central expanse that wouldn’t be out of place in a pub beer garden? Maybe you’ll have different needs at different times. Perhaps a cosy corner spot for an early-morning breakfast. Or a family-and-friends spread for those summer weekend evenings. Take time to decide what you will use your patio for, as this will help to determine the size of your patio.


Patio Furniture Measurements

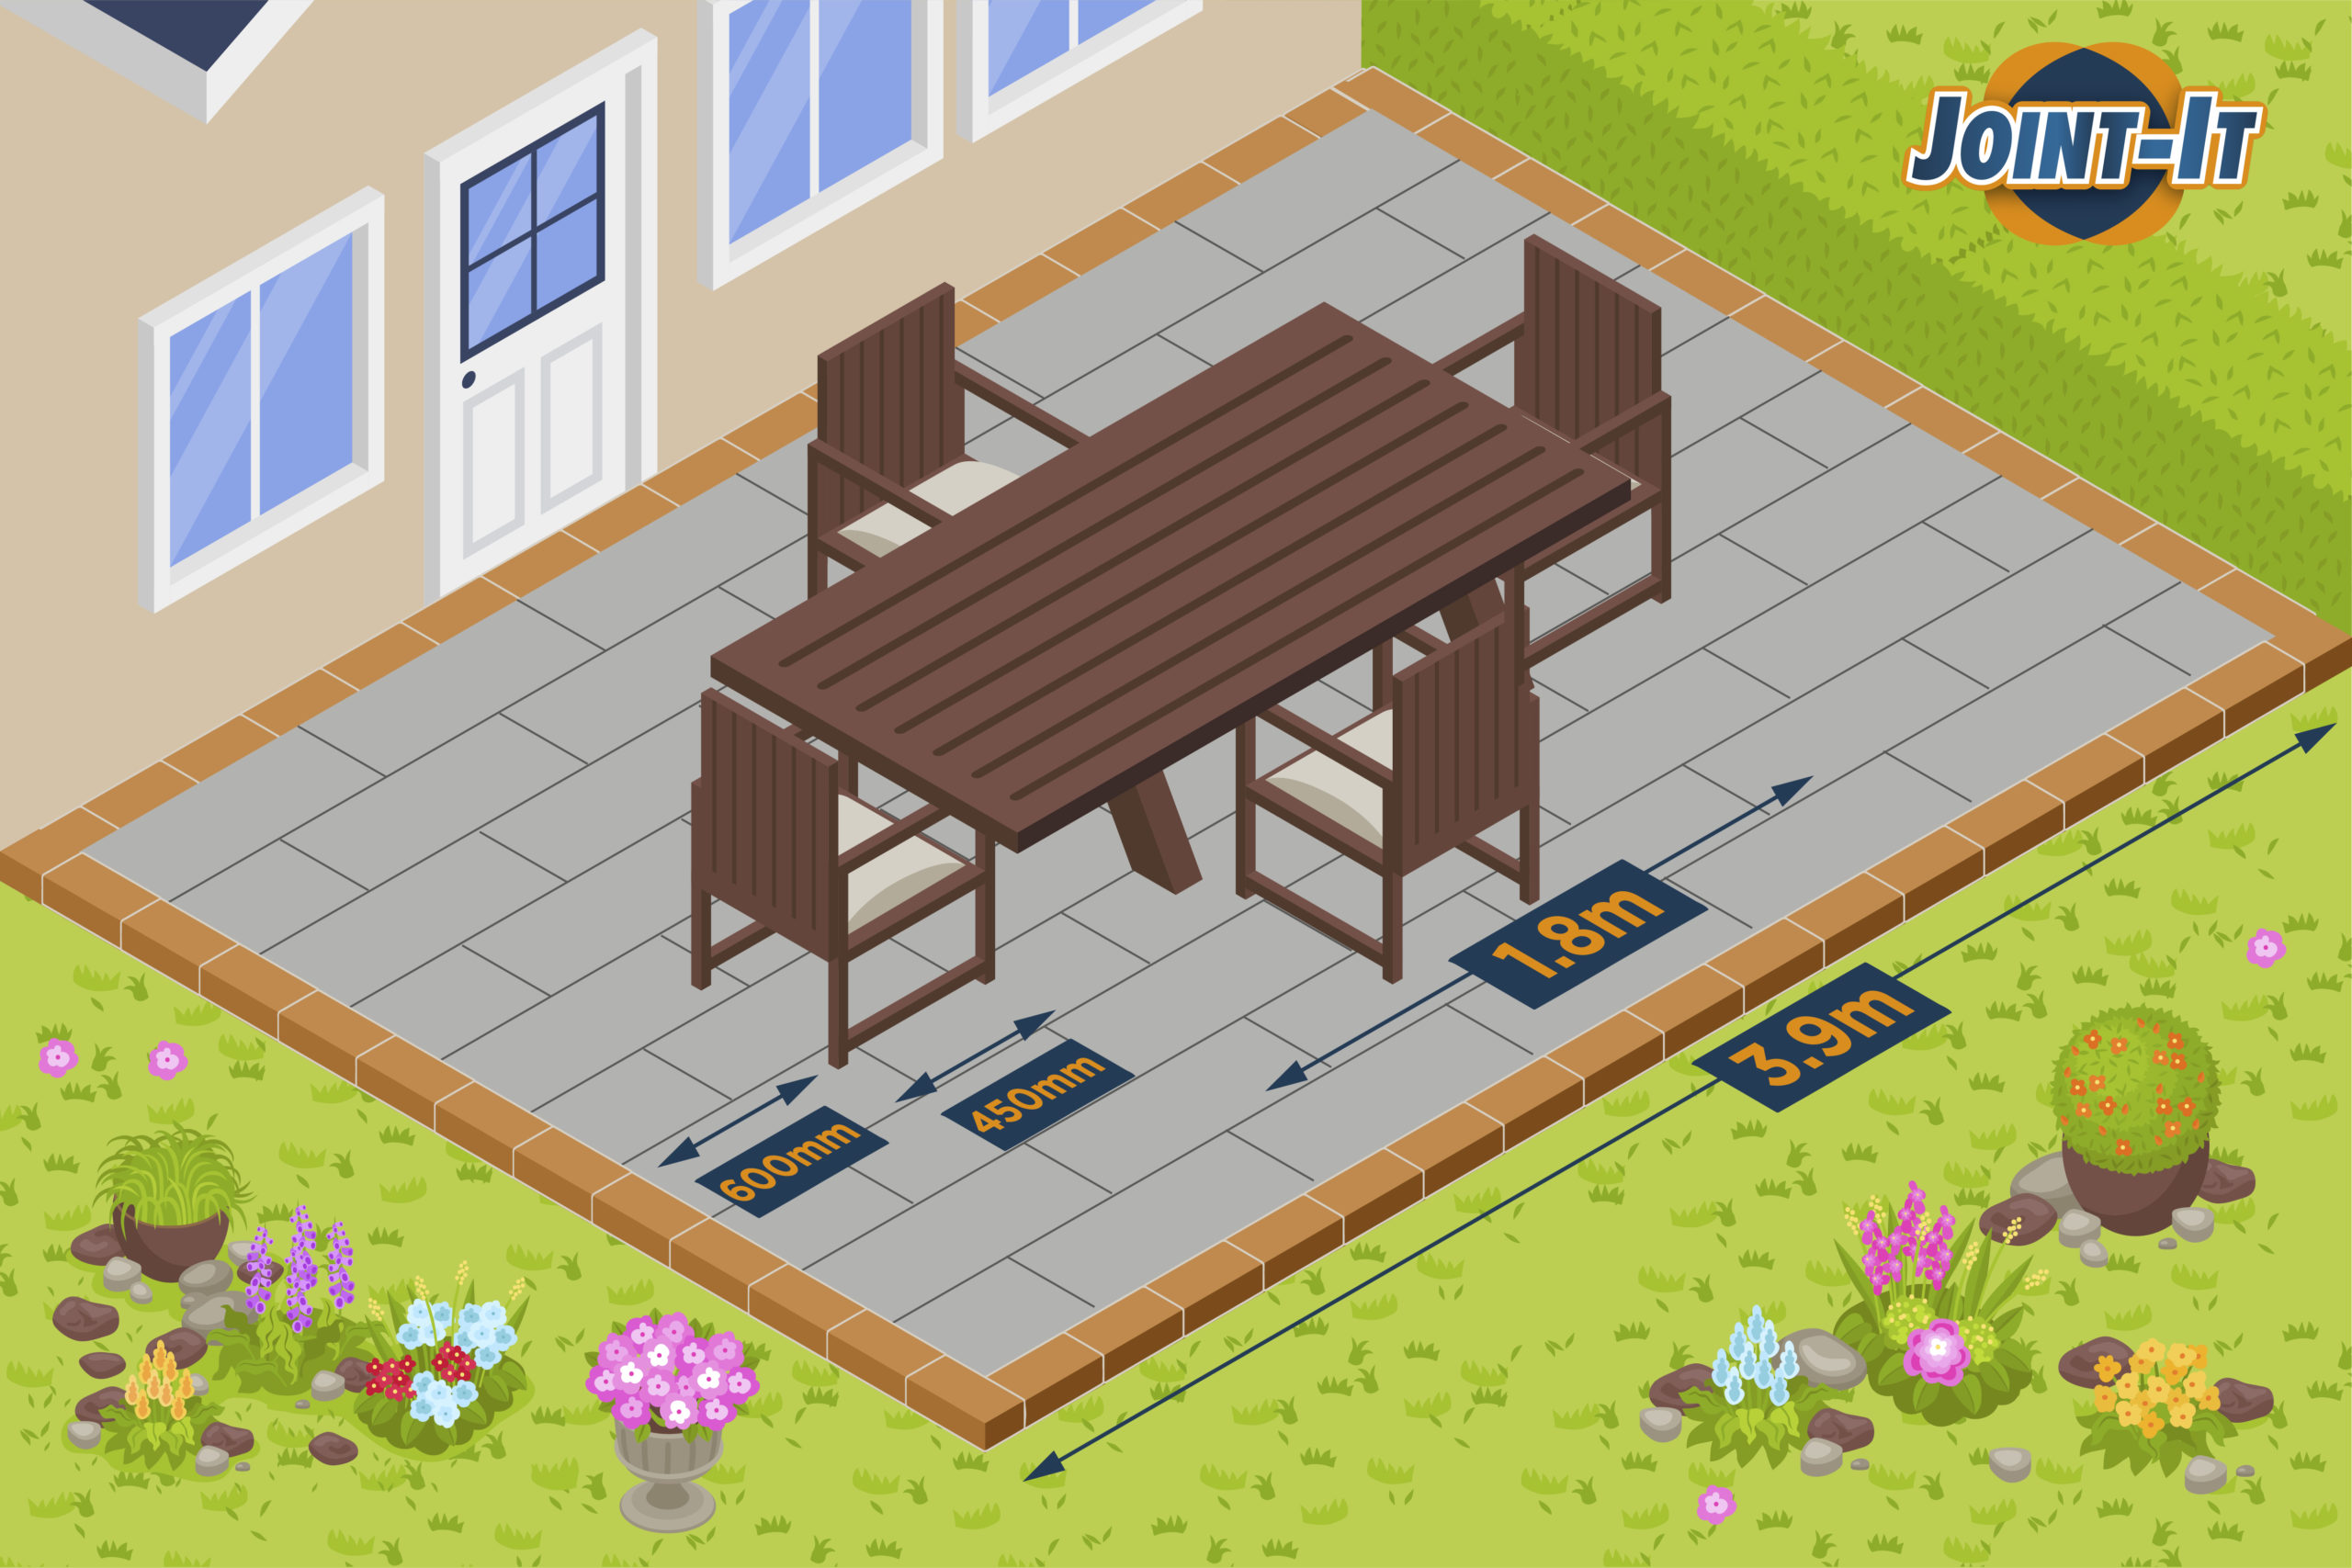
So, you need room for a table, but a table also needs chairs. The typical 1.8m dimension for a patio table, suddenly needs another 450mm or so for a chair. However, we’re not done yet. That needs to be +900mm because you’ll want chairs at both sides of the table. We’re up at 2.7m now. And then there’s nothing more annoying than trying to squeeze past a fully-seated table, or pushing out the chair to get up for another beer, and it ends up in the flower bed or sinking its legs into the lawn.
 
You need manoeuvring space, probably 500-600mm to ensure there’s not too much of an invasion of personal space. Add that 600mm to each side of the table, that’s another 1.2m and now we’re at 3.9m. All that for a 1.8m width table! To be fair, for a table of that size, it is perfectly possible to get by with 3.6m, but that’s about as tight as you’d want to go. Four metres is ample and comfortable.
 
illustration-of-garden-patio
 
If that’s too big a space to give over to hard-landscaping, then maybe choose a smaller table. It’s surprising how practical a simple 1.2m width table can be. However, the size of the patio needs to suit the scale of the garden. A 4m patio is fantastic, but if the garden is only, say, 7m wide, is it right to use more than half of it for paving? Alternatively, if there’s an acre or more, then 4m might seem a little mean-spirited.


Top Tip

It’s rarely a good idea to cover more than half the garden space available with hard surfaces. While some designs do precisely that and look fantastic, there needs to be a balance between the paving and the greenery; the hardscape and the softscape. The way the patio is to be used, and the space available, will determine what size works best.


How to Choose a Shape for your Patio

Simple rectangles work better in small plots and/or with strong geometric designs. Neat edges, crisp definition, straight lines are powerful features and are probably best used with caution. For larger areas, and particularly for those looking at a more traditional garden style, the patio offers the opportunity to create a subconscious transition from the strict orthogonal geometry of the house to the more organic, softer features of the garden itself.


A patio against the house will most likely have a straight, regimented line where it abuts the brickwork. There can also be a sinuous, curved or sculpted edge where it meets the lawn or the flower beds. A dog-legged or staggered step edge can also provide that less formal, gentler changeover. Free-standing patios, those not abutting the house or any other straight, rigid feature such as a boundary wall or fence, may take on a wholly organic shape, or perhaps a more sympathetic geometric shape, such as a circle or ellipse.

Curved Sandstone Patio with Fencing and Gravel

 
A strict, geometric square or rectangle can bring an element of formality, if so desired. With triangles…well, no installer will thank you for choosing a triangular shape. While they can seem highly appealing when sketched on a designer’s pad, it’s incredibly awkward to make them look right on the ground, and there’s a lot of tricky cutting!
 
Finally, give some thought to those edges where the garden meets the paving. Will that be a clipped and trimmed lawn edge? Would it benefit from an edging to give it upstand? If it’s a flower bed, plants will most likely spill over and soften the edge even more. Areas of loose cover, such as gravel or shingle or bark, abutting the patio may benefit from some form of retainer to keep the unruly stones in place on off the hard paving.


Final Thoughts

A patio offers so much for a garden, and it has very few design limitations. The tips above should guide you towards choosing a size and shape for your patio that suits your needs. Your patio needs to be stylish and it needs to be functional, but beyond that, the only limits are the space available and your imagination. 


This article “How to Choose a Size and Shape for your Patio” was written by Tony McCormack in conjunction with Joint-It.
Joint-It are a leading manufacturer of professional jointing and stone care products. The patio grout used in the photos of this article is Joint-It Simple: https://jointit.com/products/joint-it-simple/
 

How to Cut Flagstones for a Stunning Patio

cutting flagstone

Skilled masons can cut flagstones using nothing more than a hammer and a couple of special chisels, and smaller paving units, especially block pavers can be cut using a splitter or ‘guillotine’, but, nowadays, most paving is cut by saw

Continue reading