Patio Tools & Equipment | Joint-It

When creating a beautiful patio or paving project, having the right tools is crucial for a smooth, efficient, and safe installation. From excavation to final touches, here’s a breakdown of the essential tools you’ll need to ensure a professional finish for your garden project.

Preparing the Ground

Digging & Clearing

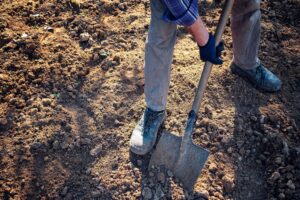
The first step is clearing and preparing the ground. Essential tools include a sturdy spade for digging and a pickaxe for tougher ground. A mattock (a type of pick) is especially useful for cutting through tree roots. For transporting soil and debris, a wheelbarrow with a pneumatic tire makes the job much easier.

Marking Out & Setting Levels

String Lines and Line Pins

Once the area is cleared, use string lines and line pins to mark the edges and levels. Cotton lines can be useful as they stretch slightly, allowing for easy adjustments. Secure the lines tightly using line pins or weighted objects, like bricks.

Spirit Level and Straight Edge

Accurate levels are essential to ensure your patio or path is even and stable. A 1-1.2 meter spirit level and a straight edge (a solid 2.4-3m timber piece works well) help check that each layer is flat and consistent.

Tape Measure

A 10-meter or longer tape measure is ideal for marking boundary lines, with a smaller 3-meter tape for quick measurements.

Laying the Sub-Base

Rake & Shovel

Once the area is measured, lay down your sub-base aggregate. Use a durable rake to spread the material evenly, and then compress it with a vibrating plate compactor. Look for a plate compactor weighing at least 75kg for effective compaction. A shovel is also helpful for moving aggregate and stone into place.

Mixing & Spreading the Mortar

Cement Mixer

A powered cement mixer is invaluable for creating a consistent mortar or concrete mix. A 10-litre bucket helps measure water precisely, and clean water is essential for a strong mix.

Large Trowel or Pointing Trowel

For spreading the mortar, use a large trowel to achieve an even, level base for each paving unit. A smaller pointing trowel is useful for precision work and for filling any mortar joints after laying.

Placing and Aligning the Paving Units

Rubber Mallet

To position each paving stone accurately, a rubber mallet is used to gently tap it down to the correct level. DIYers may prefer lighter mallets (500g or 1kg), while professionals often use a 2kg mallet. For lighter-coloured paving, look for a non-marking white mallet.

Soft Brush & Cleaning Sponge

A soft brush is perfect for sweeping away loose aggregate or mortar. For porcelain or easily stained materials, a clean water bucket and sponge help remove spills immediately, keeping your paving spotless.

Cutting Tools for Precision

Cut-Off Saw with Diamond-Tipped Blade

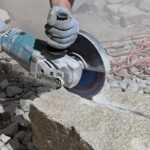
For areas where full-size stones won’t fit, a cut-off saw with a diamond-tipped blade is ideal for precision cuts. Choose a saw with dust suppression and water attachments for safety. Cutting paving stones can produce harmful dust, so always wear PPE when using this equipment.

Essential PPE for Safety

Safety Gear

When working with power tools and heavy materials, PPE is non-negotiable. Key protective gear includes:

  • Dust Mask and Eye Protection: Especially vital when using a saw, as silica dust can be hazardous.
  • Ear Defenders: These are essential when using a plate compactor or cut-off saw, as both can be very loud.
  • Gloves and Steel-Toed Boots: Protect your hands from abrasions and your feet from heavy materials, which are common hazards on paving projects.

Finishing with Joint-It Simple

After all the stones are placed, the final step is grouting. Joint-It Simple is the perfect jointing compound to complete your project, making it fast and easy to achieve a seamless, long-lasting finish. Available in 12.5kg and 20kg buckets, Joint-It Simple offers a professional-grade solution that’s durable and easy to apply.

Recommended Posts

1 Comment


Add a Comment

Your email address will not be published.