What Happens If You Don’t Clean Your Patio?

dont-clean-your-patio

If you don’t clean your patio regularly, the effects go far beyond appearance. What starts as a bit of dirt or discolouration can quickly turn into slippery surfaces, damaged joints, and costly repairs. In the UK’s damp climate, patios are especially vulnerable to neglect.

In this guide, we’ll explain exactly what happens when you don’t clean your patio, why problems escalate so quickly, and how regular maintenance protects both safety and longevity.

Why Regular Patio Cleaning Matters

Patios are exposed to rain, frost, organic debris, pollution and foot traffic all year round. Without routine cleaning, contaminants build up and begin to damage both the surface and the joints holding everything together.

If you don’t clean your patio, you’re allowing moisture, algae and debris to take hold, and once they do, problems accelerate.

What Happens If You Don’t Clean Your Patio?

1. Algae and Moss Take Over

One of the first signs you don’t clean your patio is green or dark staining.

Algae and moss:

  • Thrive in damp, shaded areas

  • Spread quickly across slabs and joints

  • Make surfaces slippery and unsafe

Left untreated, algae becomes deeply embedded, making future cleaning far more difficult.

2. Your Patio Becomes Slippery and Unsafe

A dirty patio isn’t just unattractive, it’s a safety risk.

When you don’t clean your patio:

  • Moisture combines with algae and grime

  • Slip resistance is reduced

  • Risk of falls increases, especially in winter

This is particularly dangerous for children, pets and elderly family members.

3. Patio Joints Begin to Fail

Jointing material plays a crucial role in keeping your patio stable. Dirt, organic matter and moisture break it down over time.

If you don’t clean your patio:

  • Joints remain constantly damp

  • Weed seeds embed and germinate

  • Freeze-thaw cycles cause cracking

Once joints fail, slabs can loosen or sink, leading to uneven surfaces.

4. Weeds Grow Faster and Deeper if You Don't Clean Your Patio

Weeds don’t just appear overnight, they thrive in neglected patios.

When patios aren’t cleaned:

  • Debris collects in joints

  • Weed seeds settle and root

  • Roots widen joints and cause movement

This makes weed removal more frequent and more difficult over time.

5. Permanent Staining Develops

Organic debris, fallen leaves, food spills and pollution can all stain paving.

If you don’t clean your patio regularly:

  • Stains penetrate porous stone

  • Discolouration becomes permanent

  • Natural stone loses its original colour

Once staining sets in, even specialist cleaners may not fully restore the surface.

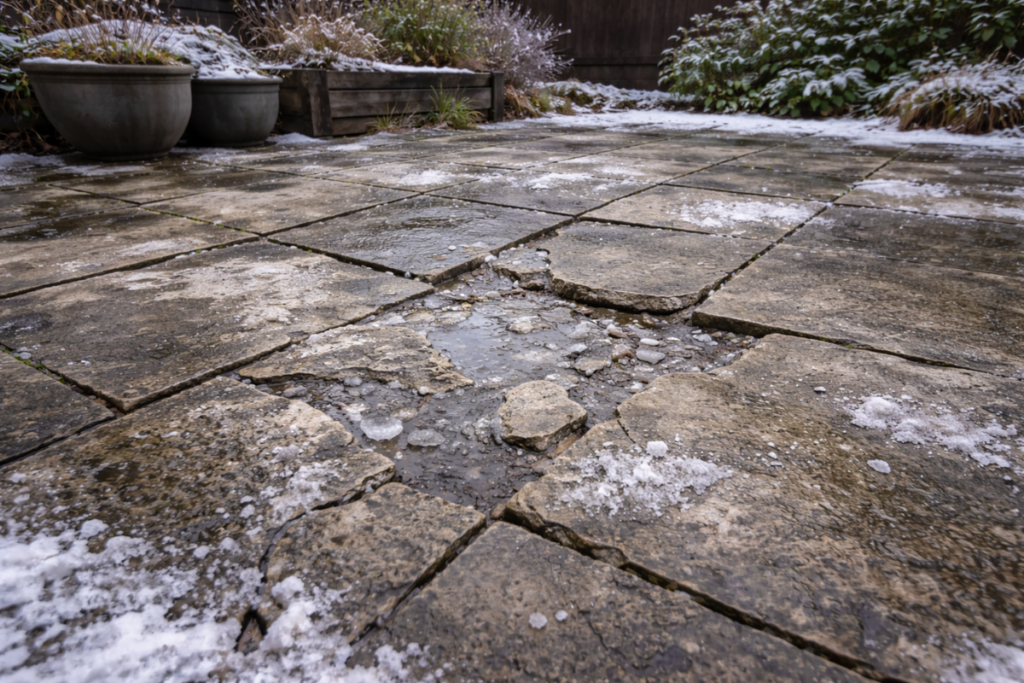
6. Increased Risk of Frost Damage

In colder months, trapped moisture becomes a serious issue.

Neglected patios:

  • Absorb more water

  • Are more prone to freeze-thaw damage

  • Develop cracks and surface flaking

Regular cleaning helps reduce moisture retention and protects against winter damage.
7. Your Patio Looks Older Than It Is

A clean patio enhances your entire outdoor space. A dirty one does the opposite.

If you don’t clean your patio:

  • Colours fade or dull unevenly

  • The garden looks neglected

  • Property appeal is reduced

This can even affect kerb appeal and perceived home value.

How Often Should You Clean Your Patio?

To avoid these issues, patios should ideally be cleaned:

  • Light clean every few weeks

  • Thorough clean 2–3 times per year with Joint-It So Clean

  • Additional cleaning after winter

High-traffic areas or shaded patios may need more frequent attention.

cleaning natural stone

The Best Way to Prevent Patio Damage

Regular cleaning works best when combined with:

  • Proper jointing materials

  • Weed-resistant joints

  • Occasional sealing where appropriate

Using the right patio cleaners and avoiding harsh methods helps maintain both appearance and performance.

If You Don't Clean Your Patio

You’re not just dealing with cosmetic issues, you’re shortening its lifespan, increasing safety risks, and setting yourself up for avoidable repairs.

Regular, gentle cleaning combined with high-quality jointing solutions keeps patios safe, attractive and long-lasting.

A little maintenance now saves a lot of work later.

How to Stop Your Patio Getting Slippy in Winter

how-to-stop-patio-getting-slippy-in-winter

A slippy patio in winter isn’t just inconvenient, it can be dangerous. Ice, algae, frost and excess moisture all contribute to slippy patio slabs, increasing the risk of slips and falls. The good news is that with the right preparation and maintenance, you can stop your patio getting slippy in winter and keep your outdoor space safe throughout the colder months.

This guide explains why patios become slippy in winter and the most effective ways to prevent it using proven methods and trusted Joint-It products.

Why Patios Become Slippy in Winter

Winter creates the perfect conditions for slippy surfaces. Common causes include:

  • Ice and frost forming overnight

  • Algae and moss growth caused by damp, shaded conditions

  • Poor drainage, allowing water to pool and freeze

  • Smooth or sealed surfaces without enough grip

Addressing these issues early is the key to winter patio safety.

1. Remove Algae and Moss Before Winter

Algae and moss are one of the biggest causes of a slippy patio, especially during colder months. When wet or frosty, these growths become extremely slick.

Using Joint-It Algae Remover before winter helps to:

  • Kill algae, moss and lichen at the root

  • Reduce slippy surfaces caused by organic growth

  • Prevent regrowth during damp winter conditions

Apply in autumn or early winter to keep your patio clean and safer before frost sets in.

2. Improve Drainage to Prevent Ice Build-Up

Standing water is a major reason patios become slippy in winter. When water can’t drain properly, it freezes overnight and creates icy patches.

To improve drainage:

  • Clear leaves and debris regularly

  • Ensure joints are intact and not holding water

  • Clean surfaces using Joint-It So Clean to remove dirt that traps moisture

A well-drained patio dries faster and is far less likely to become slippy.

3. Avoid Using Rock Salt on Patio Slabs

Rock salt may melt ice quickly, but it can damage paving slabs and jointing over time. Salt penetrates porous surfaces, increasing the risk of cracking and surface erosion.

Instead of salt:

  • Use sand or grit to improve grip

  • Choose eco-friendly de-icers suitable for patios

  • Focus on preventing ice rather than repeatedly treating it

This helps protect your patio while reducing slippy conditions.

4. Seal Your Patio to Reduce Moisture Absorption

Unsealed paving absorbs water, which freezes and makes surfaces slippy. Applying a high-quality sealer greatly reduces this risk.

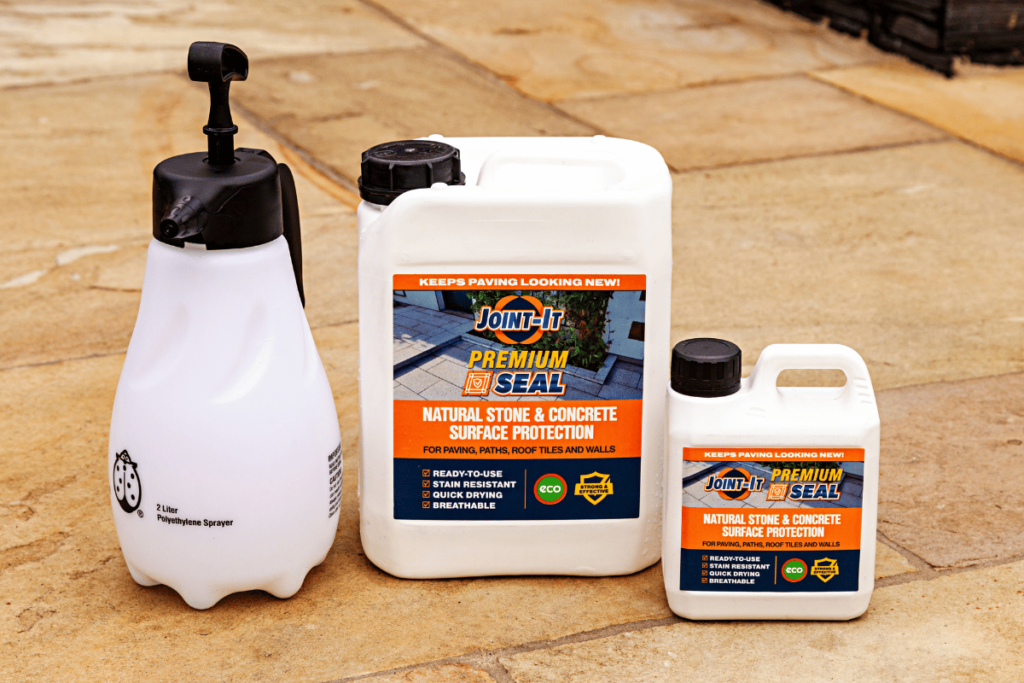
Joint-It Premium Seal helps to:

  • Repel water and reduce frost damage

  • Prevent algae growth and staining

  • Improve patio durability during winter

Sealing your patio in dry conditions before winter is one of the most effective ways to stop it becoming slippy.

5. Maintain Strong, Weatherproof Joints

Damaged or washed-out joints allow water to collect beneath slabs, increasing frost and ice formation.

Using Joint-It Simple ensures:

  • Strong, water-resistant joints

  • Reduced pooling and frost heave

  • A more stable, less slippy patio surface

Check joints annually and repair any gaps before winter weather arrives.

6. Add Extra Grip in High-Risk Areas

For patios that stay shaded or see heavy foot traffic in winter:

  • Use outdoor mats near entrances

  • Apply grit during icy conditions

  • Move furniture occasionally to improve airflow and drying

These small steps significantly reduce the risk of a slippy patio in winter.

Prevention is Key

To stop your patio getting slippy in winter, prevention is key. Removing algae, improving drainage, sealing surfaces and maintaining joints all play an essential role in keeping patios safe during cold weather.

By using Joint-It Algae Remover, Joint-It So Clean, Joint-It Simple, and Joint-It Premium Seal, you can protect your patio from moisture, ice and slippy conditions, ensuring a safer outdoor space all winter long.

Read more here on the “Best Ways to Remove Ice from Patio Slabs“

Best Ways to Remove Ice from Patio Slabs

Winter brings the risk of slippery, icy surfaces. Not only does this pose a safety hazard, but improper ice removal can damage your paving slabs. In this guide, we’ll explore effective and safe methods to remove ice from patio slabs, keeping both you and your outdoor space safe.

1. Use a Plastic or Rubber-Edged Shovel

Avoid metal shovels, which can scratch and damage your patio slabs. Instead, opt for a plastic or rubber-edged shovel to gently remove snow and ice without harming the surface.

2. Apply Eco-Friendly De-Icers

Traditional salt can be corrosive to both your patio and the environment. Consider using eco-friendly de-icers such as magnesium chloride or calcium magnesium acetate, which are less harmful and still effective at melting ice.

3. Utilise Homemade Ice Melt Solutions

A cost-effective and eco-friendly ice melt can be made using:

  • 1 litre of hot water

  • 60ml of rubbing alcohol

  • 6 drops of washing-up liquid

This mixture helps break down ice, making removal easier.

removing ice from patio

4. Add Sand or Cat Litter for Traction

While sand and cat litter won’t melt ice, they provide extra grip on slippery surfaces, helping to reduce the risk of slips and falls.

5. Avoid Using Pressure Washers to Remove Ice from Patio Slabs

High-pressure water can erode jointing materials and damage your patio slabs. It’s best to avoid pressure washers for ice removal.

6. Regular Maintenance to Prevent Ice Formation

Regularly sweeping your patio and ensuring proper drainage can prevent water from pooling, reducing the likelihood of ice forming during freezing temperatures.

When you want to remove ice from patio slabs, it requires careful methods to maintain the integrity of your outdoor space. By using the right tools and techniques, you can ensure a safe, slip-free, and well-preserved patio all winter long. For more information read “How to Protect Your Patio Against Frost“

How to Prevent Algae on Your Patio 

prevent patio algae

Algae growth on patios can be unsightly and slippery, turning your outdoor space into a hazard. While cleaning algae is important, the key to maintaining a beautiful patio is prevention. This guide will show you practical steps to prevent algae on your patio and highlight how Joint-It Algae Remover can help keep your patio clean long-term.

Why Algae Appears on Patios

Algae thrives in damp, shaded areas where moisture accumulates. Common causes include:

  • Poor drainage or water pooling

  • Frequent rainfall or overwatering nearby plants

  • Limited sunlight in shaded areas

  • Organic debris like leaves and moss

Addressing these factors helps reduce algae growth before it starts.

Step 1: Keep Your Patio Dry

Moisture is algae’s best friend. To reduce dampness:

  • Ensure proper drainage so water doesn’t pool on the surface

  • Sweep your patio regularly to remove wet leaves, dirt, and debris

  • Trim overhanging branches to increase sunlight exposure

A dry patio makes it difficult for algae to thrive.

Step 2: Regular Cleaning

Even light algae buildup can become a bigger problem if ignored. Preventative cleaning includes:

  • Sweeping and washing your patio regularly

  • Using Joint-It So Clean to remove dirt, moss, and early algae deposits

  • Checking joints and gaps for trapped moisture

Routine cleaning keeps algae at bay and extends the life of your patio.

Step 3: Use Preventative Treatments

Preventative treatments can stop algae before it takes hold. Joint-It Algae Remover isn’t just for cleaning; it can also be used as a proactive measure:

  • Apply to areas prone to algae growth after cleaning

  • Follow the product instructions for dilution and application

  • Regular use discourages regrowth and keeps patios looking fresh

Step 4: Maintain Joints and Seals

Algae often thrives in the cracks between patio slabs. Keep joints and seals in good condition to reduce algae-friendly environments:

Proper joint and seal maintenance complements cleaning and preventative treatments.

Step 5: Promote Sunlight and Airflow

Shaded, damp patios are prime spots for algae. You can reduce risk by:

  • Pruning trees or shrubs that block sunlight

  • Allowing airflow around furniture and structures to dry surfaces

  • Reorganising patio furniture occasionally to avoid trapped moisture

Sunlight and airflow naturally discourage algae growth.

clean patio slabs

Preventing algae on your patio is easier than constantly cleaning it. By keeping your patio dry, cleaning regularly, using Joint-It Algae Remover as a preventative treatment, and maintaining joints and seals, you can enjoy a safe, clean, and visually appealing outdoor space all year round.

Take proactive steps today, and your patio will stay algae-free for seasons to come.

How to Clean Algae on Your Patio

clean algae on your patio

Algae on patio slabs isn’t just unsightly; it can also make surfaces slippery and unsafe. If your patio is looking green and slimy, there’s no need to panic. This guide will show you how to clean algae from patio slabs effectively and safely. We’ll also highlight Joint-It Algae Remover, a trusted solution that makes the process fast and hassle-free.

Why Algae Grows on Patio Slabs

Algae thrives in damp, shaded areas where moisture lingers. Common causes include:

  • Poor drainage or water pooling

  • Frequent rainfall or overwatering nearby plants

  • Shaded areas with limited sunlight

Understanding why algae appears helps prevent it from coming back after cleaning.

Manual Methods to Clean Algae from Patio Slabs

For light algae growth, manual cleaning is a great place to start:


1. Sweep and Scrub

Remove loose debris with a broom, then use a stiff-bristled brush and warm soapy water to scrub the algae.

2. Pressure Washing

A medium-pressure washer can blast away algae effectively. Avoid high pressure to prevent damaging the slabs.

3. Natural Remedies

A mix of equal parts white vinegar and water can help. Pour over affected areas, let it sit for 30 minutes, then scrub with a brush.

Chemical Solutions for Stubborn Algae

When manual methods aren’t enough, a specialised product can make all the difference. Joint-It Algae Remover is designed to remove algae quickly and safely without harming your patio.

Why Use Joint-It Algae Remover?

Joint-It Algae Remover is popular with homeowners and professionals alike because it offers:

  • Fast, effective cleaning: Breaks down algae, moss, and lichen quickly

  • Long-lasting results: Helps prevent regrowth for a cleaner patio over time

  • Easy application: Simply apply, wait, and rinse if needed; no heavy scrubbing required

clean patio slabs

Step-by-Step Guide to Using Joint-It Algae Remover

  • Prepare the Area: Sweep away debris and ensure the surface is clear.

  • Dilute the Product: Follow packaging instructions to mix the concentrate with water if needed.

  • Apply Evenly: Use a sprayer, watering can, or brush to cover algae-affected areas.

  • Wait: Let the solution work. Most algae will dissolve within a few days.

Tips to Prevent Algae from Returning

Keeping your patio algae-free is easier with some preventative steps:

  • Ensure Proper Drainage: Remove standing water to reduce algae growth.

  • Regular Cleaning: Sweep and wash your patio frequently.

  • Increase Sunlight Exposure: Trim overhanging branches to dry surfaces faster.

  • Apply Preventative Treatments: Use Joint-It Algae Remover periodically to discourage regrowth.

Removing algae from patio slabs doesn’t have to be a chore. By following these steps and using Joint-It Algae Remover, you can restore your patio to a clean, safe, and attractive state. Regular maintenance and preventative measures will keep it that way all year long.

Ready to refresh your patio? Try Joint-It Algae Remover today and enjoy a green-free, safe outdoor space.

How to Protect Your Patio from Frost Damage

patio frost damage

Winter weather can be unforgiving, and patio frost damage is one of the most common issues homeowners face during the colder months. Cracks, loose paving, and stains often appear when moisture freezes inside stone or between slabs. Fortunately, with the right preparatio, and the right products, you can protect your patio and keep it looking its best all year round.

What Causes Patio Frost Damage?

Frost damage occurs when water seeps into the porous surface of natural stone, concrete, or patio joints. Once temperatures drop below freezing, that water expands and creates pressure inside the material. This freeze-thaw cycle leads to:

  • Cracks and chips in paving slabs

  • Loose or broken joints

  • Uneven surfaces caused by frost heave

  • Stains and discolouration from trapped moisture

Understanding the causes of patio frost damage is the first step in preventing it.

1. Seal Your Patio with Joint-It Premium Seal

One of the most effective ways to protect your patio from frost is to use a high-quality sealer. Joint-It Premium Seal is specially designed to:

  • Prevent water absorption that leads to frost damage

  • Protect stone from moss, algae, and staining

  • Keep patios looking fresh throughout the winter

Apply Joint-It Premium Seal in autumn on dry days so your patio is ready to withstand harsh weather.

2. Repair and Protect Joints with Joint-It Simple

Patio joints are highly vulnerable to frost. When mortar cracks or washes out, water seeps below the surface, leading to frost heave and lifted paving.

Using Joint-It Simple ensures:

  • Strong, weatherproof joints that resist frost damage

  • Long-lasting protection against heavy rain and freezing conditions

  • A neat, professional finish that holds paving securely

Repointing joints before winter drastically reduces the risk of patio frost damage.

stop patio going green Joint-It Simple

3. Improve Drainage with Regular Cleaning

Poor drainage makes patios more likely to suffer frost damage. Water that lingers on the surface will freeze and expand. To prevent this:

  • Ensure your patio has the right slope for water runoff

  • Clear away debris, moss, and leaves that trap moisture

  • Use Joint-It So Clean to remove algae and grime, helping your patio dry faster

A clean, well-drained surface is far less vulnerable to frost damage.

4. Protect Your Patio in Severe Frost

During periods of extreme cold:

  • Cover vulnerable areas with outdoor furniture covers

  • Lay rugs or mats in heavy-use areas

  • Use a plastic shovel to remove snow (avoid metal tools that scratch stone)

  • Avoid using salt, which can worsen patio frost damage by corroding stone and concrete

Instead, choose sand or eco-friendly de-icing alternatives.

5. Year-Round Maintenance

Preventing frost damage isn’t just about winter. Consistent patio maintenance throughout the year helps your paving resist seasonal wear.

This routine will keep your patio looking great while preventing future damage.

Patio frost damage doesn’t have to ruin your outdoor space. By sealing with Joint-It Premium Seal, maintaining joints with Joint-It Simple, and keeping surfaces clean with Joint-It So Clean, you’ll protect your patio from cracks, stains, and frost-related wear.

A little preparation now means you can enjoy a strong, beautiful patio for many winters to come.

Guide to Remove Grout Haze from Patios

remove grout haze

After grouting a patio, a cloudy, powdery film can appear on your tiles, this is called grout haze. Left untreated, it makes your patio look dull, even if the installation is perfect. This guide shows you how to remove grout haze step-by-step and explains why Joint-It Grout Haze Remover is the fastest, safest solution for restoring outdoor tiles.

Step 1: Identify Hazy Areas

Inspect your patio for cloudy, streaky, or powdery patches, these are signs of grout haze. Early detection makes it easier to remove grout haze and ensures a clean finish.

Step 2: Gather Your Tools

You will need:

Using the right tools ensures safe and effective haze removal without damaging your patio tiles.

Step 3: Apply Joint-It Grout Haze Remover

Apply Joint-It Grout Haze Remover directly to the affected areas. Work in small sections so the solution can penetrate the haze fully. Scrub in circular motions.

Step 4: Leave to Work

Leave product to work for 2-4 hours. In higher temperatures, product may be absorbed more quickly.

Step 5: Rinse

Using a garden hose, rinse product completely off the flags. For more porous surfaces, a power washer may be required.

Prevent Future Grout Haze

  • Clean excess grout immediately after installation

  • Mix grout according to the manufacturer’s instructions

  • Seal grout lines after curing to minimise haze formation

  • Inspect tiles during installation to remove residue promptly

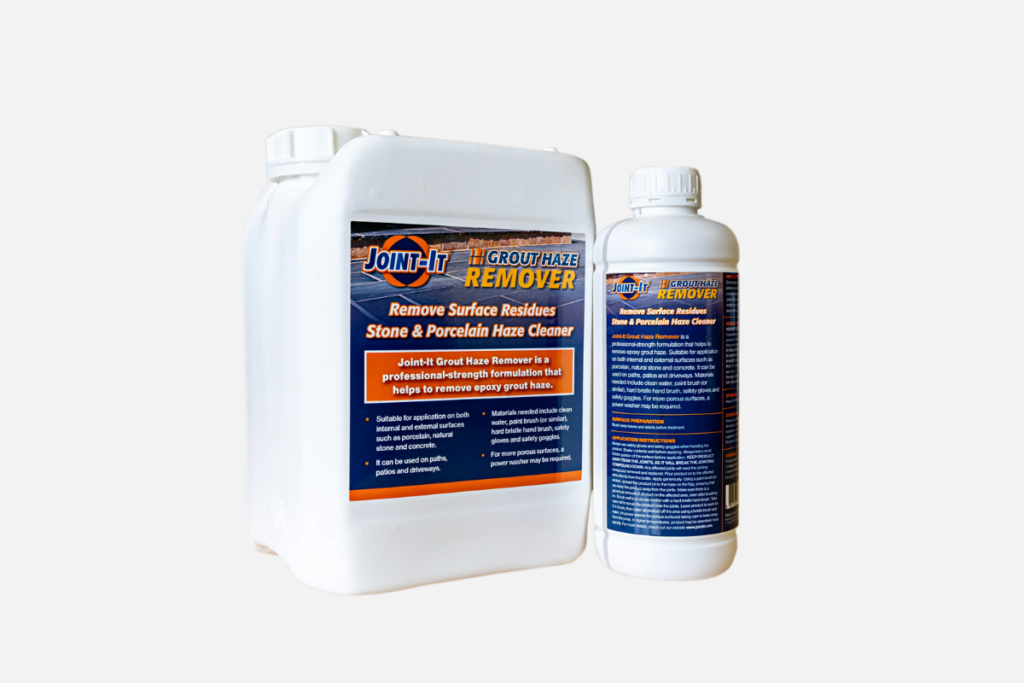
Joint-It Grout Haze Remover

Why Use Joint-It Grout Haze Remover

  • Quickly and effectively helps remove grout haze from patios

  • Safe for porcelain, ceramic, and natural stone tiles

  • Professional-strength formula for fast results

  • Easy to use for both DIYers and professionals

Removing grout haze doesn’t have to be complicated. By following this step-by-step guide and using Joint-It Grout Haze Remover, you can restore your patio tiles to a pristine, professional finish. Regular cleaning during installation will also help prevent future haze formation.

Grout Haze Removal Tips for Patios

grout haze

After laying a patio, you may notice a cloudy, powdery residue on your tiles. This is called grout haze. Left untreated, grout haze can make even the most beautiful patio look dull and unfinished.

In this guide, we share practical grout haze removal tips for patios and show how Joint-It Grout Haze Remover can quickly restore your tiles to their original, clean appearance.

What Is Grout Haze?

Haze is a thin, milky layer left on tile surfaces after grouting. It occurs when excess grout is not removed during installation. This haze can appear on all types of patio tiles, including porcelain, ceramic, and natural stone.

While harmless structurally, it affects the look of your patio, making surfaces appear cloudy or streaked.

Top Grout Haze Removal Tips for Patios

1. Clean Excess Grout Immediately

The first step to avoiding grout haze is prevention. Always wipe away surplus grout while it is still wet. Prompt cleaning significantly reduces the risk of a stubborn residue forming.

2. Use a Professional Patio Haze Remover

For haze that has already formed, a product like Joint-It Grout Haze Remover is essential. It is formulated to remove grout haze safely from all outdoor tiles without damaging the surface.

3. Work in Small Sections

Apply the remover in manageable areas, scrubbing gently with a soft cloth or sponge. This ensures even cleaning and prevents streaks.

4. Rinse Thoroughly

After scrubbing, rinse the area with clean water to remove any leftover residue. Wipe dry with a soft towel for a spotless finish.

5. Repeat if Necessary

For thicker layers of patio haze, repeat the process until the patio surface is completely clear.

Joint-It Grout Haze Remover

Additional Tips for Prevetion

  • Mix grout correctly according to the manufacturer’s instructions

  • Use protective coverings when possible during grouting

  • Seal grout lines after curing to minimise future haze

  • Check tiles regularly during installation to remove residue promptly

Why Joint-It Grout Haze Remover Works

  • Specifically designed to remove grout haze from patios
  • Safe for porcelain, ceramic, and natural stone tiles
  • Professional-strength formula for fast, effective results
  • Easy to apply and suitable for both DIY and professional use

Grout haze doesn’t have to ruin your patio’s appearance. By following these grout haze removal tips for patios and using Joint-It Grout Haze Remover, you can restore your tiles to their original clean and polished look. Regular maintenance and careful cleaning during installation will also help prevent haze from forming in the future.

How to Protect Your Patio Against Frost

patio frost

Winter can be tough on patios. Even the sturdiest stone, concrete, or porcelain paving can suffer when patio frost sets in, leaving cracks, loose slabs, and dull, faded surfaces. The good news is that with some simple preparation and the right products, you can protect your patio from frost and keep it looking vibrant and strong throughout the season.

In this guide, we’ll walk you through the essential steps to safeguard your patio against frost and winter damage, including cleaning, joint protection, and using high-quality Joint-It products.

Why Patio Frost Causes Damage

Frost on your patio is one of the biggest threats to outdoor paving. When water seeps into stone or joints and freezes, it expands, creating cracks, loose slabs, and long-term structural issues. Combined with snow, ice, and de-icing salts, frost can quickly wear down even the toughest patios.

Fortunately, with the right maintenance routine, you can prevent damage and keep your paving looking beautiful all year round.

Step 1: Clean Your Patio Before Frost Arrives

Dirt, moss, and algae hold moisture, which increases the risk of frost damage. To prepare for frost season:

  • Sweep away leaves and debris weekly.

  • Use a pressure washer or stiff brush for a deep clean.

  • Treat stains with a patio cleaner.

A clean surface reduces water absorption and minimises frost problems.

Step 2: Secure Joints Against Frost Cracks

Open joints are an easy entry point for water. When that water freezes, it expands, forcing joints apart and loosening slabs.

Filling gaps with a high-quality jointing mortar like Joint-It Simple keeps joints sealed, preventing weeds and resisting patio frost damage.

Step 3: Seal Stone Surfaces Against Frost

Porous paving stones like sandstone, limestone, and concrete soak up water, making them especially vulnerable to frost. Applying a patio colour enhancer not only revives faded colours but also creates a water-repellent barrier.

Joint-It Supreme Colour Enhancer is ideal for:

  • Protecting against moisture and frost.

  • Deepening natural stone colour for a vibrant finish.

  • Reducing moss and algae growth.

patio colour enhancer

Step 4: Use Slurry Primer for Long-Term Frost Protection

If you’re installing a new patio before winter, a slurry primer ensures slabs bond tightly to the base. This prevents lifting and cracking caused by ground movement during freezing weather.

Joint-It Slurry Primer strengthens paving foundations, making them far more resistant to patio frost damage.

Step 5: Winter Maintenance Tips

Small habits go a long way when dealing with patio frost:

  • Avoid using rock salt, which stains stone. Use sand or grit instead.

  • Sweep away snow before it melts and refreezes.

  • Inspect joints after freezing weather and top up if needed.

The Smart Way to Beat Patio Frost

Frost may be unavoidable in winter, but damage doesn’t have to be. With regular cleaning, joint protection, and products like Joint-It Supreme Colour Enhancer and Joint-It Slurry Primer, you can keep your patio safe, strong, and vibrant through the harshest weather. For information on frost resistant grouts, read “Is Jointing Compound Frost Resistant?”

How to Maintain Vibrant Patio Colour All Year Round

maintain vibrant patio

Patios are constantly exposed to the elements. Over the years, sunlight, rain, frost, and foot traffic can make even the most stunning stone or concrete patio look dull and tired. The once-vibrant tones of sandstone, granite, limestone, or concrete often fade to pale, lifeless shades. If you want to maintain vibrant patio colour all year round, it’s important to combine regular cleaning, seasonal care, and the right protection products.

Why It’s Important to Maintain Vibrant Patio Colour

Your patio is the centrepiece of your garden, but exposure to sunlight, rain, frost, and daily use can leave it looking faded and dull. To keep your outdoor space welcoming, it’s vital to maintain vibrant patio colour throughout the year.

With the right cleaning routine and protection products, you can stop fading in its tracks and keep your patio looking as fresh as the day it was laid.

Step 1: Clean Regularly to Maintain Vibrant Patio Surfaces

A clean patio is the foundation of colour vibrancy. Dirt, moss, and algae not only cause staining but also dull natural tones. To maintain your patio:

  • Sweep weekly to clear debris.

  • Use a hose or pressure washer monthly.

  • Apply a pH-neutral patio cleaner for stubborn stains.

Keeping your paving clean ensures the natural colours stay sharp and eye-catching.

Step 2: Protect Your Patio from Sunlight and Weather

UV rays are one of the biggest causes of fading. Just like fabrics lose colour in the sun, patios can too. Frost, rain, and seasonal weather changes also erode surfaces.

To maintain existing patio colour, you need to protect the surface with a colour enhancer that seals and shields against the elements.

Step 3: Use a Patio Colour Enhancer for Lasting Vibrancy

The best way to maintain vibrant patio colour all year is to use a high-quality colour enhancer.

Joint-It Supreme Colour Enhancer is designed to:

  • Revive faded paving and enhance natural tones.

  • Provide a subtle wet-look finish that makes colours pop.

  • Protect against moss, algae, and stains.

  • Work on stone, concrete, and other porous surfaces.

Applying it is simple:

  1. Shake well before use.

  2. Apply evenly with a roller, brush, or sprayer.

  3. Allow 2–4 hours drying time.

  4. For deeper colour, add a second coat.

Step 4: Seasonal Patio Care Tips to Maintain Vibrancy

Different seasons bring unique challenges, but with small adjustments you can maintain a vibrant patio year-round:

  • Spring: Deep clean after winter moss and algae.

  • Summer: Reapply colour enhancer to protect from UV rays.

  • Autumn: Sweep leaves to prevent staining.

  • Winter: Remove snow and ice to avoid frost damage.

These seasonal steps make sure your patio remains colourful and inviting.

Step 5: Reapply Enhancer When Needed

Even with the best products, patios need top-ups. To truly maintain vibrant patio colour, reapply Joint-It Supreme Colour Enhancer every 12–18 months.

The Key to a Vibrant Patio All Year Round

To maintain a vibrant patio, you need a simple three-step approach: regular cleaning, seasonal care, and a trusted colour enhancer. With Joint-It Supreme Colour Enhancer, your patio will stay protected and look stunning in every season.