How to Stop Your Patio Going Green

stop patio going green

A green, slippery patio is a common problem for homeowners, caused by algae, moss, and mildew thriving in damp and shaded conditions. Not only does it look unattractive, but it can also become a safety hazard. If you’re tired of your patio going green, follow these simple yet effective tips to keep it clean, safe, and looking its best all year round.

Why is Your Patio Going Green?

The green film on patios is usually caused by:

  • Algae – A fast-spreading organism that thrives in damp, shaded areas.

  • Moss – Common between patio joints and on porous surfaces, particularly in wet conditions.

  • Mildew and Mould – Fungi that grow in humid, poorly ventilated environments.

These organisms develop in moist conditions, particularly on porous materials like stone and concrete. Without proper maintenance, they can quickly take over your patio.

How to Prevent Green Growth on Your Patio

1. Keep Your Patio Clean

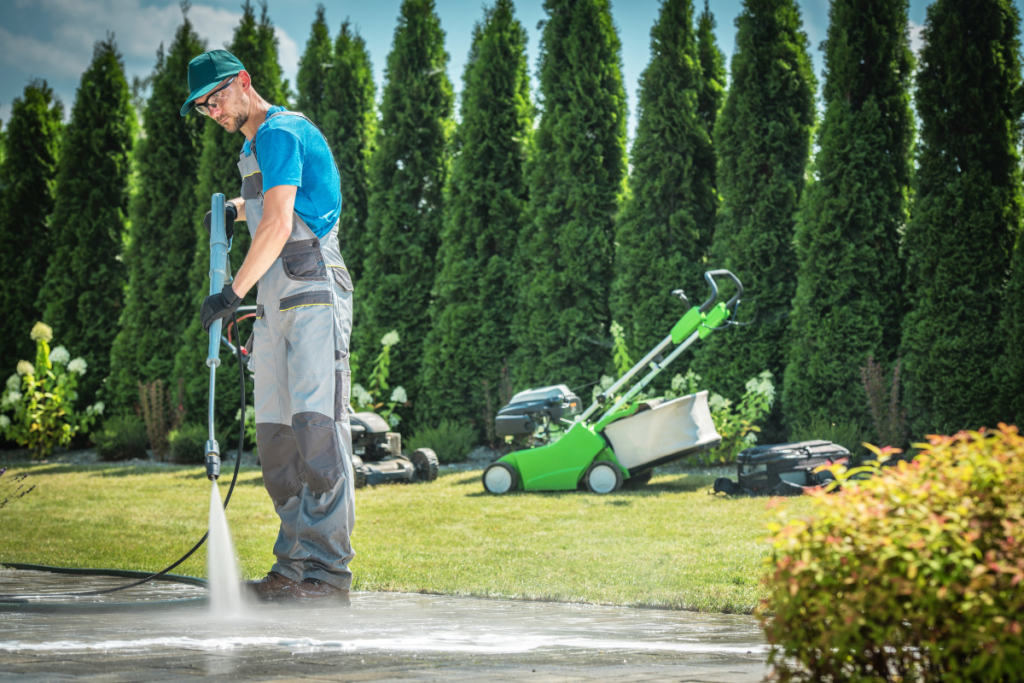
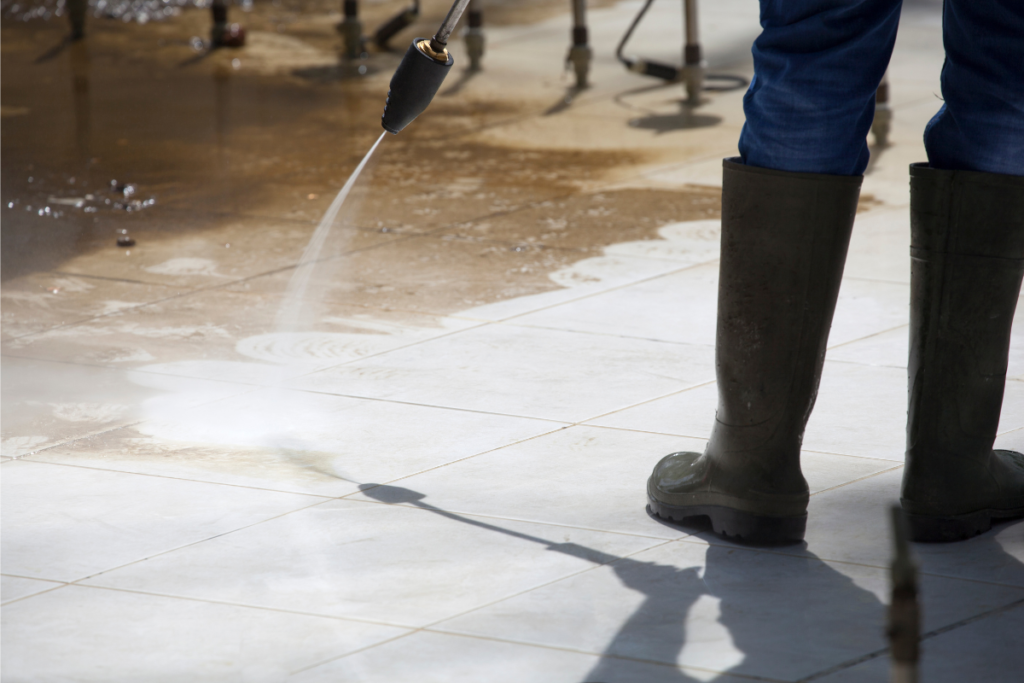
Regular sweeping and occasional pressure washing will help remove dirt, debris, and organic matter that promote algae and moss growth.

2. Increase Sunlight Exposure

Trimming back trees and overhanging plants allows more sunlight to reach your patio, helping to keep it dry and discouraging the growth of green organisms.

3. Improve Drainage

Ensure water drains off your patio rather than pooling. If necessary, adjust the slope of the surface or improve surrounding drainage.

4. Use a High-Quality Algae and Moss Remover

For a hassle-free solution, use a professional-grade cleaner like Joint-It Algae Remover. This product effectively removes algae, moss, and mildew without damaging your patio surface. Simply apply, leave to work, and rinse off for a clean, green-free patio.

clean patio slabs

5. Apply a Protective Sealer

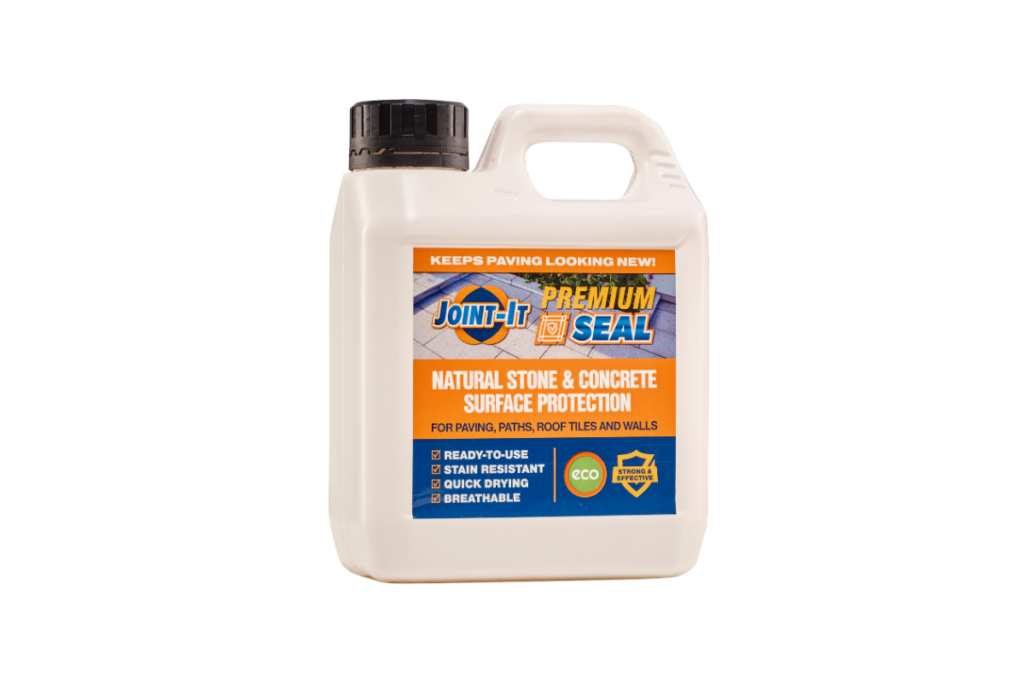
Sealing your patio prevents moisture from penetrating the surface, reducing the chances of algae and moss taking hold. Joint-It Premium Seal is a long-lasting, breathable sealer that protects against water damage and staining, preventing your patio going green.

6. Use the Right Jointing Compound

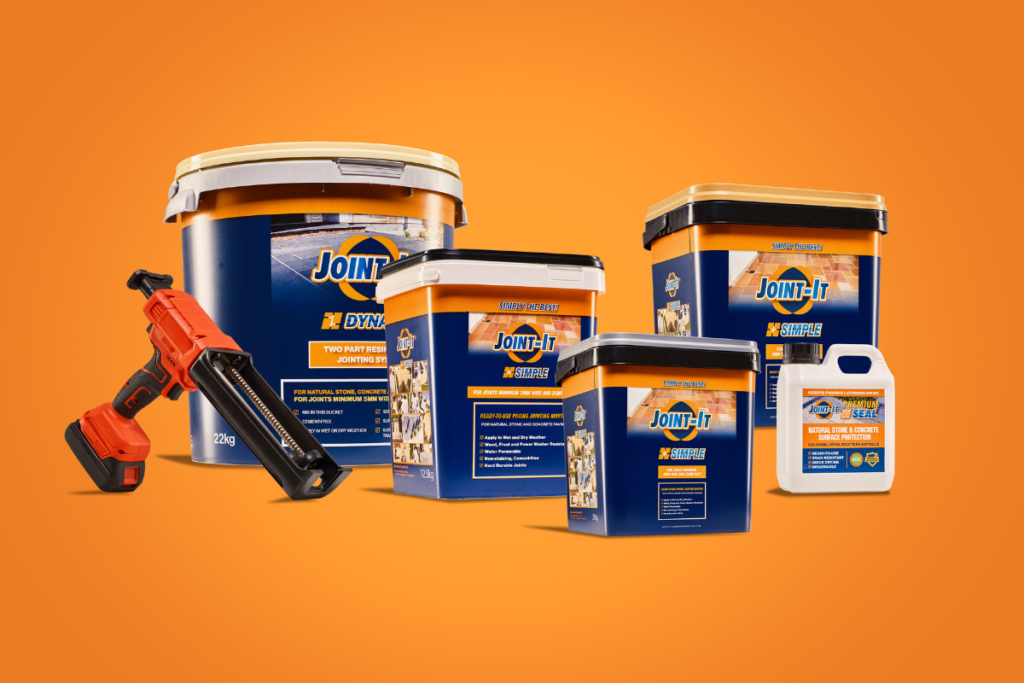
Moisture and dirt often accumulate in patio joints, encouraging weed and moss growth. Opt for a durable jointing compound like Joint-It Simple, which is permeable yet resistant to weed growth, ensuring a clean and stable patio surface.


stop patio going green Joint-It Simple

Why Choose Joint-It for Patio Maintenance?

Joint-It provides professional-grade solutions for cleaning, sealing, and maintaining patios. Our range of products are easy to use, highly effective, and long-lasting, ensuring your outdoor space stays clean and inviting all year round.

By following these simple steps and using trusted products from Joint-It, you can enjoy a beautiful, slip-free patio without the hassle of constant upkeep. Say goodbye to the green and hello to a pristine patio! For more information on why you should seal your patio for patio maintenance, read “Why You Should Use a Patio Sealer: The Key Benefits.”

jointing compounds

Ultimate Seasonal Guide to Patio & Driveway Maintenance

Patio and driveway maintenance throughout the year is essential to keep them looking their best, functioning well, and lasting longer. The UK’s ever-changing seasons bring different challenges, from winter’s freezing temperatures to summer’s scorching heat. By following a tailored maintenance routine for each season, you can ensure your outdoor spaces remain in top condition.

Spring: Refresh and Repair

As winter fades away, spring is the perfect time to assess and rejuvenate your patio and driveway.

  • Inspection – Check for cracks, loose paving, or signs of wear caused by winter weather. Early detection allows for timely repairs, preventing minor issues from escalating.
  • Cleaning – Sweep away debris, moss, and algae. A mixture of warm water and white vinegar can be an effective natural cleaner. For tougher stains, consider using a pressure washer on a low setting to avoid damage.
  • Weed Prevention – Weeds often start sprouting in spring. Apply a jointing compound like Joint-It Simple to keep them at bay and strengthen the joints in your paving.
  • Sealing – Applying a high-quality sealer like Joint-It Premium Seal will protect surfaces from moisture, stains, and moss regrowth, ensuring long-lasting results.

Summer: Protect and Preserve

With warmer temperatures and increased foot traffic, summer is all about keeping your patio and driveway looking their best.

  • Regular Sweeping – Dust, dirt, and fallen leaves can accumulate, leading to discolouration. Sweep regularly to maintain a clean surface.
  • Prevent Water Damage – Although the UK isn’t known for extreme summer heat, dry spells can cause paving to expand. Ensure joints are well maintained to prevent movement and cracking.
  • Moss and Algae Control – Hot and damp conditions encourage moss and algae growth. A simple mix of water and baking soda or a specialist cleaner can help remove build-up.
  • Re-sealing – If your patio or driveway is exposed to frequent use, consider reapplying a sealer to enhance protection and maintain its appearance.
patio maintenance

Autumn: Prepare for the Elements

Autumn brings falling leaves and increased moisture, making preparation essential before the harsher winter months.

  • Leaf Clearance – Wet leaves can stain and create slippery surfaces. Regularly clear them away to avoid potential hazards.
  • Gutter & Drain Check – Blocked drains and gutters can lead to standing water, which weakens driveways and patios over time. Ensure water is draining correctly.
  • Joint Repair – Any loose or missing jointing material should be replaced before winter to prevent frost damage. Use a durable product like Joint-It Dynamic for lasting results.
  • Mild Cleaning – A gentle wash removes dirt and organic matter before winter sets in, reducing the risk of long-term staining. Joint-It So Clean is a spray-and-go solution making this a very straightforward job.

Winter: Protect Against the Cold

The British winter can be harsh on patios and driveways, with frost, ice, and rain causing potential damage.

  • De-icing Carefully – Avoid using rock salt, as it can erode surfaces and harm surrounding plants. Opt for a gentle de-icer or sand for grip.
  • Prevent Ice Build-up – Regularly check drainage and remove standing water to minimise ice formation.
  • Minimal Pressure Washing – Avoid using a pressure washer in freezing temperatures, as trapped moisture can expand and cause cracks.
  • Cover Vulnerable Areas – If you have particularly delicate paving, consider covering it with a breathable tarp during extreme weather.
patio maintenance in winter

Year-Round Patio & Driveway Maintenance Tips

Regardless of the season, these general maintenance practices will keep your patio and driveway in peak condition:

  • Sweep regularly to prevent dirt build-up.
  • Use high-quality jointing compounds like Joint-It Simple to maintain strong, weed-free joints.
  • Apply a sealer annually to protect against stains and weather damage.
  • Address issues promptly to avoid costly repairs down the line.

By following this seasonal guide, you can enjoy a well-maintained patio and driveway all year round. For professional-grade solutions, explore Joint-It’s range of cleaning, sealing, and jointing products designed for the UK climate.

Sealing your patio makes for easier year-round maintenance. Read here for information on how patio sealer works.

Why Your Patio Looks Dirty (And How to Restore It)

Dirty Patio

A well-maintained patio enhances your outdoor space, providing the perfect setting for relaxation and entertaining. However, over time, homeowners report that their patio looks dirty when it accumulates dirt, stains, and organic growth that make them look unsightly. Understanding the causes of patio grime and using the right restoration techniques can bring your patio back to life.

Why Your Patio Looks Dirty: Common Causes

1. Algae and Moss Growth

The UK’s damp climate creates the perfect conditions for algae and moss to thrive. These growths appear as green or black patches and not only make the patio look grimy but can also create a slippery surface, increasing the risk of slips and falls.

2. Weathering and Environmental Debris

Rain, wind, and seasonal changes lead to a build-up of dirt, fallen leaves, and other debris. Over time, this accumulates and can cause discolouration, particularly on porous materials such as sandstone and concrete.

3. Efflorescence

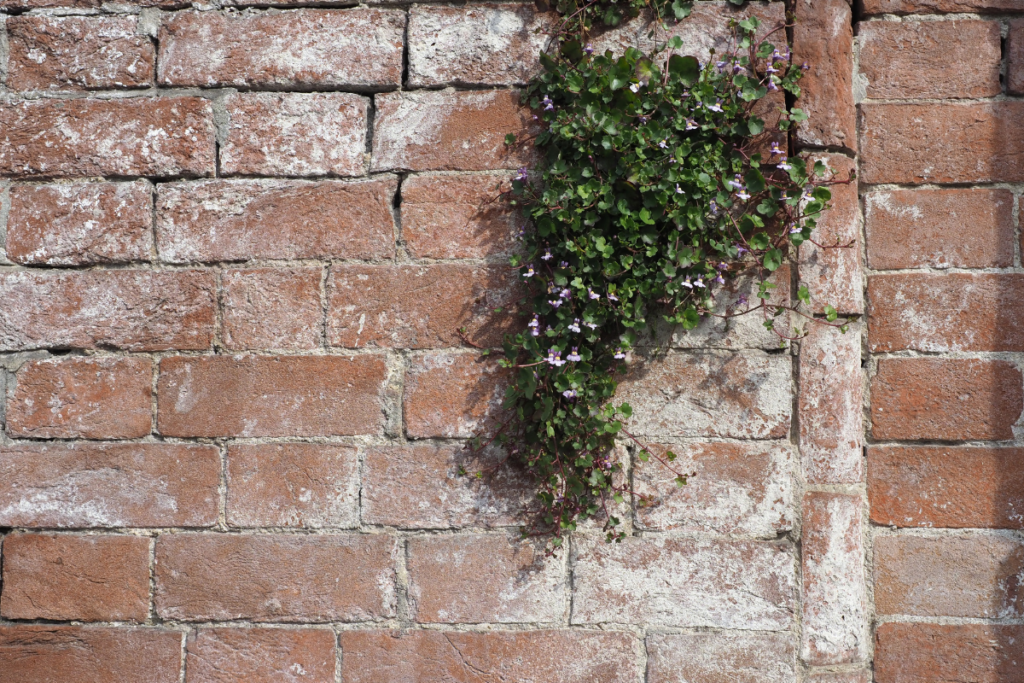
Efflorescence is the white, powdery residue that appears on the surface of concrete, brick, and stone patios. It occurs when water-soluble salts migrate to the surface and is more common in areas with high moisture levels.

4. Organic Stains

Fallen leaves, bird droppings, and plant matter can cause stubborn stains on patios. If left unchecked, these stains penetrate the surface, making them difficult to remove with standard cleaning methods.

5. Poor Drainage

If water doesn’t drain properly, it can pool on your patio, promoting the growth of mould and mildew. This not only affects the aesthetic appeal but can also lead to long-term structural damage.

How to Restore Your Patio

1. Regular Cleaning

Sweeping your patio regularly helps prevent dirt and debris from accumulating. For routine maintenance, use warm water mixed with mild detergent and a stiff brush to scrub away surface grime.

2. Deep Cleaning for Tough Stains

For more persistent stains, consider using a specialist patio cleaner. Products like Joint-It So Clean are specifically formulated to remove deep-seated dirt and restore your patio’s natural look without causing damage.

3. Removing Algae and Moss

Algae and moss require a targeted approach. Joint-It Algae Remover effectively eliminates these growths while preventing their return. Applying this solution as part of your maintenance routine helps keep your patio clean and slip-free.

4. Dealing with Efflorescence

Efflorescence can be removed with appropriate cleaning agents. Always follow the manufacturer’s instructions and use a soft-bristled brush to avoid scratching the surface.

5. Sealing the Surface

Applying a high-quality sealer protects your patio from future staining, moisture damage, and organic growth. Joint-It Premium Seal creates a durable, long-lasting barrier, ensuring your patio stays cleaner for longer.

6. Improving Drainage

Check that your patio has adequate drainage to prevent water from pooling. If necessary, adjust the gradient, clear blocked drains, or install additional drainage solutions to keep the area dry and free from excess moisture.

Preventative Measures

  • Routine Maintenance: Regularly sweeping and washing your patio prevents dirt build-up and staining.

  • Optimise Furniture Placement: Arrange outdoor furniture and potted plants to allow air circulation and sunlight exposure, reducing damp conditions where algae thrive.

  • Reapply Sealant Periodically: Over time, protective sealants wear away. Reapplying sealant as recommended helps maintain a clean, low-maintenance surface.

By understanding why your patio becomes dirty and following these simple yet effective restoration techniques, you can keep your outdoor space looking its best all year round. Investing in quality cleaning products and proper maintenance will ensure your patio remains a clean, welcoming feature of your home.

4 Signs Your Patio Needs Repointing

Over time, your patio’s mortar joints can start to deteriorate, causing damage to the structure and appearance of your outdoor space. Repointing your patio is an essential maintenance task that can restore its stability and aesthetics. In this article, we’ll explore four clear signs that your patio needs repointing and provide a step-by-step guide on how to fix it.

What Is Repointing?

Repointing refers to the process of renewing the mortar joints between the stones, bricks, or tiles in your patio. Mortar can weaken and degrade over time due to weather exposure, wear and tear, or poor installation. Repointing restores these joints, improves the overall look, and helps ensure your patio remains solid and functional for many years.

1. Cracked or Loose Joints

One of the most noticeable signs that your patio needs repointing is cracked or loose joints. As the mortar ages, it becomes more prone to cracking, crumbling, and breaking down. This can lead to uneven surfaces and structural issues, as the mortar is responsible for holding the patio stones or bricks in place.

How to Fix It:

To fix cracked or loose joints, you’ll need to remove the old, deteriorated mortar using a hammer and chisel. Once the old grout is gone, clean the joints to remove any debris. Then, apply fresh mortar and smooth it over the joints with a pointing trowel, ensuring it’s level and flush with the surface of the stones or bricks for a clean, professional finish.

2. Weeds and Moss Growing Between the Patio Slabs

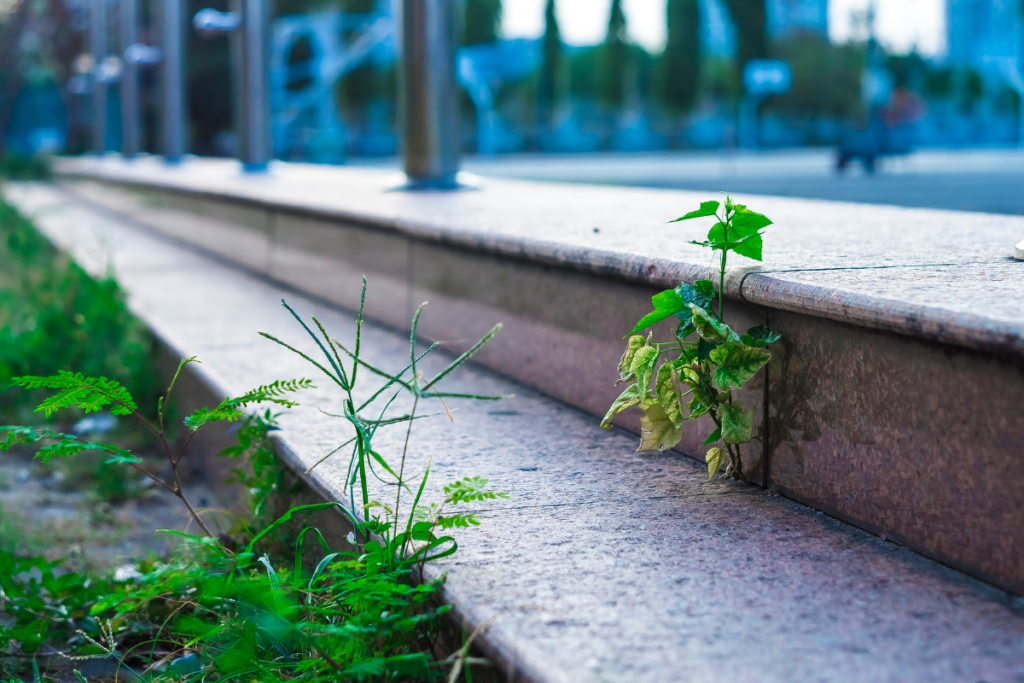
If you notice weeds or moss growing between the stones or tiles of your patio, it’s a clear sign that the grout has weakened. These gaps allow seeds to plant, creating the ideal conditions for plant growth. Over time, this can cause the grout to break down even further, leading to more serious structural issues.

How to Fix It:

To address this, remove the existing grout and replace it with a stronger, more durable grouting solution, such as industrial strength Joint-It Dynamic. When applying the new mortar, choose a mix that is designed for outdoor use, as it will better resist moisture. Once you’ve repointed the joints, consider applying a sealant to protect the new mortar and reduce the likelihood of future weed growth.

weeds in patio

3. Water Pooling on the Patio

If water is pooling on your patio after a rainfall, this may indicate that the mortar joints are no longer functioning correctly. Weakened or eroded mortar can allow water to seep beneath the surface, which not only leads to pooling but can also cause the patio to become unstable over time.

How to Fix It:

Repointing your patio will help prevent water from pooling. Make sure to remove any old, deteriorated grout and apply fresh grout evenly, filling in the joints thoroughly. This will ensure that water is diverted away from the surface and that the patio drains properly.

4. Discolouration or Stains

If your patio has developed unsightly stains or discolouration, it could be a sign of moisture infiltration. When the mortar breaks down, it can allow water to penetrate, causing stains and leading to further deterioration of the patio’s surface. This can also contribute to the growth of algae, moss, or mould, which makes your patio look unsightly.

How to Fix It:

Start by cleaning the surface of your patio with a Joint-It So Clean or a pressure washer to remove any stains or build-up. Once your patio is clean, check the joints for signs of damage. If the grout is cracked or missing, repoint the joints with fresh grout to restore the surface and help prevent further discolouration caused by moisture infiltration.

If you notice any of the signs mentioned it’s time to tackle the issue. By repointing your patio, you can improve its appearance and ensure that it stays solid and stable for years to come.

For high-quality jointing solutions, view our range of grouting products here. We offer a range of products designed to help you keep your outdoor spaces looking great and standing strong.

Can You Pressure Wash Porcelain Patio Tiles?

pressure washing porcelain patio

Porcelain patio tiles are a popular choice for outdoor spaces due to their durability, low maintenance, and stylish appearance. However, over time, dirt, moss, and grime can accumulate, leading homeowners to wonder: Can you pressure wash porcelain patio tiles? The short answer is yes, but there are important considerations to ensure you clean your tiles effectively without causing damage. In this guide, we’ll explore the best practices for pressure washing porcelain patios safely.

Is It Safe to Pressure Wash Porcelain Patio Tiles?

Yes, you can pressure wash porcelain patio tiles, but it’s crucial to use the correct settings and techniques. Porcelain is a dense and hard-wearing material, but excessive pressure or improper washing methods can damage the surface or loosen the grout between the tiles.

pressure washing porcelain patio

Best Practices for Pressure Washing Porcelain Patio Tiles

To safely and effectively clean your porcelain patio with a pressure washer, follow these best practices:

1. Choose the Right Pressure Washer Settings

  • Use a pressure washer with an adjustable PSI (pounds per square inch) setting.

  • Keep the pressure below 2000 PSI to prevent surface damage.

  • Use a wide-angle spray nozzle (25-40 degrees) to distribute water evenly without focusing too much force on one area.

2. Pre-Clean the Surface

  • Sweep the patio to remove loose dirt, leaves, and debris.

  • Apply a mild detergent or a specialized porcelain tile cleaner to help break down stubborn grime.

3. Maintain the Correct Distance

  • Hold the pressure washer at least 12-18 inches away from the surface.

  • Move the spray in smooth, even strokes to avoid concentrated pressure on one spot.

4. Be Cautious Around Grout Lines

  • Direct high-pressure water away from grout lines to prevent loosening or erosion.

  • Consider using Joint-It Porcelain Epoxy Grout, which offers excellent resistance to water and pressure washing.

5. Rinse and Dry

  • After pressure washing, thoroughly rinse the tiles with clean water to remove any detergent residue.

  • Allow the patio to air dry or use a squeegee to prevent water spots.

Alternatives to Pressure Washing

If you’re hesitant about using a pressure washer, consider these alternative cleaning methods:

  • Soft Washing: A low-pressure water application combined with a biodegradable cleaning solution.

  • Scrubbing with a Brush: A stiff-bristled brush and a mild detergent can effectively clean small areas without the risks of high pressure.

  • Steam Cleaning: A great eco-friendly option that removes dirt and grime without chemicals.

Pressure washing is an effective way to clean porcelain patio tiles, provided you use the right techniques and settings. By keeping the pressure below 2000 PSI, using a wide-angle nozzle, and maintaining a safe distance, you can keep your patio looking fresh without risking damage. For extra protection, consider using Joint-It Porcelain Epoxy Grout, which ensures longevity and resistance to high-pressure cleaning.

To make your patio easier to maintain, consider using a sealer. Learn why you should use a patio sealer here.


How Does Patio Sealer Work?

how does patio sealer work Joint-It Premium Seal

Sealing your patio is one of the most effective ways to protect paving from moisture, stains, and weather damage. But what makes a sealer effective? Understanding the science behind patio sealers—including their chemical composition and how they interact with different materials—helps in choosing the right product. Let’s break down how does patio sealer work at a molecular level and why Joint-It Premium Seal provides superior, long-lasting protection.

The Science Behind Patio Sealers: How Does Patio Sealer Work?

Patio sealers work by creating a hydrophobic barrier on or within the paving material. This barrier prevents water, dirt, and other contaminants from penetrating the stone, while still allowing vapour to escape.

The key components of most modern patio sealers include:

1. Fluoropolymers – The Key to Water & Stain Resistance

Fluoropolymers are highly compact molecules that create an ultra-dense, non-stick surface on stone and concrete. Their unique molecular structure provides:

Superior water repellency – Fluoropolymers reduce the surface energy of the paving, making water bead up and roll off instead of soaking in.

Oil and stain resistance – The tight molecular bonds prevent grease and organic materials from binding to the surface.

UV protection – Fluoropolymers resist breakdown under sunlight, ensuring long-lasting protection.

Unlike traditional silicone-based sealers, fluoropolymer-based sealers offer enhanced protection without leaving a visible film, making them ideal for natural stone patios.

2. Silane and Siloxane – The Breathable Barrier

These two compounds are responsible for the penetration and adhesion of sealers into porous surfaces.

  • Silane molecules are small enough to penetrate deep into the pores of stone and concrete, chemically bonding with the material to form an invisible, waterproof shield.
  • Siloxanes create a flexible barrier that repels moisture while allowing vapour to escape. This breathability prevents trapped moisture, which is crucial in reducing efflorescence (white salt deposits) and freeze-thaw damage.

The combination of fluoropolymers, silane, and siloxane in Joint-It Premium Seal ensures deep penetration without trapping water inside, reducing the risk of long-term damage.

3. Polymer Cross-Linking – The Key to Durability

High-quality sealers use polymer cross-linking technology to form a strong, interwoven molecular structure. This creates a tough, weather-resistant shield that withstands foot traffic, rain, and temperature fluctuations.

  • Traditional acrylic sealers lack cross-linking, leading to faster degradation.
  • Joint-It Premium Seal utilises advanced polymer cross-linking, ensuring superior longevity and resistance to wear.
how does patio sealer work Joint-It Premium Seal (2)

How Joint-It Premium Seal Works on Different Materials

Porous Stone (Sandstone, Limestone, Concrete)

  • The sealer penetrates deeply, filling microscopic pores with hydrophobic molecules.
  • Water and oil-repelling compounds prevent staining and moisture absorption.
  • The breathable layer ensures vapour escapes, reducing the risk of efflorescence.

Dense & Non-Porous Stone (Granite, Porcelain)

  • The fluoropolymer technology creates an ultra-thin protective barrier on the surface.
  • Since these stones naturally resist moisture, the sealer enhances durability and stain resistance without altering the appearance.
how does patio sealer work Joint-It Premium Seal

Why Choose Joint-It Premium Seal?

Advanced fluoropolymer technology – Offers superior water, oil, and stain resistance.

Breathable formulation – Prevents trapped moisture and efflorescence.

UV-resistant – Protects against colour fading from sun exposure.

Long-lasting durability – Polymer cross-linking ensures high wear resistance.

Natural-look finish – No shiny residue, preserving the beauty of your patio.

By combining scientific innovation with superior performance, Joint-It Premium Seal ensures long-term protection for any patio.

For more information on the importance of sealing your patio, read this article: Why You Should Use a Patio Sealer: The Key Benefits

Efflorescence in Patio Slabs: The Science & What To Do

efflorescence on patio | Joint-It Premium Seal

You have probably noticed that efflorescence is a common issue that affects patio slabs, leaving behind unsightly white deposits. This phenomenon occurs when water-soluble salts within the paving material dissolve and migrate to the surface as moisture evaporates. Once exposed to air, these salts crystallise, forming a chalky residue. While efflorescence is not a sign of structural damage, it can affect the appearance of your patio. Understanding its causes and knowing how to manage it will help keep your paving in top condition.

What is Efflorescence in Patio Slabs?

It is a white, powdery deposit that forms on the surface of patio slabs, bricks, and concrete. This occurs when water-soluble salts within the paving materials dissolve in moisture and migrate to the surface as the water evaporates. Once exposed to air, these salts crystallise, leaving behind a chalky residue.


The Science Behind Efflorescence

  • Most patio slabs contain calcium hydroxide, a byproduct of cement hydration.
  • When water enters the slabs, it dissolves these salts.
  • As the water moves to the surface and evaporates, the dissolved salts crystallise into calcium carbonate, forming visible deposits.
  • This is a natural chemical reaction and does not indicate structural damage to your patio slabs.

Causes of Efflorescence in Patio Slabs

1. Moisture Penetration

Rain, groundwater, or excess moisture from cleaning can dissolve salts within the slabs. As the water moves to the surface and evaporates, these salts are left behind.

2. Newly Laid Paving

Fresh cement-based materials contain higher amounts of salts, making new patios particularly prone to efflorescence. This issue typically appears within the first 6–12 months of installation.

3. High Humidity and Temperature Fluctuations

Warm, humid conditions accelerate moisture movement, increasing the likelihood of salt deposits.

4. Use of Water-Based Cleaners

Some patio cleaners can dissolve salts and bring them to the surface, making efflorescence more noticeable.

efflorescence on patio | Joint-It Premium Seal

How to Remove and Manage Efflorescence

1. Natural Weathering

  • Patio efflorescence often disappears on its own over time due to rain and natural wear.
  • Regular sweeping and light rinsing can help remove surface deposits.

2. Brushing and Dry Cleaning

Use a stiff-bristled brush to sweep away dry efflorescence without spreading it further.

3. Mild Acid-Based Cleaners

  • A diluted white vinegar solution (1 part vinegar to 5 parts water) can help dissolve and remove stubborn deposits.
  • Alternatively, use a specialised efflorescence remover designed for patio slabs.
  • Always test on a small, hidden area first to avoid damage.

4. Improve Drainage and Reduce Moisture

  • Ensure your patio has proper drainage to prevent excess water from seeping into the slabs.
  • Consider using a breathable jointing compound like Joint-It Simple to reduce moisture retention in the joints.

When and Why You Should Seal Your Patio

Sealing your patio can help prevent moisture penetration, reducing the risk of efflorescence and protecting your slabs from stains, algae growth, and weather damage. However, timing is crucial to avoid trapping salts inside the paving.

Best Time to Seal Your Patio

After 6–12 months for new patios – This allows any initial efflorescence to naturally wash away before sealing.

During dry weather – Ensure at least 48 hours of dry conditions before and after application.

When the patio is completely dry – Sealing damp paving can trap moisture and worsen efflorescence.

Spring or summer – Temperatures between 10–25°C are ideal for proper curing.


Choosing the Right Patio Sealer

Breathable, Water-Based Sealers – Allows moisture to escape while still providing protection, and does not alter the stone’s appearance. Joint-It Premium Seal is an incredibly effective sealer with long-term benefits.
Solvent-Based Sealers – Offers strong protection but can darken or affect the stone.

Final Tips for a Long-Lasting Patio

✔ Use high-quality paving materials to minimise salt content.
✔ Ensure proper installation and drainage to prevent water buildup.
✔ Choose a weather-resistant jointing compound like Joint-It Dynamic for long-term durability.
✔ Maintain and clean your patio regularly to prevent efflorescence buildup.
✔ Seal your patio at the right time for maximum protection.

By understanding the science behind efflorescence and following best practices for prevention and maintenance, you can keep your patio looking pristine for years to come.

For more information on efflorescence, read this article “Efflorescence: Causes, Prevention, and Solutions.“

Why You Should Use a Patio Sealer: The Key Benefits

Patio Sealer - sealed vs unsealed stone

A beautifully laid patio is an investment in your outdoor space, offering both aesthetic appeal and functionality. However, exposure to the elements can take its toll on paving slabs over time. That’s where a high-quality patio sealer comes in — offering protection while preserving the natural beauty of your patio.

Our water-based, breathable patio sealers are specially designed to protect without altering the colour, texture, or slip resistance of your slabs. Let’s explore the key benefits of using a patio sealer and why it should be part of your patio care routine.

What Is a Patio Sealer?

A patio sealer is a protective coating applied to the surface of paving slabs. Its purpose is to create a barrier against moisture, dirt, staining, and weather damage. It helps to prolong the lifespan of your patio while making it easier to clean and maintain.

Some sealers can alter the appearance of paving or leave a glossy finish. Our water-based formula in our products protects while preserving the original look and feel of your slabs.

The Top Benefits of Using a Patio Sealer

Protection Against Water Damage

Patios are constantly exposed to rain, frost, and moisture. Our breathable patio sealer provides a protective barrier that prevents excess water absorption while still allowing moisture to escape from the surface.

Breathability helps prevent frost damage. It allows moisture to escape instead of becoming trapped, which can lead to cracks and surface flaking.

Prevents Unsightly Staining

Paving slabs are vulnerable to staining from mud, fallen leaves, algae, bird droppings, and even food spills during summer barbecues. A patio sealer creates a barrier that makes it harder for stains to penetrate the surface, keeping your slabs looking cleaner for longer.

Our water-based formula also repels oil and grease stains, which can be particularly challenging to remove from porous paving materials.

Reduces Algae and Moss Growth

Damp conditions can encourage the growth of algae, moss, and lichen. This not only affects the appearance of your patio but can also create slippery surfaces.

Our non-slip patio sealer reduces moisture buildup, helping prevent organic growth. It keeps the surface safe to walk on, even when wet.

Maintains the Natural Appearance of Your Slabs

Some patio sealers can darken or create a glossy sheen on the surface of paving, which might not be ideal if you prefer a natural finish.

Our water-based patio sealer is designed specifically to preserve the original colour, texture, and finish of your slabs, keeping your patio looking just as it did when first installed.

Non-Slip Formula for Safety

Safety is essential when it comes to outdoor surfaces, especially in damp climates where patios can become slippery.

Our patio sealer not only protects your slabs but also features a non-slip formula to ensure safe foot traffic, even during wet conditions — ideal for family gardens and social spaces.

Easier Cleaning and Maintenance

Sealed patios are far easier to keep clean compared to untreated surfaces. The protective barrier helps prevent dirt from becoming embedded, so routine cleaning requires less scrubbing and harsh chemicals.

A simple rinse with water or mild detergent is often all you need to keep your patio looking pristine.

Extends the Life of Your Patio

By shielding your paving from moisture penetration, staining, and organic growth, a quality patio sealer helps prevent long-term wear and structural damage.

This added protection reduces the need for costly repairs or slab replacements, ultimately extending the life of your patio investment.

Protect Your Patio with Confidence

A patio sealer is a simple yet powerful way to protect your outdoor space from weather damage, staining, and organic growth while keeping your slabs looking fresh and beautiful.

Our breathable, non-slip, water-based patio sealer offers the perfect balance of protection and aesthetics, ensuring your patio stays safe, clean, and long-lasting — all without altering its natural beauty.

Ready to protect your patio? Explore our range of sealers today and give your outdoor space the care it deserves!

Efflorescence: Causes, Prevention, and Solutions

Efflorescence—a term that might sound unfamiliar—can be an all-too-common nuisance for homeowners. This white, powdery residue often appears on patios, walls, and masonry surfaces, marring the beauty of outdoor spaces. While it’s usually harmless, efflorescence can be frustrating, especially if you’ve invested in a pristine patio or stylish brickwork.

In this blog, we’ll explore what it is, why it occurs (particularly in the UK and Ireland), and how to prevent and remove it effectively.

What is Efflorescence?

Efflorescence is the result of water-soluble salts migrating to the surface of porous materials like concrete, brick, or natural stone. When water penetrates these materials and dissolves the salts within, the water evaporates, leaving behind a white or sometimes light-coloured residue.

While typically white, efflorescence in the UK and Ireland can occasionally take on yellow or brown hues, depending on the type of salts involved and the local environment.

Why is Efflorescence Common in the UK and Ireland?

The damp climate in the UK and Ireland makes it particularly susceptible to this natural phenomenon. Here’s why:

  • Frequent Rainfall: The consistent wet weather increases the chance of water seeping into porous materials.
  • High Humidity: Slows the evaporation process, allowing salts more time to travel to the surface.
  • Temperature Swings: Freeze-thaw cycles during the cooler months create micro-cracks in materials, encouraging water ingress.
  • Soil Composition: The UK and Ireland’s varied soil types often contain high levels of salts, which can be absorbed by construction materials.

These conditions make efflorescence a recurring issue, especially for patios, garden walls, and exterior brickwork.

Is Efflorescence Harmful?

The good news is that efflorescence is largely a cosmetic issue—it doesn’t typically damage the structural integrity of materials. However, persistent moisture can lead to secondary problems, such as:

  • Staining: Prolonged salt deposits may permanently discolour some materials.
  • Surface Deterioration: Repeated freeze-thaw cycles can weaken porous surfaces.
  • Moss and Algae Growth: Damp conditions that encourage efflorescence can also promote organic growth.

How to Remove Efflorescence

This unsightly residue can be effectively removed with the right approach. Here’s a step-by-step guide:

  1. Brush it Off: Use a stiff-bristled brush to sweep away loose deposits. This works best on dry surfaces.
  2. Wash the Surface: Rinse the area with water and mild detergent. A pressure washer can be helpful for larger patios or walls.
  3. Use a Specialised Cleaner: For stubborn efflorescence, use a masonry or efflorescence remover. These cleaners often contain mild acids that dissolve salt deposits. Always follow the manufacturer’s instructions and test on a small, discreet area first.
  4. Avoid Scrubbing Too Hard: Excessive scrubbing can damage delicate materials like natural stone.
  5.  

Preventing Efflorescence in the UK

Prevention is always better than cure. Here are some practical tips to keep efflorescence at bay:

  1. Seal Your Patio or Walls: Applying a high-quality, water-based, breathable sealant helps reduce water absorption while allowing moisture to escape, preventing salt migration.
  2. Improve Drainage: Ensure water doesn’t pool on patios or near walls. Proper drainage can minimise water penetration.
  3. Use the Right Materials: Choose low-alkaline construction materials and mortar mixes to reduce the availability of salts.
  4. Maintain Regular Cleaning: Keep surfaces clean and free of moss, algae, or debris that can trap moisture.
  5. Install Damp-Proof Courses (DPCs): For walls, ensure a proper DPC is in place to prevent rising damp, a common source of efflorescence.

Final Thoughts

Efflorescence is a common and largely manageable issue for UK and Irish homeowners, especially in wet and humid climates. By understanding its causes and following the right prevention and removal strategies, you can protect your patios, walls, and paving from this unsightly residue. Regular maintenance and a proactive approach will keep your outdoor spaces looking their best, no matter what the British and Irish weather throws at them.

How to Remove Black Spots on Your Patio

Black spots on patio

Black spots on patios are a common and frustrating problem for homeowners. These unsightly blemishes can ruin the aesthetic appeal of your outdoor space and, if left untreated, may lead to long-term damage. In this article, we’ll explore the causes of black spots on patios, their prevention, and effective methods for removing them.


What Causes Black Spots on Your Patio?

Black spots, often referred to as “patio lichen,” are caused by a combination of natural factors. Here are the primary culprits:

  1. Fungal Growth: Black spots are frequently caused by lichen—a symbiotic relationship between algae and fungus. These organisms thrive in damp, shaded conditions and can penetrate the porous surface of stone or concrete.

  2. Moss and Mould: In moist environments, moss and mould can take root on patio surfaces, creating dark patches.

  3. Pollution and Dirt: Over time, pollution particles, dirt, and other contaminants can accumulate, staining your patio.

  4. Weather Conditions: Rain and humidity provide the perfect breeding ground for black spots to form, especially if your patio doesn’t receive much sunlight.

black spots on patio - Joint-It

How to Remove Black Spots from Your Patio

Removing black spots can be a challenging task, but with the right tools and techniques, you can restore your patio to its original beauty. Here’s how:

1. Pressure Washing

Pressure washing is one of the most effective ways to tackle this issue. A high-powered jet of water can dislodge dirt, algae, and lichen from the surface. However, take care not to use too much pressure on delicate materials like natural stone, as it can cause damage.


2. Use a Specialised Patio Cleaner

There are many patio cleaning products on the market designed to dissolve lichen and algae. Look for biodegradable solutions that won’t harm nearby plants. Follow these steps:

  • Apply the cleaner evenly across all the patio black spot.
  • Allow it to soak for the recommended time (usually 15–30 minutes).
  • Scrub the area with a stiff brush or broom.
  • Rinse thoroughly with water.

3. Steam Cleaning

Steam cleaning is an eco-friendly method to remove black spots without chemicals. The high temperature of the steam kills algae, lichen, and mould while lifting stubborn stains.

Preventing Black Spots on Your Patio

Once you’ve removed the spots, prevention is key to maintaining a pristine patio. Here are some tips:

  • Regular Cleaning: Sweep your patio frequently to remove dirt, leaves, and debris that can promote fungal growth.
  • Seal the Surface: Use a high-quality patio sealant to create a protective barrier against moisture and stains.
  • Improve Drainage: Ensure that your patio has proper drainage to prevent water from pooling.
  • Trim Overhanging Plants: Allow more sunlight to reach your patio by trimming nearby trees and bushes.
  • Treat Annually: Apply a preventative patio cleaner or fungicide annually to keep these spots at bay.

Why It's Important to Act Quickly

Leaving black spots untreated can lead to long-term issues. Lichen can embed itself deeply into porous materials, making it even harder to remove. Additionally, these spots can cause the surface to become slippery when wet, posing a safety hazard.

Black spots on patios may be stubborn, but they’re not impossible to remove. With the right methods, tools, and preventative measures, you can keep your outdoor space looking fresh and inviting. Whether you opt for pressure washing, specialised cleaners, or DIY solutions, tackling the problem early will save you time and effort in the long run.

Keep your patio pristine and ready for entertaining by staying vigilant against black spots. 

Is your Concrete Going Green?

pressure washing patio concrete going green

Sometimes when patio areas are shaded they are more susceptible to both spots and green growths. If your concrete is going green, read our guide here.