How to Keep Your Porcelain Patio Looking New

A porcelain patio is a stylish, durable choice for outdoor living, but even the toughest materials need a little care to stay looking their best. Over time, dirt, algae, and everyday wear can dull the fresh, clean appearance you loved when it was first installed.

The good news? With the right approach, it’s easy to keep your porcelain patio looking new all year round.

1. Sweep Regularly to Prevent Dirt Build-Up

Loose dirt, leaves, and debris can trap moisture and encourage algae growth. Sweeping once or twice a week prevents staining and keeps the surface fresh.

Pro tip: Use a soft-bristled broom to avoid scratching the surface.

2. Use the Right Cleaner for Porcelain Paving

Harsh chemicals like bleach can damage grout and dull the tile surface. Instead, choose a pH-neutral cleaner designed for outdoor porcelain.

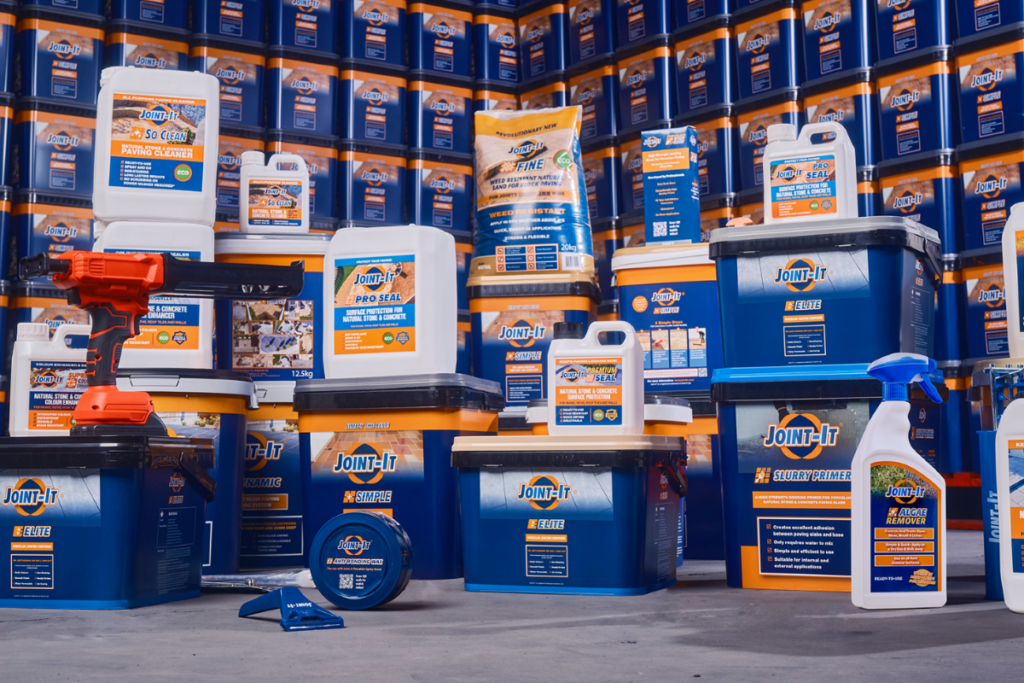
Joint-It So Clean safely removes dirt, algae, and grime without harming your paving or joints, keeping your patio bright without the risk of damage.

clean patio slabs

3. Avoid Overusing the Pressure Washer

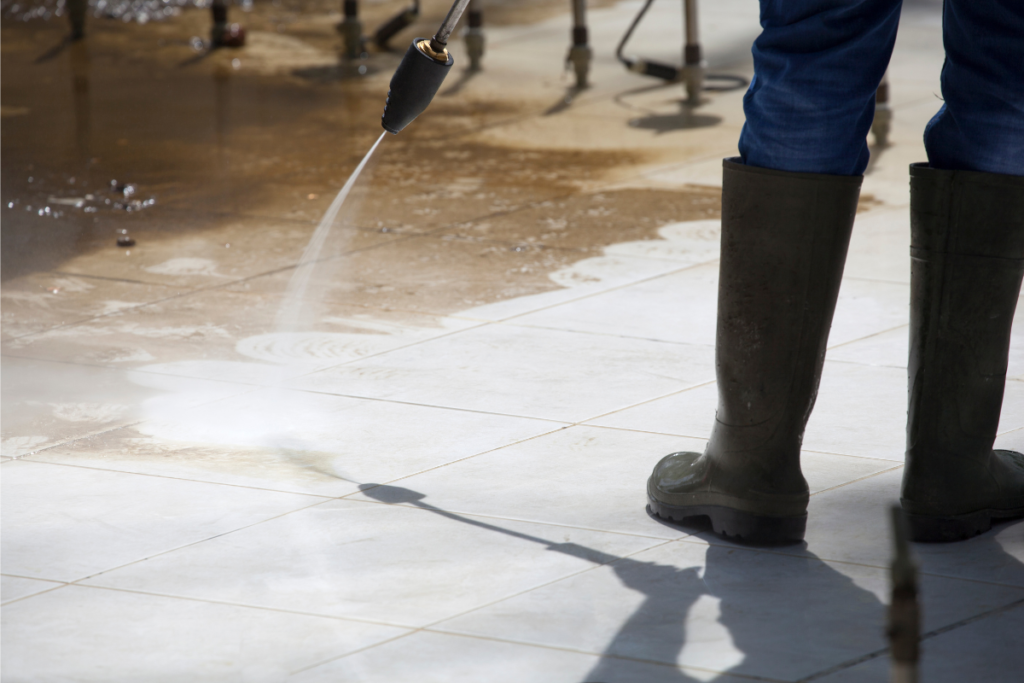
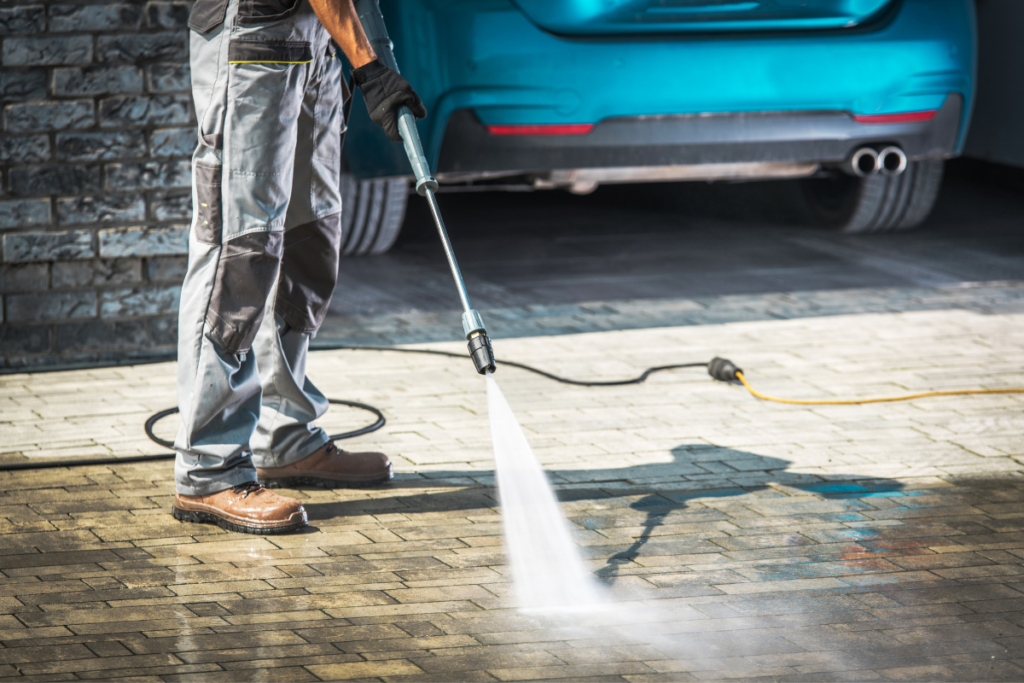
While a pressure washer can be useful for heavily soiled patios, using it too often can erode grout and force water into joints.

If your patio is very dirty:

  1. Apply Joint-It So Clean first and leave it to work.

  2. Lightly pressure wash to lift stubborn dirt.

  3. Reapply cleaner and let it protect the surface.

For routine cleaning, sweeping and spot-cleaning is often enough.

pressure washing patio concrete going green

4. Protect Against Algae and Moss

Damp, shaded areas are prone to green growth. Applying Joint-It Algae Remover twice a year prevents algae from taking hold, keeping your porcelain paving fresh and slip-free.

5. Check and Maintain the Grout

Damaged or missing grout can allow weeds, dirt, and water to get in, leading to frost damage. If you need to regrout, choose Joint-It Porcelain Epoxy Grout, it’s stain-resistant, frost-proof, and designed for narrow porcelain joints.

Keep It Looking Like the Day It Was Laid

By following these simple steps — regular sweeping, using the right cleaner, protecting against algae, and maintaining your grout — you can keep your porcelain patio looking new for many years.

With Joint-It’s specialist products, your outdoor space will stay just as beautiful and low-maintenance as the day it was installed.

How to Stop Outdoor Porcelain Grout from Staining

Best jointing compound - Joint-It Porcelain Epoxy Grout

Porcelain paving is a popular choice for patios thanks to its sleek look and low maintenance, but even the best paving can be let down if the grout becomes stained. Outdoor porcelain grout is constantly exposed to dirt, rain, algae, and even BBQ spills, which can quickly spoil its clean, fresh appearance, so let’s dive into how to stop porcelain grout from staining.

Why Does Outdoor Porcelain Grout Stain?

Even though porcelain itself is highly resistant to stains, the grout between the tiles is more porous and can absorb dirt, moisture, and contaminants. Common causes include:

  • Moss, algae, and lichen growth in damp, shaded areas

  • Food and drink spills from outdoor dining

  • Mud and dirt tracked from the garden

  • Fallen leaves releasing tannins that leave brown marks

The wrong type of grout can absorb these stains, making them hard (or even impossible) to remove completely.

Choose the Right Grout from the Start

The most effective way to stop staining is to use a low-porosity, stain-resistant grout when installing your porcelain paving.

Joint-It Porcelain Epoxy Grout is specially formulated to resist staining. Its benefits include:

  • Waterproof finish: stops liquids from soaking into the joints

  • Non-porous surface: prevents dirt and algae from embedding

  • UV stable: colour stays bright and doesn’t fade in the sun

  • Easy to clean: dirt sits on the surface and wipes away easily

By starting with the right product, you can avoid the most common staining problems altogether.

joint-it porcelain epoxy grout

How to Protect Your Existing Porcelain Patio

If your patio is already installed, you can still take steps to prevent staining:

1. Keep it Clean

Regularly sweep the area to remove leaves, dirt, and debris before they have time to stain.

2. Use a Patio Cleaner

Apply Joint-It So Clean to remove dirt, algae, and surface stains without damaging your paving or grout.

3. Avoid Harsh Chemicals

Bleach and acidic cleaners can damage some types of grout, so use pH-neutral cleaners designed for outdoor surfaces.

4. Seal the Porcelain Patio

For extra protection, apply a breathable sealer that repels water and dirt. This creates a barrier that makes stains less likely to penetrate.

Joint-It Porcelain Epoxy Grout being applied in patio joints with an application gun

How to Remove Stains if They Appear

If stains have already set in, quick action is key:

  • Clean the affected area with a specialist outdoor cleaner like Joint-It So Clean

  • Use a stiff brush to lift surface dirt (avoid wire brushes, which can scratch)

  • Rinse thoroughly and let the area dry completely

In severe cases, you may need to replace the stained grout with a stain-resistant option like Joint-It Porcelain Epoxy Grout to restore your patio’s appearance.

Stop Outdoor Porcelain Grout from Staining

The secret to preventing grout stains is simple:

  1. Start with a premium, stain-resistant grout like Joint-It Porcelain Epoxy Grout

  2. Maintain your patio with gentle, regular cleaning

  3. Act fast if you notice any marks

By following these steps, you’ll keep your porcelain paving looking as fresh and modern as the day it was laid. For more maintenance information, read “What’s the difference between patio cleaner and bleach?”

Do I Need to Pressure Wash After Using Patio Cleaner?

Power wash patio

Keeping your patio fresh, clean and free from moss or algae doesn’t have to be hard work, but many people ask: “Do I need to pressure wash after using patio cleaner?” The answer depends on how dirty your paving is and which product you’re using.

In this guide, we’ll explain exactly when you do (and don’t) need to pressure wash after using a patio cleaner like Joint-It So Clean or Joint-It Algae Remover, so you get a beautiful, slip-free patio all year round.

When Do I Need to Pressure Wash After Using Patio Cleaner?

If you’re wondering, “Do I need to pressure wash after using patio cleaner for heavy dirt?”, the answer is yes for very dirty patios.

For paving with lots of moss, green algae, black spots, or deep-seated grime, the best results come from using Joint-It So Clean or Joint-It Algae Remover first, then pressure washing. Here’s how:


Apply the Patio Cleaner First:

Spray or pour Joint-It So Clean onto the surface to loosen dirt and algae. This makes the grime easier to lift off.

Leave It to Work:
Allow the patio cleaner to work for the time recommended on the label. This gives the active ingredients time to break down stubborn build-up.

Pressure Wash for a Deep Clean:
After the product has soaked in, use a power washer to blast away the loosened debris. This restores your patio to its best condition.

Reapply for Extra Protection:
If your patio is very dirty, you can reapply Joint-It So Clean or Joint-It Algae Remover after pressure washing to help prevent future moss and algae growth.

Do I Need to Pressure Wash After Using Patio Cleaner for Light Dirt?

If your patio is not heavily soiled, you do not need to pressure wash.
A huge benefit of Joint-It So Clean and Joint-It Algae Remover is that they keep maintenance simple.

For regular cleaning: 

  • Apply the cleaner to your patio slabs.
  • Leave it to work. No scrubbing or power washing required.
  • Natural weathering (rain, sun) helps keep your patio cleaner for longer.
clean patio slabs
Joint-It Algae Remover

Why Use Joint-It So Clean and Joint-It Algae Remover?

When asking, “Do I need to pressure wash after using patio cleaner?” it’s good to know why high-quality products matter.
Joint-It So Clean lifts dirt, black spots and organic stains from natural stone, concrete or block paving.
Joint-It Algae Remover targets green algae, moss and slippery surfaces, keeping your patio safe.

Both are:

  • Easy to apply

  • Effective with or without pressure washing

clean patio slabs
Joint-It So Clean

Ready to Keep Your Patio Spotless?

Shop our range of trusted patio cleaners:

Spend less time scrubbing and more time enjoying your patio. For more information on cleaning your patio, read “How to Clean Natural Stone Paving Without Damaging It”

How Do You Stop Weeds Growing Between Paving Slabs?

Weeds growing between paving slabs can be more than just an eyesore – they can weaken your paving structure and create an unkempt appearance. Whether you’re maintaining a patio, driveway, or garden path, keeping it weed-free is key to long-lasting, beautiful paving. In this guide, we’ll explore the most effective ways to stop weeds from growing between your paving slabs and how Joint-It products can help you achieve a professional, low-maintenance finish.

Why Are Weeds Growing Between Paving Slabs?

Weeds thrive in gaps where moisture, light, and organic material accumulate. Even the smallest crack in your paving can become a haven for airborne seeds, which take root and grow rapidly, especially during the wetter months.

Common Reasons for Weed Growth:

  • Poorly filled joints

  • Weathering and erosion of old jointing compound

  • Accumulation of dirt and organic debris

  • Inadequate drainage

1. Use a High-Quality Paving Jointing Compound

The most effective long-term solution to stop weeds growing between paving slabs is to fill the joints with a durable, weed-resistant paving jointing compound.

Why Choose Joint-It Simple?

Joint-It Simple is a ready-to-use, brush-in paving jointing compound that:

  • Prevents weed growth by creating a strong, weatherproof barrier

  • Is permeable, allowing water to drain while blocking weed seeds

  • Withstands power washing, unlike traditional sand or mortar

  • Lasts for years without cracking or washing out

Joint-It Simple is ideal for natural stone, concrete, and outdoor paving areas – making it a top choice for professionals and homeowners alike.

stop patio going green Joint-It Simple

2. Keep Paving Slabs Clean

Regular cleaning is essential to stop weeds from taking hold. Sweep your paving weekly to remove leaves, soil, and debris that can trap moisture and create a seedbed.

Power Washing:

Occasional power washing can help remove grime and prevent moss buildup. If you’ve used Joint-It Simple, your joints are safe from being blasted away – unlike sand-filled joints.

3. Apply Weed Killer (If Needed)

For existing weed infestations, use a non-toxic, biodegradable weed killer before applying jointing compound. Avoid harsh chemicals that can damage surrounding plants or harm the environment.

Tip: Remove the weeds from the root and let the area dry completely before repointing.

4. Repoint Damaged Joints

Over time, jointing materials can degrade. If you see gaps forming, it’s time to repoint your paving with a reliable product like Joint-It Simple. Filling the gaps quickly stops weeds from returning and protects the structural integrity of your surface.

Watch our application video here:

5. Improve Drainage

Poor drainage encourages weed growth and can accelerate joint erosion. Ensure your patio or pathway is properly sloped and water doesn’t pool in the joints. Consider using permeable jointing compounds like Joint-It Simple to support water flow without compromising strength.

Say Goodbye to Weeds Growing Between Paving Slabs

Stopping weeds from growing between paving slabs doesn’t need to be a constant battle. By using a premium jointing compound like Joint-It Simple, maintaining cleanliness, and staying on top of minor repairs, you can enjoy beautiful, weed-free paving for years to come.

Explore Our Range:

Explore our full range of paving jointing solutions and find the perfect product for your project. If your patio grout is cracking which is causing weeds to plant an flourish, read our guide “Why Your Patio Grout Keeps Cracking“

Why You Should Never Use Acid Cleaners on Natural Stone Paving

acid cleaners on patio

Natural stone paving adds timeless aesthetic to any outdoor space. Whether it’s sandstone, limestone, granite, or slate, these materials are valued for their unique appearance and durability. But did you know that using the acid cleaners can permanently damage your stone?

In this article, we explain why acid cleaner damages natural stone, how acid-based cleaners react with natural materials, and why Joint-It So Clean is the safe, effective alternative for cleaning your patio or driveway.

Learn more about Joint-It So Clean and explore our full range of professional paving products.

What Happens When You Use Acid Cleaners on Natural Stone?

Acidic cleaners are often marketed as powerful stain removers or quick solutions for removing dirt, algae, or efflorescence. However, they can cause serious and irreversible damage to many types of natural stone.

How acid cleaners damage stone:

  • Etching and Surface Erosion
    Acid reacts with calcium carbonate found in limestone, marble, and some sandstones, causing visible etching, dull patches, or loss of polish.

  • Discoloration
    Acidic solutions can bleach, stain, or alter the natural colour of your stone, leaving behind patchy or blotchy surfaces.

  • Weakened Structure
    Over time, repeated use of acid corrodes the stone’s surface, making it more porous and prone to absorbing dirt, water, and algae.

  • Damage to Grout and Jointing
    Acid can also break down traditional sand and cement joints and even degrade modern jointing compounds, leading to cracking and water ingress.

If you’ve noticed fading, pitting, or rough patches on your paving, there’s a good chance an acidic cleaner is to blame.

Why Certain Stones Are Especially Vulnerable

Not all stones are equally resistant to acid. The following types are especially sensitive:

  • Limestone – Contains high levels of calcium carbonate and reacts quickly with acid.

  • Marble – Very porous and chemically reactive to even weak acids.

  • Sandstone – Can suffer surface damage and discolouration.

  • Concrete paving – Though man-made, concrete is also susceptible to acid erosion over time.


Granite and some dense slates are more resistant, but repeated acid exposure will still degrade them eventually.

Why Joint-It So Clean Is the Safer Choice

clean patio slabs

Joint-It So Clean is a professional-grade, patio and paving cleaner, designed for regular use on all natural stone surfaces.

Benefits of Joint-It So Clean:
  • Safe for all stone types – Won’t etch or discolour limestone, sandstone, or marble

  • Biodegradable and eco-friendly – Won’t harm nearby grass, plants, or pets

  • Gentle but effective Breaks down dirt, grease, and algae buildup without harsh chemicals

  • Won’t damage grout or jointing compounds – Perfect for use with Joint-It Simple
How to Use Joint-It So Clean
  1. Dilute as directed. (If you have purchased the 1L ready-to-use product, there is no need to dilute).

  2. Apply with a low-pressure sprayer or watering can.

  3. Leave it to work.

Use regularly to keep your natural stone paving looking pristine without risking acid-related damage.

clean natural stone

Say No to Acid Cleaners

If you’re tempted by a quick fix, remember this: acid cleaners damage stone, and issues are permanent and costly to repair. Instead of risking your stone patio or driveway, choose a safe, stone-friendly solution like Joint-It So Clean.

Explore Joint-It So Clean and explore our full range of professional paving products. For more information on patio cleaning, read “What Cleans Patio Slabs? The Best Methods”


How to Clean Natural Stone Paving Without Damaging It

clean natural stone

Natural stone paving adds timeless appeal and durability to outdoor patios. Whether it’s sandstone, limestone, granite, or slate, natural stone offers unmatched aesthetic and value. However, without proper maintenance, even the most resilient stone can become dull, stained, or weather-worn. In this guide, we’ll walk you through how to clean natural stone paving without damaging it, using best practices and trusted solutions.

Why You Need To Clean Natural Stone the Right Way

Natural stone is porous and can absorb water, oils, moss, and dirt. Using the wrong cleaning methods or harsh chemicals can lead to:

  • Surface etching or discoloration

  • Accelerated erosion

  • Weakened joints and pointing

  • Long-term structural damage

That’s why it’s crucial to use products specifically designed for natural stone, like Joint-It So Clean and Joint-It Algae Remover, formulated to restore stone safely and effectively.

Step-by-Step Guide to Cleaning Natural Stone Paving

1. Clear Debris

Begin by sweeping away leaves, mud, or loose moss. Use a soft-bristle broom or brush to avoid scratching the surface.

2. Use a High-Performance Stone Cleaner

For everyday dirt and grime, apply Joint-It So Clean – a biodegradable, pH-neutral cleaner that’s safe for all natural stone types.

How to use:
  • Dilute with water as directed on the label. (Or if using the 1L product, it is ready-to-use).

  • Apply with a low-pressure sprayer or watering can.

  • Allow product to do the work. Visible improvement after 24 hours.

  • In very dirty cases, apply and scrub with a soft brush, allow to sit for 30 minutes, powerwash off and then reapply a second time.

    Tip: Clean natural stone in cooler parts of the day to avoid the cleaner drying too quickly.

cleaning natural stone

3. Remove Algae, Moss, and Lichen

For stubborn green algae or black lichen, use Joint-It Algae Remover. It’s specially formulated to eliminate organic growth without damaging the stone.

How to use:
  • Apply directly to dry stone surfaces.

  • Allow to soak in – no need to rinse unless heavy residue remains.

  • Results continue to improve over the following days.

This product is ideal for shaded, damp areas where algae thrive.

clean patio slabs

What Not to Do When You Clean Natural Stone

Avoid these common mistakes:

  • No acid cleaners – especially on limestone or marble

  • Don’t power wash too close – high-pressure water can damage the surface or joints

  • No bleach or household detergents – they can stain or degrade the stone

  • Avoid metal brushes – they can scratch and scar the surface

Stick to purpose-built cleaners like those from Joint-It to clean natural stone safely and effectively.

Protect and Restore Your Stone After Cleaning

Once your paving is clean, consider applying a breathable stone sealer to protect against future staining and slow down the return of algae and dirt. Sealing also makes routine maintenance much easier.

Don’t Forget the Joints

Clean joints are just as important as clean paving. We recommend Joint-It Simple, a weather-resistant paving jointing compound that:

  • Prevents weed growth

  • Doesn’t wash out or crack

  • Provides a durable, professional finish

stop patio going green Joint-It Simple

Clean Natural Stone the Right Way

To maintain the beauty and longevity of your natural stone paving, regular cleaning with the right products is essential. With Joint-It So Clean, Joint-It Algae Remover, and Joint-It Simple, you can clean natural stone surfaces safely, restore their appearance, and protect them for years to come. If you’re having issues with concrete and algae, read “How to Stop Your Patio Going Green”

Your Guide to Block Paving Driveway Maintenance

blockpaving driveway maintenance

Maintaining a block paving driveway doesn’t have to be a chore — but it does require the right approach. Whether you’ve just installed a new driveway or want to refresh an older one, good block paving driveway maintenance is the key to keeping your surface looking great and performing well for years to come.

In this guide, you’ll learn everything you need to know about cleaning, sealing, re-jointing, and protecting your block paving from the elements — plus expert tips on how to do it right using trusted products like Joint-It Fine and Joint-It Clean.

Why Block Paving Maintenance Matters

Block paving is a durable and attractive option for driveways, but it’s constantly exposed to the elements, vehicle traffic, and organic build-up. Without regular care, your surface can quickly become uneven, overgrown, or discoloured.

Benefits of regular maintenance:

  • Extends the life of your driveway

  • Prevents weed growth and insect damage

  • Keeps paving blocks securely in place

  • Enhances curb appeal

  • Saves money on major repairs

Step 1: Inspect and Clean the Surface

Sweep Away Debris

Start with a stiff-bristled broom to remove leaves, moss, dirt, and surface-level debris. This helps prevent staining and stops organic matter from taking root in the joints.

Use a Professional-Grade Cleaner

For deeper cleaning, especially if your driveway has algae, lichen, or black spots, use a stone-safe cleaner like Joint-It So Clean. It’s specially formulated for natural stone and concrete block paving – tough on grime, gentle on surfaces.

Tip: Always test your cleaner in a small area first and avoid using acidic products that could damage your stone.

Step 2: Refill the Joints

Over time, the sand between your paving blocks can be eroded by rain, sweeping, and traffic. Gaps in joints not only look untidy – they allow weeds to grow and make the surface unstable.

Use the Right Jointing Sand

For the best results, choose a high-performance, fine-grade jointing sand like Joint-It Fine. It’s ideal for narrow joints (1–5 mm) and resists weed growth naturally through tight compaction – with no resins, polymers, or cement.

Apply on a Dry Day

Make sure the paving surface and joints are completely dry before brushing in the sand. After sweeping it into the joints, gently compact and top up any low spots. Finish with a clean sweep to remove residue.

Tip: Joint-It Fine is best applied by a professional paving contractor.

blockpaving driveway maintenance

Step 3: Seal for Extra Protection

Sealing your block paving helps protect against staining, moisture ingress, and weed growth. It also enhances colour and makes future cleaning easier.

Choose a breathable, UV-stable sealer suitable for concrete or natural stone. We recommend Joint-It Premium Seal. Avoid over-applying, and follow the manufacturer’s instructions for drying times and conditions.

sealing my patio

Step 4: Keep Up with Annual Maintenance

Block paving doesn’t need constant attention, but a yearly routine can go a long way in keeping it fresh:

  • Spring: Clean and check for joint loss or weeds

  • Summer: Re-sand or seal if needed

  • Autumn: Clear leaves and organic debris

  • Winter: Check drainage and look for frost damage

Common Block Paving Maintenance Mistakes to Avoid

  • Using pressure washers too aggressively (they dislodge jointing sand)
  • Applying jointing sand when the surface is damp
  • Ignoring early weed growth — it spreads quickly
  • Choosing the wrong type of sand for narrow joints
  • Sealing over dirty or unstable joints

Why Choose Joint-It Products for Block Paving Maintenance?

Joint-It products are trusted by professionals and homeowners across Europe. Whether you’re cleaning, jointing, or refreshing your surface, these products are safe, effective, and built to last:

block paving sand to stop weeds

A clean, stable, and weed-free driveway isn’t hard to achieve – it just needs a little proactive care. With the right approach and reliable products, your block paving can stay beautiful, functional, and low-maintenance year after year.

Use this guide as your go-to for effective block paving driveway maintenance and enjoy a surface that looks as good as the day it was laid.

For more information, read “The Benefits of Using Paving Sand for Block Paving”.

Ready to Refresh Your Driveway?

Explore our full product range for premium jointing sands and professional-grade cleaners and sealers – trusted by paving contractors, built for homeowners.

Weeds in Paving Joints: How to Prevent It

weeds in paving

Weeds in your paving joints can be a persistent and frustrating problem. Not only do they detract from the aesthetic appeal of your driveway, patio, or garden path, but they can also cause damage to your paving over time. Fortunately, preventing weeds from sprouting through your paving joints is easier than you might think. In this article, we’ll share effective tips and tricks for keeping your paved areas weed-free and looking their best.

Why Weeds Grow in Paving Joints

Weeds in patios thrive when they find a space with access to moisture, air, and soil. When gaps between the stones or pavers allow water to accumulate, it creates a fertile environment for weed seeds to settle and grow. If your paving joints aren’t sealed properly, even small openings can invite weeds to grow. Addressing this issue involves more than just pulling weeds — it’s about making your paving system less inviting to them in the first place.

1. Use a High-Quality Jointing Compound

stop patio going green Joint-It Simple

One of the best ways to prevent weeds in your driveway joints is by using a high-quality jointing compound, like Joint-It Simple. This specially formulated compounds fill the gaps between paving stones, making it very difficult for weeds to take root. Ready-mix jointing compounds offer exceptional resistance against weeds, as they are rock solid, creating an strong barrier.

2. Regularly Clean and Maintain Your Paving Joints

Maintaining clean paving joints is essential in preventing weeds. Organic debris, such as leaves, dust, and dirt, can collect in the joints over time, creating a perfect environment for weed seeds to settle and grow. Regularly sweeping and cleaning the joints will help keep the paving surface clear and reduce the chances of weed growth.

By removing organic debris, you reduce the amount of material that can feed weeds. It also helps you spot any early weed growth so that you can address it before it spreads.

3. Apply Weed Killer (Carefully)

If you already have a weed problem in your paving joints, applying a weed killer can help eliminate them quickly. However, it’s important to use a targeted, eco-friendly weed killer that doesn’t harm your plants or the environment. Avoid chemical-based weed killers that can damage your jointing compound or surrounding vegetation. Look for natural or organic solutions that specifically target weeds in hard surfaces.

Weed killers, particularly those designed for paving, can effectively kill weeds without harming the surrounding area. By using them strategically, you can keep your paving joints weed-free.

4. Refill Joints if Required

Over time, your jointing sand in brickpaving may wear down or wash out, particularly in high-traffic areas or places that experience heavy rainfall. If the joints start to open up again, it’s time to re-sand or refill the joints with fresh jointing material such as Joint-It Fine. This will help maintain the solid barrier that prevents weeds from taking root. 

A consistent maintenance of block-paving jointing sand prevents weeds from finding a foothold. Regular maintenance ensures that your paving system remains functional and aesthetically pleasing.

block paving sand to stop weeds

5. Ensure Proper Drainage to Prevent Weeds in Paving

Standing water is one of the main reasons weeds grow in paving joints. If your paving system doesn’t allow for proper drainage, it creates a damp environment where weeds can flourish. Ensure that your paving stones are properly installed with the right angle for drainage, and that water can flow freely through the joints and away from the surface.

Preventing weeds in your paving joints is a mix of proactive measures and regular maintenance. By using high-quality jointing sand like Joint-It Fine, regularly cleaning your paving joints, and employing targeted weed-killing methods, you can keep your paved surfaces looking pristine year-round. Follow these tips to enjoy a beautiful, weed-free outdoor space that requires minimal upkeep.

When Should Your Driveway Be Sealed?

when should you seal your driveway

A well-maintained driveway enhances curb appeal and extends the lifespan of your pavement. Sealing your driveway is a crucial step in protecting it from the elements, preventing cracks, and maintaining a smooth, polished look. But when should your driveway be sealed? In this article, we’ll explore the best timing, signs that your driveway needs sealing, and how Joint-It Premium Seal can provide long-lasting protection.

Why Seal Your Driveway?

Driveways are exposed to various damaging factors, including:

  • Weather Conditions: Rain, snow, and extreme temperatures can cause surface deterioration.

  • UV Rays: Prolonged sun exposure can fade and weaken driveway materials.

  • Oil and Chemical Spills: These can stain and degrade tarmac, concrete, and brick paving surfaces.

  • Weed Growth: Cracks and gaps provide an opportunity for weeds to take root, further damaging the structure.

Sealing your driveway acts as a protective layer, preventing water penetration, minimising wear and tear, and enhancing durability.

When Should Your Driveway Be Sealed?

The ideal time for sealing a driveway depends on several factors:

1. Newly Installed Driveways

For fresh tarmac driveways, it’s recommended to wait at least 6 months to a year before applying a sealer. This allows the surface to cure properly and ensures optimal adhesion of the sealant.

For brick paving driveways, sealing can be applied sooner, typically after a few months, once the paving sand has settled into the joints and the surface has fully stabilised.

2. Seasonal Considerations

  • Spring & Summer: The best seasons to seal a driveway are late spring to early autumn, when temperatures are consistently above 10°C. Warm weather helps the sealant dry and bond effectively.

  • Avoid Rainy or Cold Conditions: Sealing in wet or freezing weather can prevent proper curing and reduce effectiveness.

3. Frequency of Sealing

  • Tarmac Driveways: Should typically be sealed every 2 to 3 years to maintain resilience and appearance.

  • Concrete Driveways: While concrete does not require sealing as often, applying a quality sealant every 3 to 5 years can prevent staining and moisture damage.

  • Brick Paving Driveways: Should be sealed every 3 to 4 years to maintain the integrity of the paving sand and prevent weed growth and colour fading.

Signs Your Driveway Needs Sealing

If you’re unsure whether your driveway needs to be sealed, look out for these indicators:

  • Fading Colour: A dull, grey appearance suggests UV damage and exposure to the elements.

  • Small Cracks or Surface Wear: Sealing prevents minor cracks from expanding into costly repairs.

  • Water Absorption: If water soaks into the driveway instead of beading on the surface, it’s time to reseal.

  • Increased Weeds in Joints: A quality sealant can help deter weed growth between pavers, asphalt cracks, or concrete slabs.

Why Choose Joint-It Premium Seal?

how does patio sealer work Joint-It Premium Seal

For superior protection and longevity, Joint-It Premium Seal is the best choice for homeowners and contractors.

Benefits of Joint-It Premium Seal

  • Weather-Resistant: Protects against rain, UV rays, and freezing temperatures.
  • Prevents Staining: Shields against oil, fuel, and other contaminants.
  • Enhances Appearance: Restores and preserves the original colour and texture.
  • Long-Lasting Protection: Reduces the need for frequent resealing.
  • Ideal for Brick Paving: Keeps paving sand in place and prevents weed growth.
  • Easy to Apply: Designed for DIY users and professionals alike.

How to Apply Joint-It Premium Seal

  • Clean the Surface: Remove dirt, debris, and stains before application.

  • Ensure Dry Conditions: Apply only when rain is not expected for at least 4 hours.

  • Use a Roller or Sprayer: Apply evenly across the surface.

  • Allow Proper Drying Time: Typically, 24-48 hours before heavy use.

Sealing your driveway at the right time is essential for preserving its longevity and appearance. Whether you have an asphalt, concrete, or brick paving driveway, following the recommended timelines and using a high-quality sealant like Joint-It Premium Seal ensures long-lasting protection and aesthetic appeal. For more information on sealing your driveway, read “How Does Patio Sealer Work?”

What Cleans Patio Slabs? The Best Methods

A clean patio enhances the beauty of your outdoor space, extends the life of your slabs, and prevents algae, moss, and grime from making surfaces slippery. If you’re wondering what cleans patio slabs effectively, we’ve got you covered. Knowing what cleans patio slabs best will help maintain a fresh and inviting outdoor area year-round.

One of the biggest challenges for patio maintenance is the buildup of algae and moss, which can make surfaces slippery and unattractive. Joint-It Algae Remover is specifically designed to eliminate algae, moss, and lichen quickly and effectively. Simply apply, leave it to work, and rinse away for a refreshed patio surface.

For a deep clean that tackles dirt, stains, and grime, Joint-It So Clean is the perfect choice. This professional-grade, environmentally friendly cleaner removes tough stains without harming your patio slabs or surrounding plants. Just apply, scrub if necessary, and rinse for instant results.

A high-pressure washer is one of the most effective ways to clean patio slabs. It blasts away dirt, moss, and lichen, restoring the original look of your paving. Use a pressure washer with an appropriate setting to avoid damaging softer stone slabs.

pressure washing patio

For light dirt and stains, mix warm water with dish soap and use a stiff-bristle brush to scrub the surface. This method is gentle yet effective for regular maintenance. Rinse thoroughly with clean water to avoid residue buildup.

For an eco-friendly cleaning method, mix equal parts white vinegar and water. Pour the solution onto the patio and let it sit for 30 minutes before scrubbing. You can also sprinkle baking soda over stubborn stains before scrubbing. Rinse well with water.

A diluted bleach solution (one part bleach to five parts water) can be effective for removing tough stains and algae. Apply it carefully, ensuring it doesn’t harm surrounding plants. Leave it on for 10–15 minutes, then rinse thoroughly with water.

Keeping your patio clean is easier with regular maintenance:

  • Sweep frequently to prevent dirt buildup.

  • Remove weeds from joints to avoid cracks and stains.

  • Apply a sealant like Joint-It Premium Seal to protect slabs from stains and weather damage.

sealing my patio

For long-lasting cleanliness and protection, Joint-It Algae Remover and Joint-It So Clean are the top choices. These professional-quality products make patio maintenance simple and effective, ensuring a beautiful outdoor space year-round.

For a more comprehensive guide on cleaning your patio, read this article: “The Ultimate Guide to Cleaning Your Patio”