Fossils in Sandstone: What Are Those Markings in Your Paving?

Fossils-in-sandstone-paving-cover

One of the things that makes natural sandstone paving so distinctive is that no two slabs are exactly the same. Colours, textures, veins and natural markings can vary considerably from one piece of stone to another.

Occasionally, you may even come across something that looks like it has been preserved in the stone for millions of years.

Fossils in sandstone can occur naturally. However, not every plant-like marking found in a sandstone paving slab is actually a fossil. Some of the striking fern, leaf or tree-like patterns seen in natural sandstone may instead be mineral formations known as dendrites.

So, how can you tell the difference – and what exactly are you looking at when unusual markings appear in your sandstone paving?

Fossils in Sandstone: Can Sandstone Contain Fossils?

Yes, genuine fossils can be found in sandstone.

Sandstone is a sedimentary rock. It forms when layers of sand and other sediment accumulate over time before eventually becoming compacted and cemented together into stone.

Because sedimentary rocks form gradually from deposited material, they can sometimes preserve evidence of ancient life.

Depending on where the sandstone formed and the environment at the time, fossils found in sedimentary rock can include shells, plant remains, impressions, burrows and other traces left behind by organisms.

This means that finding fossils in sandstone is certainly possible.

However, one of the interesting things about natural stone is that geological processes can also create patterns which look surprisingly similar to fossils.

What Are the Fern-Like Markings in Sandstone?
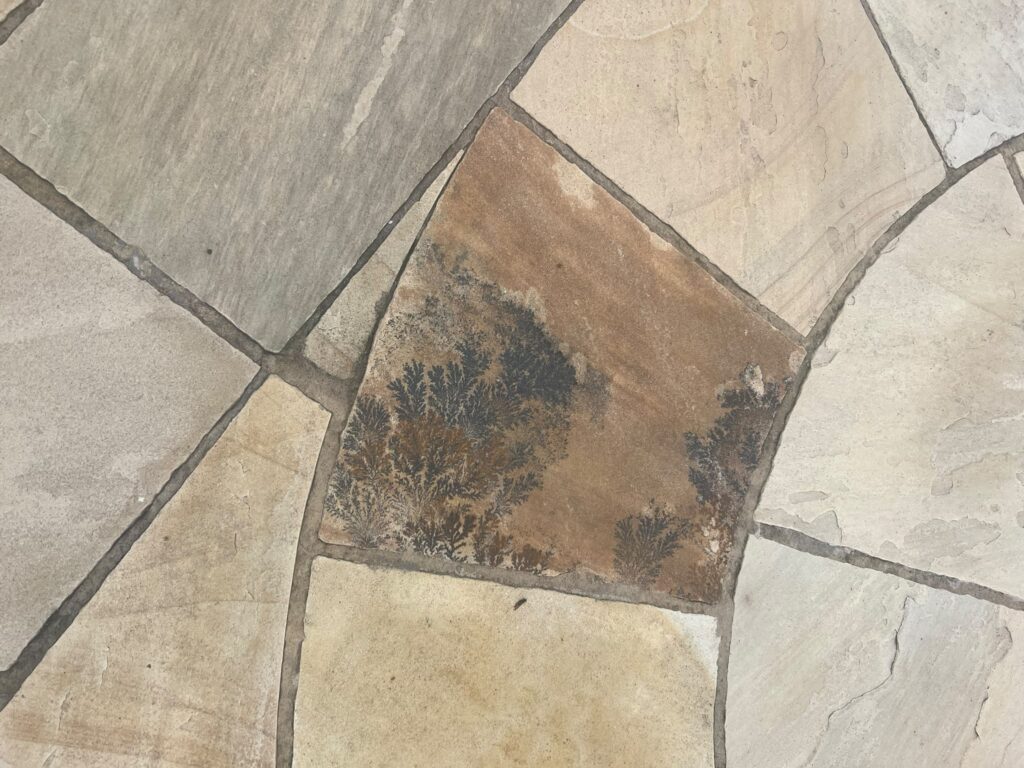
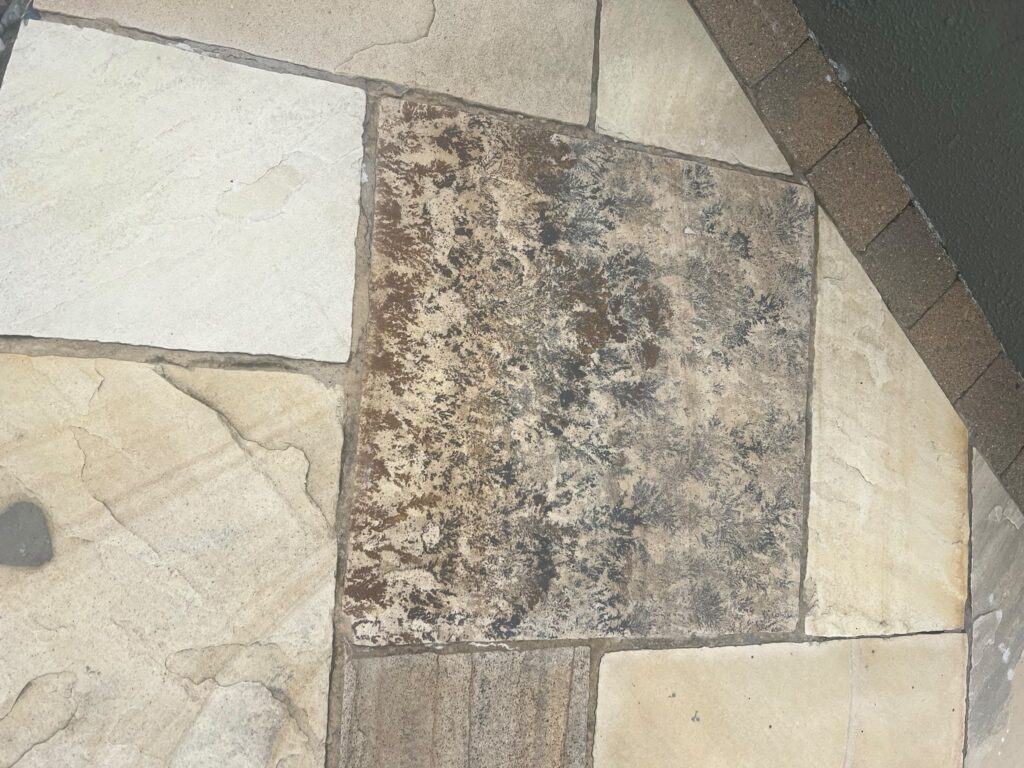
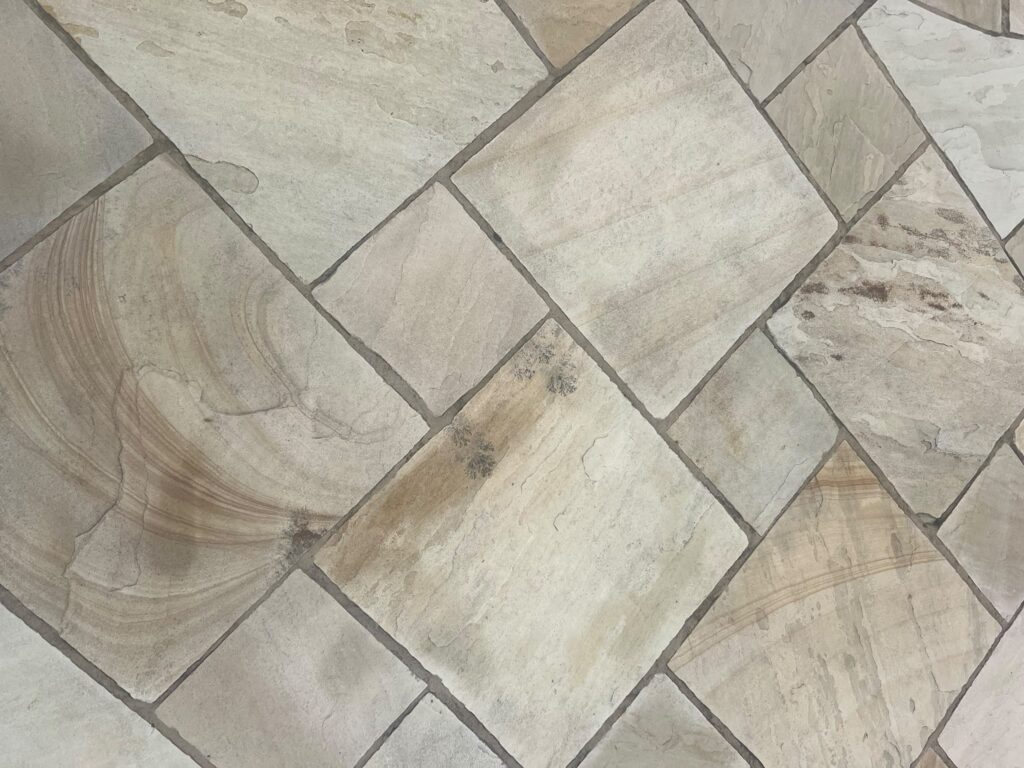
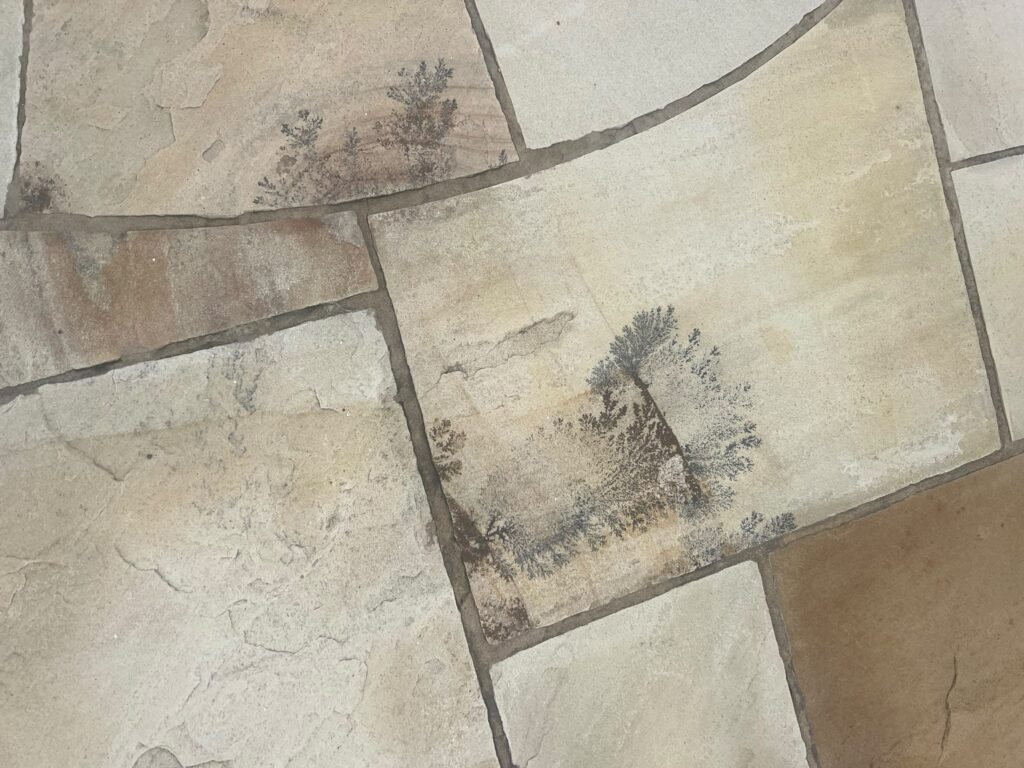
Take a look at the sandstone paving shown in these photographs.

Across several of the slabs are dark, branching patterns that look remarkably like ferns, small trees or leaves.

It’s easy to understand why someone would immediately assume they were looking at fossilised plants.

Within the paving industry, markings like these may often be described as fossil markings. However, many similar fern-like formations found in natural stone are actually mineral dendrites.

Mineral dendrites are naturally occurring deposits that form branching patterns within or across the surface of stone.

Because the finished patterns resemble plants so closely, they are sometimes described as pseudofossils – geological formations that look like fossils but were not formed by a living organism.

What Are Mineral Dendrites?

Dendritic markings are generally associated with minerals containing manganese or iron.

Over long periods, mineral-rich water can move through tiny cracks, pores or bedding planes within the stone.

As minerals are deposited, they can spread out into fine branching formations.

The resulting shapes often resemble:

  • Ferns
  • Leaves
  • Tree branches
  • Moss
  • Roots

In some sandstone slabs, the markings are small and subtle. In others, they can spread across a large section of the stone and become one of the most noticeable features of the paving.

The effect can be extremely convincing, which is why mineral dendrites have historically been mistaken for plant fossils.

From a photograph alone, it isn’t always possible to identify a particular geological marking with complete certainty. The origin and composition of the stone would need to be considered for a definitive identification.

That’s why it’s better to think of these markings as fossil-like natural features unless their geological origin has been confirmed.

Fossil or Pseudofossil: What's the Difference?

The main difference is how the marking was created.

A fossil is evidence of something that was once alive.

That could mean the remains of an organism itself, or a trace it left behind, such as an impression, footprint or burrow.

A pseudofossil, on the other hand, is created through natural geological or mineral processes but happens to resemble something biological.

Dendritic mineral formations are one of the best examples.

When we see a branching shape that resembles a fern or plant, our brain naturally interprets it as something organic. In reality, the pattern may have been created entirely by minerals moving through the stone.

Either way, it provides an interesting insight into the natural history of the sandstone.

Are Fossil-Like Markings in Sandstone a Defect?

No.

Natural colour variation, mineral deposits, veining and other geological markings are all part of the character of genuine natural sandstone.

Unlike manufactured paving, natural sandstone isn’t produced under controlled factory conditions where every slab is designed to look identical.

Variations can include:

  • Different colours and tones
  • Natural veining
  • Surface texture
  • Bedding patterns
  • Mineral deposits
  • Fossils or fossil-like formations
  • Natural banding

Even slabs from the same pack can look noticeably different.

In the paving shown below, for example, some stones have only small areas of dark branching detail, while others contain dramatic patterns across a significant part of the slab.

These variations are not necessarily imperfections. They’re part of what makes natural stone exactly that – natural.
Should You Try to Remove These Markings?

Before attempting to remove an unusual mark from sandstone paving, it’s important to work out whether you’re dealing with a surface stain or a natural characteristic of the stone.

Dirt, algae and other organic growth sit on or close to the surface and can usually be treated with an appropriate cleaning method.

A mineral formation within the sandstone is different.

If the marking forms part of the natural stone itself, cleaning products are unlikely to remove it in the same way they would remove surface contamination.

Using aggressive cleaners or excessive pressure in an attempt to remove a natural marking could instead alter the appearance of the surrounding sandstone.

If you’re unsure what has caused a mark on natural paving, it’s always best to establish what you’re dealing with before attempting to treat it.

Natural Variation Is Part of Sandstone's Appeal

One of the main reasons people choose sandstone paving is its natural character.

A patio can contain a mixture of creams, buffs, browns, pinks and greys, along with veins, mineral deposits and other variations created as the stone formed.

That’s also why natural sandstone should be viewed as a complete installation rather than judging each slab individually.

When laying natural stone, mixing slabs from different packs can help distribute changes in colour and pattern throughout the patio, creating a balanced overall finish.

Features such as fossil-like markings can then become part of the character of the finished space rather than appearing concentrated in one area.

Millions of Years of Geology Beneath Your Feet

Finding what appears to be a fossil in sandstone is a reminder of just how different natural stone is from a manufactured paving product.

Before a sandstone slab was ever quarried, cut and installed in a garden, the rock had already been shaped by geological processes taking place over an enormous period of time.

Some markings may genuinely preserve evidence of ancient life.

Others may simply be mineral formations that happen to look incredibly similar.

Either way, the colours, patterns and markings found in natural sandstone help tell the story of how the stone was formed.

So, the next time you notice what looks like a tiny fern, tree or leaf hidden within your sandstone paving, take a closer look.

It could be a fossil.

Or it could be geology doing a very convincing impression of one.

Working With Natural Sandstone Paving?

Whether you’re installing a new sandstone patio or maintaining an existing one, it’s important to use products that are suitable for both the natural stone and the construction of the paving.

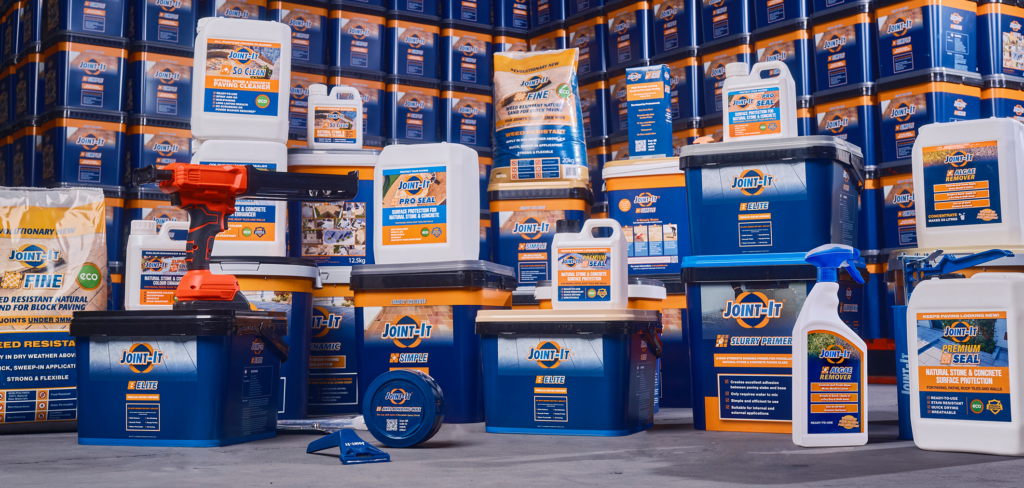
Joint-It offers a range of professional jointing and stone care products for outdoor paving.

Explore the Joint-It range or use our Store Locator to find your nearest Joint-It stockist.

For more tips and advice, subscribe to our YouTube channel.
 

What to Look Out for When Hiring a Paving Contractor

hiring-a-paving-contractor

Hiring the right paving contractor can make the difference between a patio that lasts decades and one that starts failing after a single winter. When hiring a paving contractor, it’s important to look beyond price and promises and understand what really defines quality workmanship.

In this guide, we’ll walk you through exactly what to look out for when hiring a paving contractor, the warning signs to avoid, and how to ensure your paving project is built to last.

Why Hiring the Right Paving Contractor Matters

Paving is a structural installation, not just a cosmetic one. Poor workmanship can lead to:

  • Uneven slabs

  • Cracked or failing joints

  • Water pooling and drainage issues

  • Frost damage

  • Ongoing maintenance problems

Choosing the wrong contractor often results in costly repairs, or a full re-lay, within a few years.

Key Things to Look Out for When Hiring a Paving Contractor

1. Proven Experience With Similar Projects

Not all paving contractors specialise in the same materials or applications.

When hiring a paving contractor, ask:

  • How long they’ve been installing patios or driveways

  • Whether they’ve worked with porcelain, natural stone or block paving

  • To see examples of completed projects

Experience with your chosen paving type is essential.

2. Clear and Detailed Quotations

A professional contractor should provide a transparent quote, not a vague figure.

A good quotation should include:

  • Ground preparation and sub-base details

  • Drainage considerations

  • Jointing materials

  • Waste removal

  • Labour and timescales

If anything is unclear, ask questions before work begins.

paving quotation

3. Proper Ground Preparation

One of the biggest mistakes homeowners make when hiring a paving contractor is overlooking what happens beneath the surface.

A quality contractor will:

  • Excavate to the correct depth

  • Install a suitable sub-base

  • Compact layers properly

Cutting corners here almost guarantees future problems.

4. Knowledge of Drainage and Fall

Poor drainage is one of the main reasons patios fail.

When hiring a paving contractor, ensure they understand:

  • Correct patio fall (slope)

  • How to direct water away from buildings

  • The importance of permeable solutions where required

If drainage isn’t mentioned, that’s a red flag.

5. The Right Jointing Materials

Jointing plays a huge role in durability and appearance.

A reliable paving contractor will:

  • Recommend jointing suited to your paving type

  • Avoid outdated sand-and-cement methods where inappropriate

  • Understand modern resin or grout solutions

Incorrect jointing is a common cause of cracking and weed growth.

stop patio going green Joint-It Simple

6. Reviews, References and Reputation

Always check:

  • Online reviews

  • Testimonials

  • Before-and-after photos

If possible, ask for references from previous clients. A reputable contractor will have no issue providing them.

7. Insurance and Guarantees

Before work begins, confirm that the contractor has:

  • Public liability insurance

  • Guarantees or warranties on workmanship

This protects both you and your property if anything goes wrong.

Warning Signs to Avoid When Hiring a Paving Contractor

Be cautious if a contractor:

  • Offers a price that seems too good to be true

  • Refuses to provide written quotes

  • Pushes for immediate decisions

  • Skips site assessments

  • Dismisses drainage or preparation concerns

These are common signs of poor-quality work.

Questions to Ask Before Hiring a Paving Contractor

  • How will you prepare the ground?

  • What jointing material will you use and why?

  • How do you manage drainage?

  • What happens if issues arise after installation?

  • How long before the patio can be used?

The answers will tell you a lot about their professionalism.

Frequently Asked Questions

Different paving materials require different installation techniques. Experience reduces the risk of costly mistakes.

Not necessarily. Lower prices often mean shortcuts on preparation, materials or drainage.

Sometimes, but many issues require partial or full replacement, which is far more expensive than doing it right first time.

Hiring a paving contractor isn’t just about finding someone who can lay slabs, it’s about choosing a professional who understands structure, drainage, materials and long-term performance.

By knowing what to look out for, you can avoid common pitfalls and invest in a patio or driveway that looks great and lasts for years.

Quality installation starts with the right contractor.

Patio Design Mistakes That Date Your Garden

patio-design-mistakes

A well-designed patio should feel timeless, practical and easy to maintain. However, many gardens start to look tired not because of age, but because of patio design mistakes that fall out of fashion or create long-term problems.

In this guide, we’ll explore the most common patio design mistakes that date your garden, why they happen, and how to avoid them when planning or updating your outdoor space.

Why Patio Design Mistakes Matter

Your patio is one of the most permanent features in your garden. While furniture and plants can be changed easily, poor patio design choices are far harder, and more expensive, to fix.

Avoiding common patio design mistakes helps:

  • Keep your garden looking modern for longer

  • Improve usability and safety

  • Reduce maintenance over time

  • Protect the value of your home

The Most Common Patio Design Mistakes

1. Choosing Trend-Led Materials That Don’t Age Well

Highly fashionable paving colours or finishes can quickly make a patio look dated.

Patio design errors often include:

  • Overly glossy surfaces

  • Strong colour trends that fall out of favour

  • Materials that stain or fade unevenly

Timeless materials with natural tones tend to age far better.

2. Ignoring Patio Layout and Proportions

A patio that’s too small, too large, or poorly shaped can feel awkward and outdated.

Common layout-related patio design errors include:

  • Narrow patios with limited seating space

  • Oversized slabs in small gardens

  • Poor alignment with doors or garden features

Balanced proportions create a more modern, intentional look.

3. Poor Jointing Choices

Jointing is often overlooked, yet it has a huge impact on appearance and longevity.

Outdated jointing methods can:

  • Crack or discolour

  • Encourage weeds

  • Make paving look uneven

Using modern jointing solutions helps keep patios clean, uniform and visually sharp.

4. Failing to Plan for Drainage

Drainage issues quickly age a patio.

When drainage is ignored:

  • Water pools on the surface

  • Algae and staining develop

  • Slabs can shift or sink

Good drainage is essential for both aesthetics and performance.

5. Overcomplicating the Design

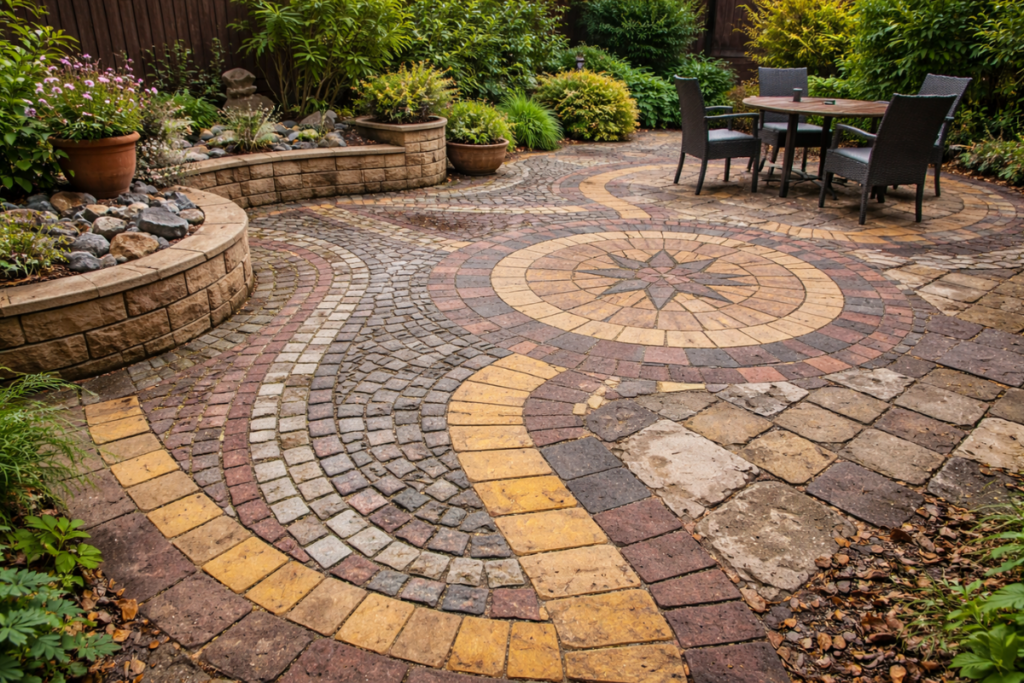
Too many patterns, colours or textures can overwhelm a space.

Patio design mistakes often involve:

  • Multiple paving styles in one area

  • Complicated laying patterns

  • Excessive borders or contrasts

Simple designs tend to look more contemporary and age better.

overcomplicated patio design

6. Neglecting Practical Use

A patio should suit how you actually use your garden.

Mistakes include:

  • No space for furniture

  • Poor access routes

  • Slippery surfaces

Functionality is just as important as appearance in good patio design.

7. Using Cheap Materials to Cut Costs

Short-term savings often lead to long-term regret.

Lower-quality materials can:

  • Discolour quickly

  • Crack or fail under weather exposure

  • Require frequent repairs

Investing in quality from the start helps avoid future patio design problems.

How to Avoid Patio Design Mistakes

To future-proof your patio:

A well-planned patio should still look good years down the line.

Frequently Asked Questions

Patio design mistakes don’t just date your garden, they create ongoing maintenance issues and reduce usability. By focusing on timeless design, quality materials and proper planning, you can create a patio that looks modern and performs well for years to come.

Avoiding common patio design mistakes is one of the smartest investments you can make in your outdoor space. For more information, read “How to Choose a Size and Shape for Your Patio“

How to Stop Water Pooling on Your Patio

stop-water-pooling-on-your-patio

Water pooling on your patio is more than just an inconvenience. Standing water can make surfaces slippery, accelerate joint failure, encourage algae growth, and even damage the foundations beneath your paving. If you’ve noticed puddles forming after rain, it’s a sign something isn’t working as it should.

In this guide, we’ll explain how to stop water pooling on your patio and how to prevent it long term using the right preparation and jointing solutions.

Why Does Water Pool on a Patio?

Understanding the cause is the first step to fixing the problem. Common reasons include:

1. Poor Drainage

If water has nowhere to go, it will naturally sit on the surface. This often happens when patios are laid without proper drainage planning.

2. Incorrect Patio Fall (Slope)

A patio should always be laid with a slight gradient (known as a fall) to allow water to run away from the surface. If it’s too flat, or slopes towards the house, water will collect.

3. Blocked or Failed Joints

Damaged or poorly installed joints can trap water instead of allowing it to drain through the patio structure.

4. Non-Permeable Materials

Some jointing methods, such as sand and cement, are not permeable and can prevent water from draining naturally.

5. Ground Movement or Subsidence

Over time, the ground beneath a patio can shift, causing low spots where water gathers.

Why Standing Water on a Patio Is a Problem

Ignoring water pooling can lead to several issues:

  • Increased slip risk, especially in winter

  • Faster growth of moss and algae

  • Weakened patio joints

  • Frost damage and cracking

  • Reduced lifespan of your patio

Stopping water pooling isn’t just about appearance, it’s about safety and durability.

stop water pooling on patio

How to Stop Water Pooling on Your Patio

1. Improve Patio Drainage

If drainage is the main issue, you may need to:

  • Install drainage channels

  • Improve the sub-base beneath the patio

  • Use permeable jointing solutions that allow water to pass through

Good drainage is essential for long-term performance.

2. Check and Correct the Patio Fall

A patio should have a fall of approximately 1:60 (about 16mm per metre), directing water away from buildings.

If the fall is incorrect:

  • Minor issues may be solved by lifting and relaying affected slabs

  • Severe cases may require a full re-lay

While this is more involved, it’s often the most effective permanent fix.

3. Replace Failed or Cracked Joints

Broken joints allow water to sit where it shouldn’t, or trap it entirely.

Removing old jointing and replacing it with a high-quality resin jointing compound can dramatically improve drainage and durability.

Resin jointing:

  • Is permeable

  • Resists cracking

  • Helps prevent standing water

  • Reduces weed and moss growth

4. Use Permeable Jointing Solutions

One of the simplest ways to prevent water pooling is choosing the right jointing material.

Modern resin jointing compounds allow water to drain through the joints rather than sitting on the surface, making them ideal for:

  • Patios

  • Paths

  • Natural stone paving

  • Porcelain slabs

This is a key reason many homeowners and professionals now choose resin over traditional sand and cement.

5. Fix Low Spots in the Patio

If water only pools in certain areas, you likely have low spots.

Solutions include:

  • Lifting and re-bedding affected slabs

  • Re-jointing once levels are corrected

  • Improving the sub-base if it has degraded

Targeting problem areas can often solve pooling without replacing the entire patio.

How to Prevent Water Pooling in the Future

Prevention is always better than repair. To avoid future issues:

  • Ensure correct patio fall during installation

  • Use permeable jointing compounds

  • Maintain joints and replace damaged sections early

  • Keep joints clear of debris

  • Clean algae and moss regularly

A well-installed, well-jointed patio should never hold standing water for long.

Water pooling on your patio is a clear sign that something needs attention, but the good news is that it’s often fixable without major disruption. By improving drainage, correcting levels, and choosing the right jointing solution, you can create a patio that stays dry, safe, and long-lasting.

For a permanent, low-maintenance solution, using a high-quality resin jointing compound like Joint-It Simple can make all the difference.

How to Prepare Your Patio for Winter

prepare patio for winter

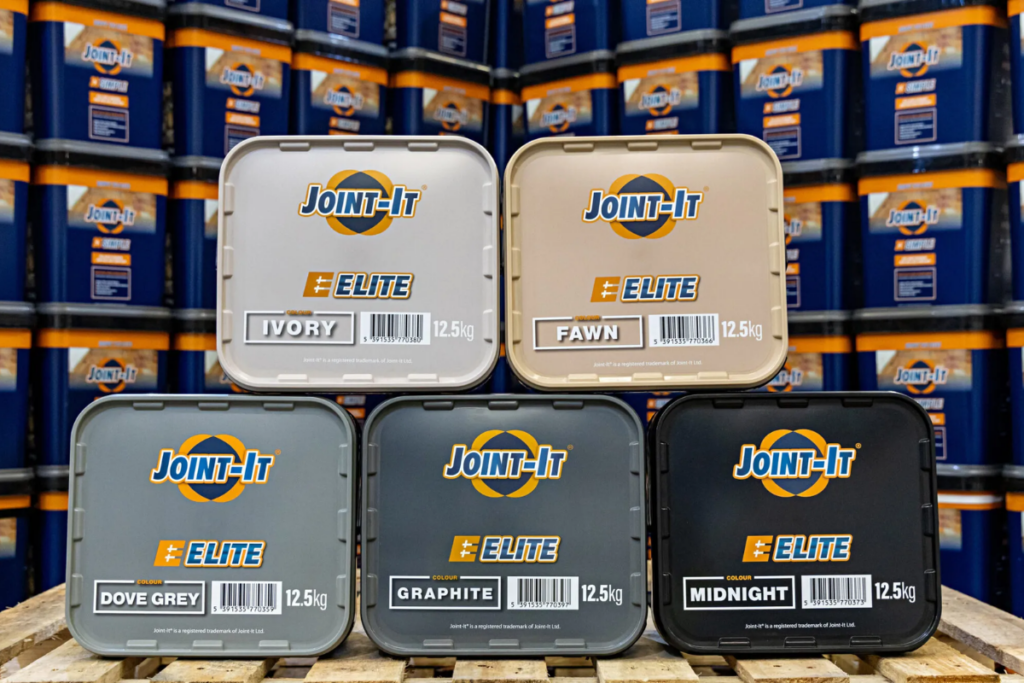
Winter weather can take a toll on patios, from frost and rain to cracking and weed growth. Taking steps to prepare your patio for winter will help protect your outdoor space and keep it looking great. Using Joint-It Elite for jointing and Joint-It Supreme Colour Enhancer to maintain vibrant paving colours ensures your patio stays durable and beautiful all season long.

Step 1: Clean Your Patio Thoroughly

Start by removing leaves, dirt, and debris with a broom or leaf blower. Use Joint-It So Clean, a specialised patio cleaner, to remove moss, algae, and stubborn dirt. Rinse thoroughly with water to leave the paving fresh and ready for joint maintenance or colour enhancement.

Step 2: Inspect and Repair Joints

Check your patio carefully for:

  • Loose or cracked tiles

  • Joints showing signs of wear

  • Areas where water could pool

Reinforce weak joints with Joint-It Elite, an air-curing jointing compound that resists frost, cracking, and weed growth. Filling and securing joints before winter prevents further damage during freeze-thaw cycles.

benefits of joint-it elite

Step 3: Enhance and Protect Tile Colour

Winter weather can dull the colour of natural stone and porcelain patios. Applying Joint-It Supreme Colour Enhancer helps:

  • Restore and maintain vibrant paving colours

  • Protect the surface against water and frost damage

  • Keep your patio looking fresh even in harsh weather

This product is perfect for keeping your patio visually appealing through the colder months.

Step 4: Maintain the Patio During Winter

Even after preparation, a little care goes a long way:

  • Regularly sweep away leaves and debris to prevent staining or moss growth

  • Avoid harsh chemicals or metal tools that could damage tiles and joints

  • Inspect joints periodically and top up with Joint-It Elite if needed

Taking steps to prepare your patio for winter ensures your paving remains durable, weed-free, and visually striking. Using Joint-It So Clean to thoroughly clean, Joint-It Elite to reinforce joints, and Joint-It Supreme Colour Enhancer to maintain vibrant colours protects your patio from frost, cracking, and dulling, keeping your outdoor space in top condition all season.

Best Outdoor Heating Options for Patios

outdoor heating options for patios

Winter doesn’t have to mean the end of patio season. With the right outdoor heating solutions, you can transform your patio into a cozy retreat, no matter how low the temperatures drop. In this guide, we’ll explore the best outdoor heating options for patios, their benefits, and tips for making your outdoor space warm and inviting.

Why You Need Outdoor Heating for Your Patio

Patios are a hub for relaxation, entertaining, and enjoying fresh air. However, when winter arrives, cold weather can make outdoor spaces less appealing. Installing a reliable outdoor heating solution allows you to:

  • Extend your patio use year-round

  • Increase comfort during evening gatherings

  • Create a cozy ambiance for friends and family

  • Boost your home’s value with a functional outdoor space

By choosing the right heating system, you can enjoy your patio even in the coldest months.

1. Patio Heaters

Patio heaters are one of the most popular options for warming outdoor areas. They come in various types:

  • Propane Heaters: Portable and easy to use, these heaters provide immediate warmth. Ideal for smaller patios or occasional use.

  • Natural Gas Heaters: Connected to your home’s gas line, they offer continuous heat without refilling tanks. Perfect for large, permanent setups.

  • Electric Heaters: Compact and clean, electric heaters are great for covered patios where ventilation is limited.

Tip: Position your patio heater near seating areas but away from flammable objects for safety.

Patio heater

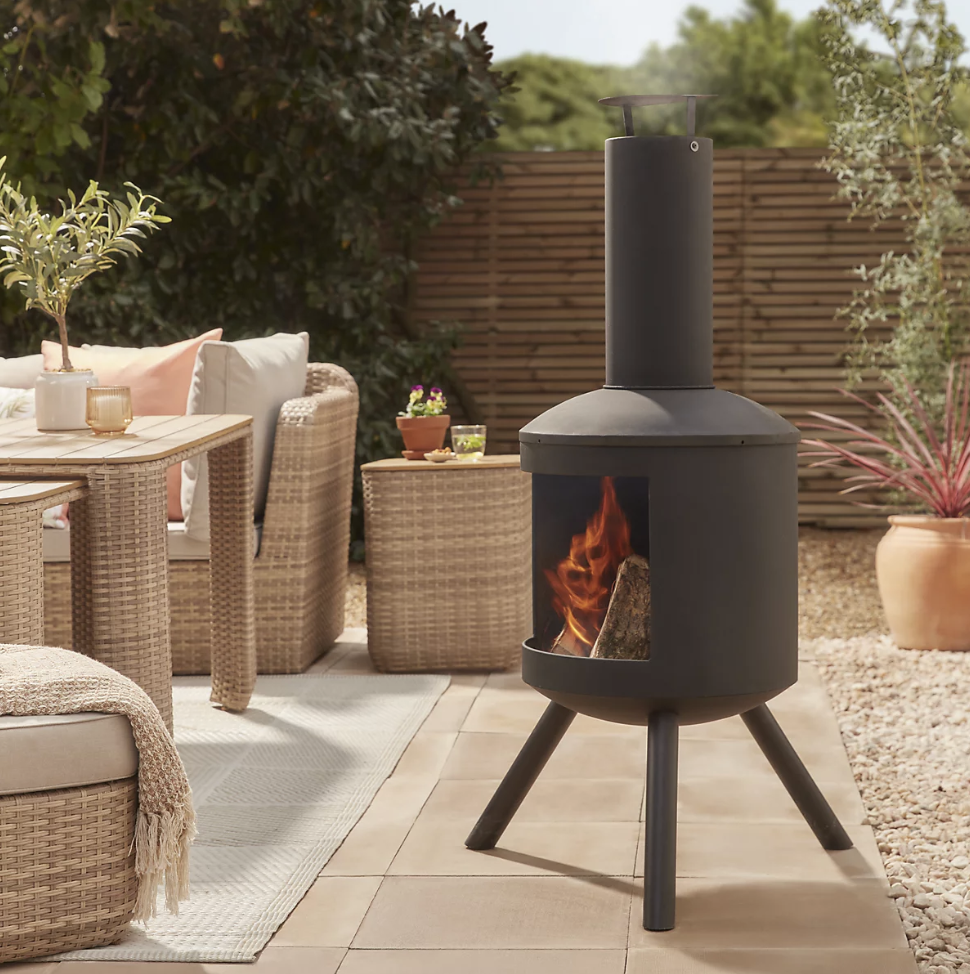
2. Fire Pits and Fire Tables

Fire pits aren’t just functional, they add style and a focal point to your patio.

  • Wood-Burning Fire Pits: Offer a traditional fire experience with the soothing crackle of burning wood. Great for casual gatherings.

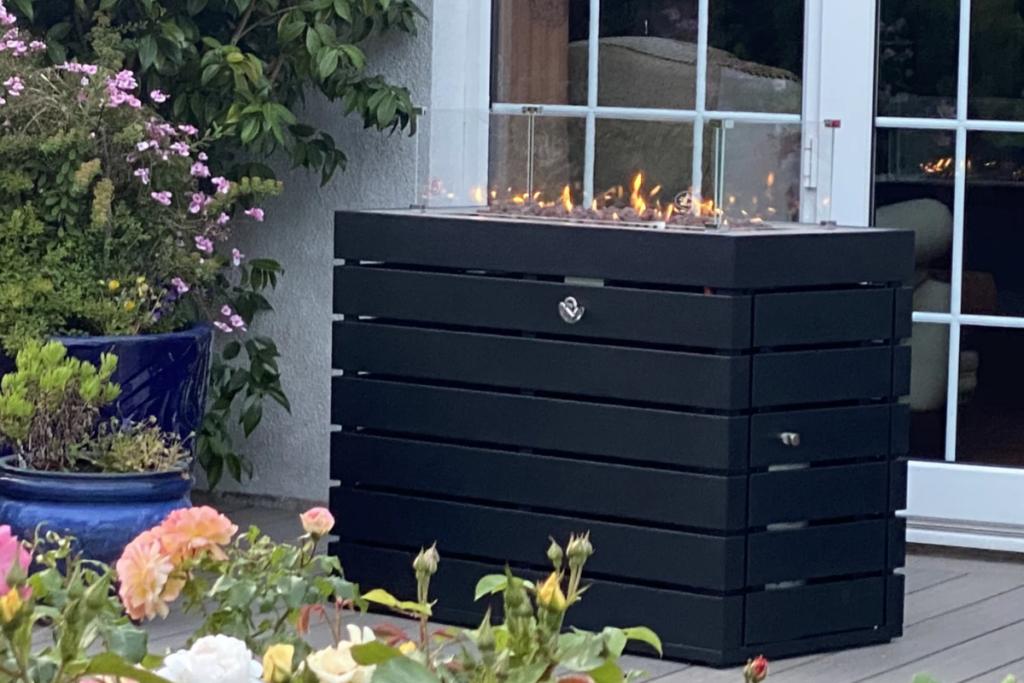
  • Gas Fire Pits: Cleaner and easier to maintain than wood-burning options. Many models come with adjustable flame control.

  • Fire Tables: Combine warmth with a flat surface for drinks or snacks, perfect for entertaining.

They create a cozy atmosphere, making your patio feel like an outdoor living room.

patio fire table

3. Infrared Patio Heaters

Infrared heaters use radiant heat to warm people directly rather than the surrounding air.

  • Energy Efficient: They focus heat where it’s needed, reducing energy waste.

  • Fast Heating: Infrared heaters warm up instantly, perfect for quick outdoor gatherings.

  • Versatile Installation: Can be wall-mounted, ceiling-mounted, or freestanding.

This is ideal for patios with partial coverage or windy conditions, as they don’t rely on heating the air.

4. Outdoor Fireplaces

For a statement piece that combines warmth and style, consider an outdoor fireplace.

  • Adds architectural interest and serves as a social focal point

  • Can be fueled by wood, gas, or propane

  • Offers substantial heat for larger patios or backyard spaces

An outdoor fireplace can transform your patio into a year-round entertainment hub.

outdoor fireplace

5. Portable Electric Heaters

When flexibility is key, portable electric heaters are a convenient option.

  • Easy to move around to different patio areas

  • Safe for covered patios or smaller spaces

  • Ideal for short-term use or renters who can’t install permanent heaters

These heaters are perfect for those who want warmth without long-term commitment.

Bonus Tips for a Cozy Winter Patio

To maximise comfort while staying safe, follow these tips:

  1. Add Outdoor Rugs: Insulate your feet and make the patio feel warmer.

  2. Use Blankets and Cushions: Extra layers create a snug, inviting atmosphere.

  3. Install Windbreaks: Screens or outdoor curtains can block cold drafts.

  4. Layer Lighting: String lights and lanterns enhance ambience and warmth perception.

Choosing the Best Heating Option for Your Patio

When selecting your outdoor heating solution, consider:

  • Patio size and layout

  • Frequency of use

  • Fuel type and availability

  • Safety and ventilation requirements

  • Budget and maintenance needs

Combining heaters with cozy accessories like blankets and fire pits can create the ultimate winter patio retreat.

Winter doesn’t have to keep you indoors. With the right outdoor heating options for patios, you can enjoy your outdoor space comfortably year-round. From traditional fire pits to modern infrared heaters, there’s a solution for every patio style and size.

Turn your patio into a warm and inviting oasis this winter, and make cold evenings something to look forward to.

How to Remove Patio Haze Quickly

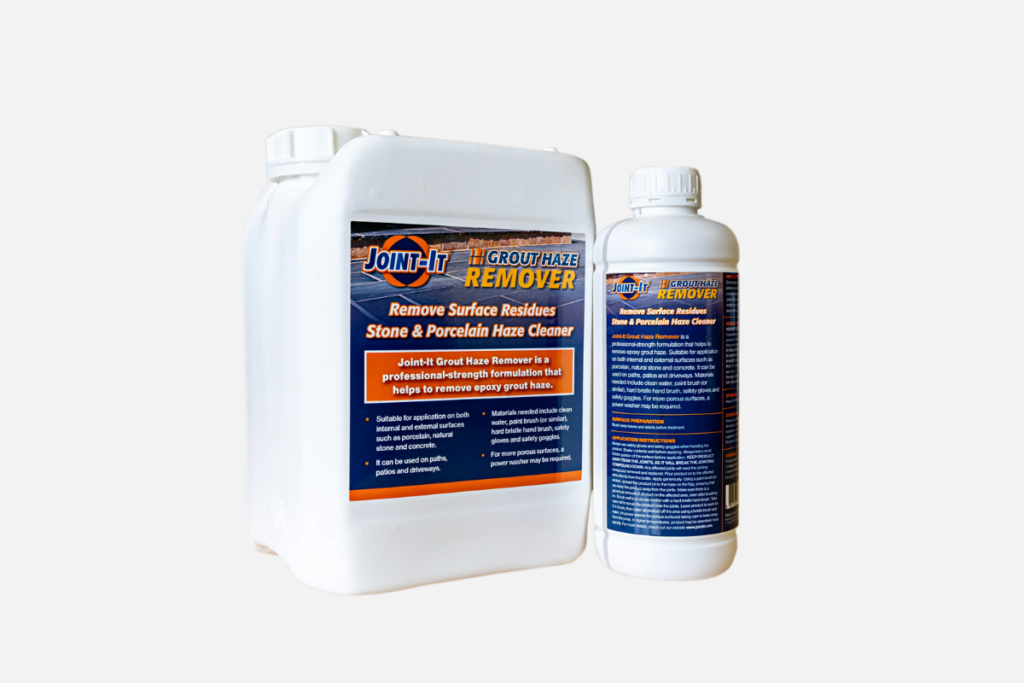
If your newly laid patio has a cloudy or milky film on the surface, you’re likely seeing grout haze. This haze can spoil the look of your outdoor space, making even the best-laid tiles appear dull. The fastest way to remove patio haze is with Joint-It Grout Haze Remover, a professional-strength solution designed to restore your tiles to their original condition.

What Is Patio Haze?

Patio haze (also known as grout haze) is a thin, cloudy residue left on tiles after grouting. It commonly occurs when excess grout isn’t cleaned off immediately during installation. If left untreated, this haze can become stubborn and difficult to remove, especially on porous surfaces like natural stone or porcelain.

Why Use Joint-It Grout Haze Remover?

Joint-It Grout Haze Remover is specially formulated to help you remove patio haze efficiently:

  • Professional Strength: Eliminates grout haze without damaging tiles.

  • Safe on Multiple Surfaces: Works on porcelain, ceramic, and natural stone tiles.

  • Easy to Apply: User-friendly for both DIYers and professionals.

Joint-It Grout Haze Remover

Step-by-Step Guide to Remove Patio Haze

  1. Prepare the Surface: Make sure the tiles are dry and free of loose debris.

  2. Apply the Haze Remover: Spread Joint-It Grout Haze Remover on the affected areas.

  3. Scrub Gently: Use a soft cloth or sponge to loosen the haze without scratching the tiles.

  4. Rinse Thoroughly: Wash away all residue with clean water.

  5. Dry the Tiles: Wipe with a clean towel for a sparkling finish.

Tip: Work in small sections to ensure effective haze removal and prevent streaks.

Preventing Patio Haze in the Future

  • Clean Quickly: Remove excess grout immediately during installation.

  • Follow Mixing Instructions: Properly mixed grout reduces residue.

  • Protect Tiles: Cover or wipe tiles carefully during grouting to minimise haze.

Grout haze doesn’t have to ruin your patio’s appearance. Using Joint-It Grout Haze Remover makes it easy to remove patio haze quickly and safely, restoring your tiles to their original beauty. Combine this with careful installation and immediate cleaning to keep your patio looking flawless for years.

The Best Way to Keep Patio Slabs Level

tile spacers for porcelain patios

A level patio not only looks great but also ensures safety and long-term durability. Uneven paving can create trip hazards, water pooling, and structural problems. Knowing the best way to keep patio slabs level is essential for any outdoor installation.

This guide explains how to achieve perfectly level patio slabs using modern tools like Joint-It Tile Spacers and Levelling Caps, giving your patio a professional and long-lasting finish.

Why Keeping Patio Slabs Level Is Important

Maintaining a level patio ensures:

  • Safe, hazard-free walkways
  • Correct drainage to prevent water pooling
  • A sleek, professional appearance
  • Long-lasting durability with fewer repairs

Even minor height differences, known as lippage, can be very noticeable, especially with large-format or porcelain slabs.

Step 1: Prepare a Stable Base

Begin with a well-compacted base, such as hardcore or aggregate, and ensure a gentle slope for drainage. Leveling at this stage makes it easier to keep your patio slabs level throughout the project. Add a bedding layer of sand or mortar for the slabs to rest on.

Step 2: Use Tile Spacers for Consistent Joints

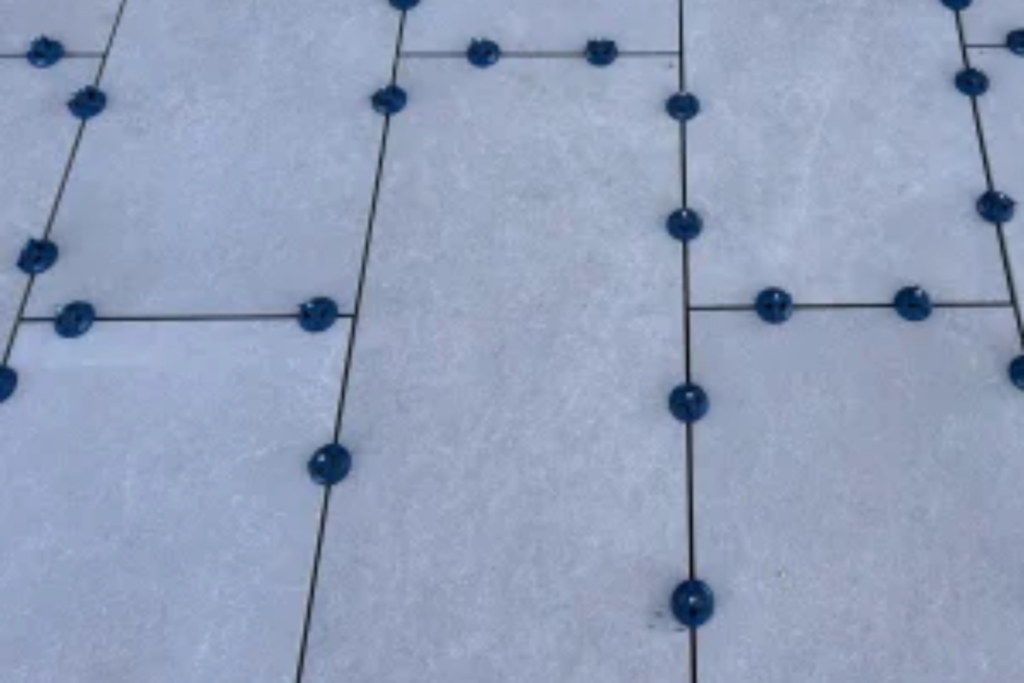
Tile spacers are essential for uniform joint widths. Inserting them between slabs keeps your patio even and supports stability, helping you maintain patio slabs level during installation.

Step 3: Apply Levelling Caps for a Flush Surface

Joint-It levelling caps are designed to work with tile spacers to prevent lippage. They hold slabs at the correct height as the adhesive sets, ensuring your patio slabs remain level across the surface.

How to Use Levelling Caps:

  • Insert a levelling clip under the edge of the first slab.
  • Position the next slab and slide the clip into place.
  • Twist or tighten the levelling cap to align slabs perfectly.
  • Repeat across all tiles, checking levels regularly.
  • Remove caps after adhesive cures, they’re reusable.
levelling caps

Step 4: Check Levels Frequently

Use a spirit level or laser level both along and across the slabs. Adjust immediately if any areas are uneven, small corrections are much easier at this stage than after the adhesive sets.

Step 5: Fill Joints and Finish

After all slabs are level and adhesive has set, remove tile spacers and levelling caps. Fill joints with weather-resistant grout or Joint-It Simple, ensuring consistency and durability. Clean off any excess to achieve a professional look.

Benefits of Joint-It Levelling Caps and Tile Spacers

  • Maintain patio slabs level effortlessly
  • Eliminate lippage for a flat, professional surface
  • Save installation time compared to manual levelling
  • Durable, reusable, and compatible with porcelain, ceramic, and stone slabs

Using the right tools guarantees a patio that is not only visually stunning but also built to last. For information on how to use them, read “How to Use Tile Spacers for Porcelain Patios”

Do You Really Need Tile Spacers for Porcelain Patios?

Do you need Tile Spacers for Porcelain

When it comes to laying porcelain patios, precision is everything. Porcelain tiles are manufactured with tight tolerances, which means even the smallest unevenness in joint width or height will stand out. That’s why many installers ask: do you really need tile spacers for porcelain?

The answer is simple: yes, and here’s why.

Why Tile Spacers for Porcelain Are Essential

Porcelain tiles are thin, dense, and unforgiving of mistakes. Without tile spacers for porcelain, you risk:

  • Uneven grout lines that spoil the finished look
  • Tiles shifting during installation
  • Lippage, where one tile sits higher than another
  • Weak joints that may crack under pressure

Using tile spacers for porcelain ensures perfect alignment, even grout widths, and a durable finish that withstands outdoor conditions.

Consistent Grout Joints = Professional Finish

Outdoor patios are constantly exposed to rain, frost, and temperature changes. Consistent joint widths created by tile spacers for porcelain allow grout to bond correctly, reducing cracking and long-term damage. The result is a smooth, professional look that lasts.

Preventing Lippage With Tile Spacers and Levelling Caps

One of the biggest issues with porcelain patios is lippage. A single uneven edge can ruin the sleek, modern style of your patio. By combining tile spacers with a levelling system like Joint-It Levelling Caps, you’ll achieve:

  • Flush, even surfaces
  • Safer patios with no trip hazards
  • A premium finish that enhances your outdoor space
tile spacers for porcelain

Are There Alternatives?

Some DIY installers try to judge spacing by eye, but with porcelain tiles this rarely works. Precision is key, and only tile spacers and levelling caps guarantee the accuracy needed for long-lasting results.

Choosing the Right Size Tile Spacers for Porcelain

For porcelain patios, 3mm and 5mm spacers are the most common. Narrow joints create a sleek, contemporary look, while wider joints can be better for certain styles or practical needs. Always follow the tile manufacturer’s recommendations.

Why Choose Joint-It Tile Spacers & Levelling Caps?

Joint-It offers a professional-grade system designed for porcelain patios:

  • Precision alignment for clean grout lines
  • Levelling caps that prevent lippage and hold tiles securely
  • Reinforced fibres for strength and durability
  • Reusable and recyclable for eco-conscious installations
  • Suitable for porcelain, ceramic, and natural stone tiles

So, do you really need tile spacers? Absolutely. They guarantee perfect joint widths, prevent lippage, and make sure your outdoor porcelain tiles look as professional as possible. Whether you’re a DIYer or contractor, using tile spacers for porcelain with levelling caps is the key to a flawless, long-lasting patio. View Joint-It Tile Spacers and Levelling Caps here.

How to Restore Faded Patio Colour

A faded patio can make your beautiful outdoor space look dull and neglected. Over time, UV exposure, weathering, and foot traffic can strip patios of their original vibrant colour. The good news is that you can restore faded patio colour and give your patio a fresh, long-lasting appearance with the right products and techniques.

Why Patios Fade Over Time

Patio surfaces, especially natural stone and concrete, are prone to fading due to:

  • Sunlight: UV rays break down pigments in stone and concrete.

  • Weather Exposure: Rain, frost, and general weathering can dull colours.

  • Foot Traffic and Wear: Everyday use can erode the surface and reduce vibrancy.

By addressing these factors, you can revive your patio’s original beauty and protect it from future fading.

Step 1: Clean Your Patio Thoroughly

Before applying any colour-enhancing product, your patio must be clean and free of moss, algae, and dirt. Use a pressure washer or a patio cleaner to remove all contaminants. A clean surface ensures that the colour enhancer penetrates effectively, giving consistent results.

Step 2: Choose the Right Colour Enhancer

To effectively restore faded patio colour, you need a high-quality colour enhancer. Joint-It Supreme Colour Enhancer is specially formulated to revive the natural colour of your patio while providing protection against moisture, moss, and algae.

Benefits of Joint-It Supreme Colour Enhancer:

  • Restores colour to natural stone, concrete, and porous surfaces.

  • Provides a subtle wet-look finish without being glossy.

  • Protects against environmental damage and staining.

  • Easy to apply for both DIY and professional use.

Step 3: Apply Joint-It Supreme Colour Enhancer

  1. Shake well before use.

  2. Apply evenly using a brush, roller, or low-pressure sprayer.

  3. Work in sections to avoid overlapping marks.

  4. Allow to dry completely (typically 2–4 hours depending on weather).

Pro Tip: Applying a second coat enhances the depth of colour and longevity.

Step 4: Maintain Your Patio

After restoring colour, regular maintenance will keep your patio vibrant:

  • Sweep regularly to prevent dirt accumulation.

  • Remove moss or algae promptly.

  • Consider reapplying Joint-It Supreme Colour Enhancer every 12–18 months for maximum colour retention.

Why Choose Joint-It Supreme Colour Enhancer?

Using a premium colour enhancer like Joint-It Supreme Colour Enhancer ensures:

  • Consistent and long-lasting colour restoration.

  • Protection against fading from sunlight and weather.

  • A professional finish that enhances the natural beauty of your patio.

With the right preparation and the correct product, you can restore faded patio colour and enjoy a vibrant outdoor space year-round.

patio colour enhancer

Ready to Revive your Patio?

Bring back the beauty of your stone or concrete surfaces with Joint-It Supreme Colour Enhancer today. See our trusted list of stockists here.