Why You Need Slurry Primer for Porcelain Patios

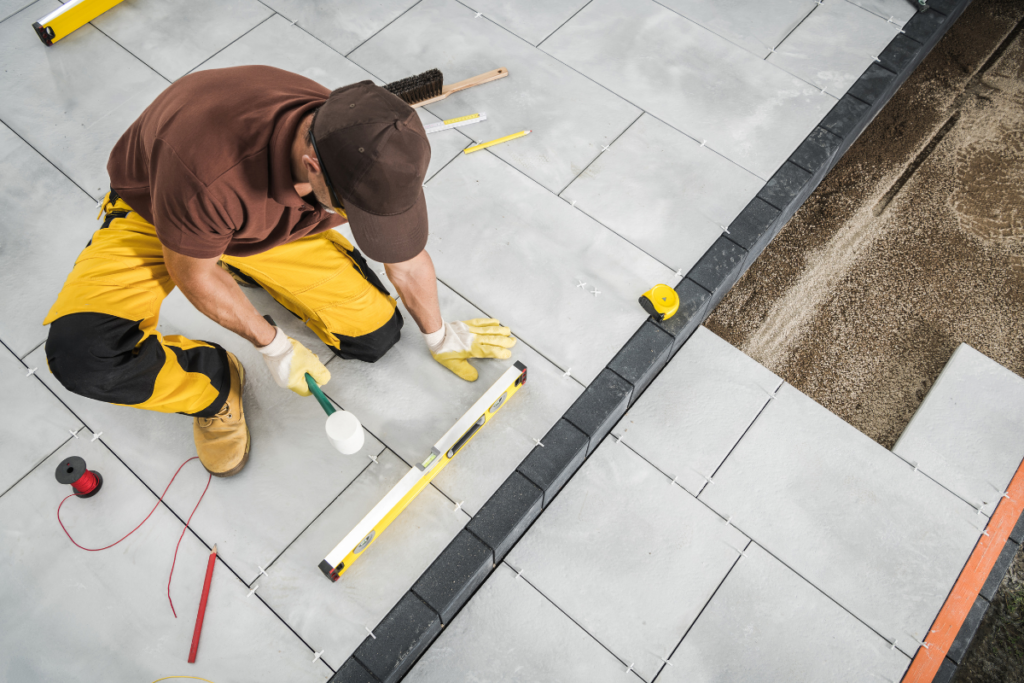
When installing porcelain paving, achieving a secure, long-lasting bond is crucial. Porcelain slabs are low-porosity, which means they don’t naturally adhere well to mortar. Without a bonding layer, the patio can experience loose slabs, movement, or even delamination over time. A slurry primer for porcelain acts as a bonding agent between the paving slab and the mortar bed. This creates a strong adhesive layer that prevents lifting and ensures your patio remains durable and visually appealing.

Why Porcelain Patios Need Slurry Primer

Porcelain is highly durable and stylish, making it a popular choice for patios. However, its non-porous nature requires extra care during installation. Skipping a slurry primer for porcelain can result in:

  • Slabs lifting or rocking after freeze-thaw cycles.

  • Bond failure between the mortar and the slab.

  • Water ingress and potential weed growth in weak joints.

  • Ensures adherence to BS 7533 (British Paving Standards)

Applying a slurry primer for porcelain, such as Joint-It Slurry Primer, guarantees a strong, lasting bond that protects your investment.

Benefits of Using Joint-It Slurry Primer for Porcelain Patios

Superior Bond Strength

Joint-It Slurry Primer provides unmatched adhesion for porcelain paving, ensuring slabs remain securely in place over time.

Versatile for All Slab Types

Whether you are installing porcelain, natural stone, or concrete slabs, a slurry primer works perfectly to create a strong bond.

Prevents Costly Repairs

Loose or lifting slabs can be expensive to fix. Using Joint-It Slurry Primer prevents movement, cracking, and delamination.

Easy to Apply

Mix Joint-It Slurry Primer with water and apply evenly to the back of the slab before laying. This ensures maximum adhesion and a professional finish.

How to Apply Joint-It Slurry Primer

Step 1

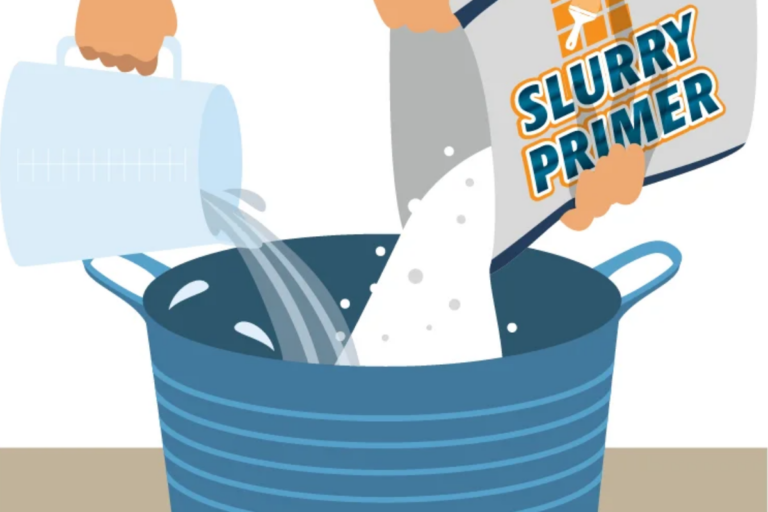
Pour required amount of product contents into a mixing bucket.
Add 250ml water per 1kg of Joint-It Slurry Primer.

slurry primer for porcelain

Step 2

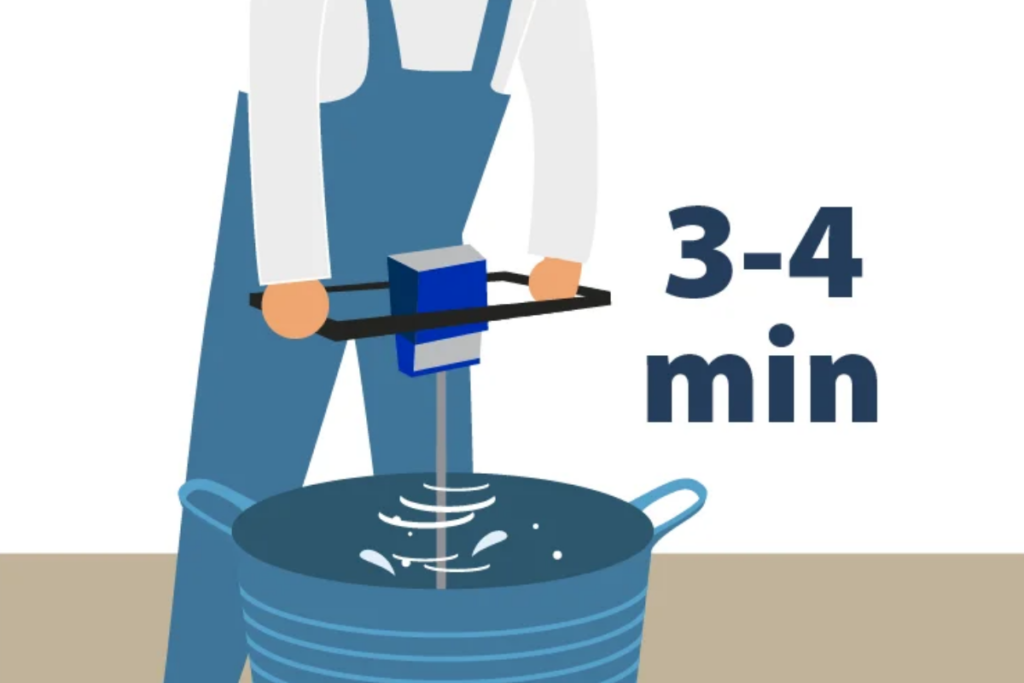
Mix with paddle mixer for at least 3-4 minutes to achieve desired consistency for Slurry Primer.
A semi fluid consistency should be achieved to ensure easy adhesion to substrate.

slurry primer for porcelain

Step 3

Apply priming slurry to porcelain slabs using a stiff brush with a thickness of 1-2mm. For increased adhesion, you can apply a 1-2mm coat directly onto the base as well as the slab, before placing the slab down.

priming slurry for patios

Step 4

Place the primed porcelain slab onto the bedding mortar.

Priming Slurry for patios

Coverage and Technical Details

  • Bag Size: 20 kg

  • Coverage: Approximately 18 m² per bag

  • Working Time: Around 1 hour after mixing

  • Application Temperature: 5°C to 30°C

Buy Joint-It Slurry Primer for Porcelain Today

Don’t risk loose or lifting slabs. Protect your investment with the slurry primer for your porcelain patio that professionals trust. See our trusted stockist list here.

Avoid These Mistakes When Grouting Porcelain Paving

Porcelain paving is a premium choice for outdoor spaces, it’s durable, stylish, and low maintenance. But even the best paving can suffer if the grouting is done incorrectly. Poor grouting can lead to staining, cracking, or loose slabs, shortening the lifespan of your patio, so let’s dive in to how to avoid mistakes when grouting porcelain paving.

Mistake 1: Using the Wrong Type of Grout

Porcelain paving has narrow joints (typically 2–5mm) that require a specialist grout. Using standard sand and cement or natural stone jointing compound can:

  • Fail to bond properly with porcelain

  • Allow water to penetrate, leading to frost damage

  • Discolour over time

The fix: Use a product designed for porcelain, like Joint-It Porcelain Epoxy Grout. It’s non-porous, stain-resistant, and frost-proof, perfect for outdoor porcelain tiles.

Mistake 2: Grouting on a Dirty Surface

If your paving slabs aren’t completely clean before grouting, dust and dirt can get trapped in the joints and cause poor adhesion or stains.

The fix: Sweep and wash your paving before starting. If needed, use Joint-It So Clean to remove dirt, algae, and residue.

Mistake 3: Working in Bad Weather

Grouting in rain, extreme heat, or freezing conditions can cause:

  • Poor curing

  • Weak joints

  • Streaking or water marks

The fix: Choose a dry, mild day and check the forecast before you start. Joint-It Porcelain Epoxy Grout sets quickly, so ideal weather is important.

Mistake 4: Letting Grout Dry on the Surface

One of the biggest mistakes when grouting porcelain paving is leaving excess grout on the porcelain tiles, epoxy grout hardens fast and is difficult to remove once cured.

The fix: Work in small sections, wiping away excess grout immediately with a damp sponge. Rinse the sponge often to avoid smearing residue across the tiles.

Mistake 5: Not Filling Joints Fully

Underfilled joints can weaken quickly, letting water and dirt get in. This leads to cracking, frost damage, and weed growth.

The fix: Ensure you use enough product, and fill joints slowly to ensure they are fully filled.

The Right Way to Grout Porcelain Paving

By avoiding these mistakes when grouting porcelain paving and choosing the right materials, you’ll get a flawless finish that lasts for years.

Joint-It Porcelain Epoxy Grout is specially designed for outdoor porcelain paving, offering:

  • Stain resistance

  • Frost protection

  • Long-lasting strength

  • Easy maintenance

Key Takeaways

  • Always use a grout designed for porcelain paving

  • Prepare your surface properly before starting

  • Work in small sections and clean as you go

  • Check the weather to avoid curing issues

For a step by step guide on how to apply porcelain grout, read “How to Grout Porcelain Paving”

Is Jointing Compound Frost Resistant?

patio frost

If you live in a colder climate or experience harsh winters, you’ve probably wondered:
Is jointing compound frost resistant, or will it crack and fail when temperatures drop?

Choosing the right jointing compound is essential if you want a long-lasting patio or driveway that stands up to weather year-round. In this article, we’ll explain how jointing compounds perform in cold conditions, and why some are far better than others at resisting frost and ice.

What Is Jointing Compound?

Jointing compound is used to fill the gaps between paving slabs. It stabilises the surface, prevents weed growth, and improves water drainage. Unlike traditional mortar, modern jointing compounds are designed to be more flexible and weatherproof, but is jointing compound frost-resistant by default?

The answer depends entirely on the quality of the product you choose.

Can Jointing Compound Withstand Frost?

Yes, high-quality jointing compounds are frost-resistant. That means they can endure freezing temperatures, frost, and ice without cracking, crumbling, or failing. However, not all jointing compounds are created equal.

To be truly frost-resistant, a jointing compound must:

  • Allow water to drain freely (so it doesn’t freeze inside the joints)

  • Be flexible enough to move with temperature changes

  • Maintain strong adhesion even in sub-zero conditions

Why Joint-It Simple Is Frost Resistant

At Joint-It, we designed Joint-It Simple with harsh weather in mind, including freezing winters and regular frost. Developed in Ireland, it’s been tested in real-world conditions where rain, ice, and frost are common.

Key frost-resistant features:

  • Water-permeable: allows water to drain, preventing frost damage

  • Strong but flexible:  expands/contracts without cracking

  • No shrinking: stays intact even after repeated freeze-thaw cycles

  • Ideal for natural stone: like sandstone, granite, and concrete paving

So if you’re asking “is jointing compound frost resistant?”, the answer is a confident yes, when you use Joint-It Simple.

stop patio going green Joint-It Simple

How to Ensure Long-Term Frost Protection

Even the best frost-resistant jointing compound performs better with proper prep and maintenance:

  1. Clean the paving thoroughly
    Use Joint-It So Clean to remove dirt and grime before jointing.

  2. Apply in dry conditions
    Make sure the surface is dry and the weather is above 5°C during application.

  3. Consider sealing
    Use a breathable patio sealer to reduce water absorption and improve longevity.

  4. Brush off debris regularly
    Keep your paving clean to prevent organic material from affecting the joints.

Frost Resistant vs Non-Resistant Jointing Compounds

FeatureFrost-Resistant CompoundLow-Quality Compound
Withstands freeze-thaw cycles✅ Yes❌ No
Prevents cracking or shrinkage✅ Yes❌ Crumbles easily
Allows water to drain✅ Yes❌ Traps moisture
Requires replacement each year❌ No✅ Likely

Trusted by Professionals in Cold Climates

Professionals across the UK and Ireland choose Joint-It Simple because they’ve seen how well it performs through wet, frosty winters. If you want a patio jointing compound that can handle extreme weather without failing, choose one that’s specifically frost resistant.

Protect Your Patio from Frost This Winter

So, is jointing compound frost-resistant? It absolutely can be, as long as you choose a product that’s built for the job.

Joint-It Simple offers proven frost protection, all-weather performance, and long-lasting results.
Don’t let cold weather damage your paving, seal it right the first time. 

If your grout is cracking, there are a number of reasons this might be. Read this article for more information “Why Your Patio Grout Keeps Cracking”

Paving Grout Installation Mistakes: 5 Common Errors

paving grouting mistakes

Installing paving grout correctly is essential for a strong, long-lasting finish. Whether you’re working on a patio, driveway, or garden path, small mistakes during the grouting process can lead to joint failure, stains, or even costly rework. At Joint-It, we help homeowners and contractors avoid these pitfalls with our expert advice and industry-leading paving grout solutions.

Here are five common paving grout installation mistakes and how to avoid them for professional results every time.

1. Using the Wrong Grout for the Weather Conditions

The Mistake: Applying paving grout without considering weather conditions or choosing the wrong product for the environment.

Why It Matters: Not all grout is suitable for all conditions. Using the wrong type can prevent proper curing and weaken the joints.

How to Avoid It:

  • Use Joint-It Simple in wet or damp conditions. It’s designed to be applied to wet surfaces, making it ideal for unpredictable weather.

  • Use Joint-It Fine in dry conditions only. The sand will not flow into the joints easily if the paving is wet. 

Choosing the right grout for the job is the first step to success.

2. Failing to Prepare the Surface Properly

The Mistake: Applying grout to dirty or poorly cleaned paving.

Why It Matters: Dirt, debris, or algae on the surface can interfere with adhesion and may lead to grout lifting or surface staining.

How to Avoid It:
Thoroughly clean your paving before application. For Joint-It Simple, rinse the area with water and brush out debris from joints. For Joint-It Fine, ensure the surface and joints are completely dry and dust-free.

3. Not Compacting the Grout into the Joints

The Mistake: Letting grout sit loosely in the joints without compacting it.

Why It Matters: Loose grout leads to weak spots, erosion, and an increased risk of weeds.

How to Avoid It:
Always compact the grout into the joints. For brush-in products like Joint-It Simple, compact into joints with a trowel.
For Joint-It Fine, sweep at a 45° angle into joints and use a whacker plate to compact.

compacting paving sand

4. Leaving Grout Residue on the Paving Surface

The Mistake: Letting grout dry on the surface of the paving slabs.

Why It Matters: Dried residue causes staining or a hazy finish that’s difficult to remove, especially on natural stone.

How to Avoid It:
Clean as you go. When using Joint-It Simple, keep the surface wet and brush away excess grout. Rinse the surface thoroughly after application. 

5. Ignoring Weather Forecasts During Application

The Mistake: Applying grout during unsuitable weather—too hot, too cold, or under threat of rain.

Why It Matters: Extreme conditions can delay curing or wash away freshly laid grout.

How to Avoid It:

  • Joint-It Simple can be applied in wet weather but still needs time to cure, so avoid extremely heavy rain for at least 12 hours post-application.

  • Joint-It Fine requires dry conditions for 24+ hours, with no rain forecast and mild temperatures.

Always plan your installation based on weather recommendations specific to your grout type to avoid paving grout installation mistakes.

Avoiding Paving Grout Installation Mistakes

Avoiding these paving grout installation mistakes can save you time, money, and stress. With the right preparation, weather awareness, and product choice, your paving will stay solid, clean, and weed-free for years.

At Joint-It, we provide reliable, easy-to-use paving grout solutions trusted by professionals across the UK, Ireland, and beyond. Explore our full product range or reach out to our team via our live chat for expert guidance on your next project. Read here for information on The Benefits of Using Paving Sand for Block Paving.

Choosing the Perfect Patio Furniture to Complement Your Paving

When designing your ideal outdoor space, paving is just the beginning — it sets the foundation, but your patio furniture brings it to life. Whether you’re sipping your morning coffee, hosting a summer BBQ, or relaxing with a book, the right furniture should complement your paving, both in function and style.

In this guide, we’ll help you choose the perfect patio furniture to match your paving, so your outdoor area feels cohesive, comfortable, and beautifully designed.

Why Your Patio Furniture Should Complement Your Paving

Your paving and furniture work together to define the tone and character of your garden or patio. A mismatch in style, colour, or material can disrupt the flow of your space, while well-paired elements create harmony and elevate the overall look.

Here are a few key reasons to coordinate:

  • Visual Cohesion – Matching colours and textures tie the space together

  • Outdoor Ambience – Balanced design creates a more relaxing atmosphere

  • Functionality – Certain paving styles work better with specific furniture types

1. Match Materials with Your Paving Style

Start by considering the type of paving you have or plan to install — natural stone, concrete, porcelain, or block paving all have unique textures and tones. Your furniture materials should reflect or contrast these thoughtfully.

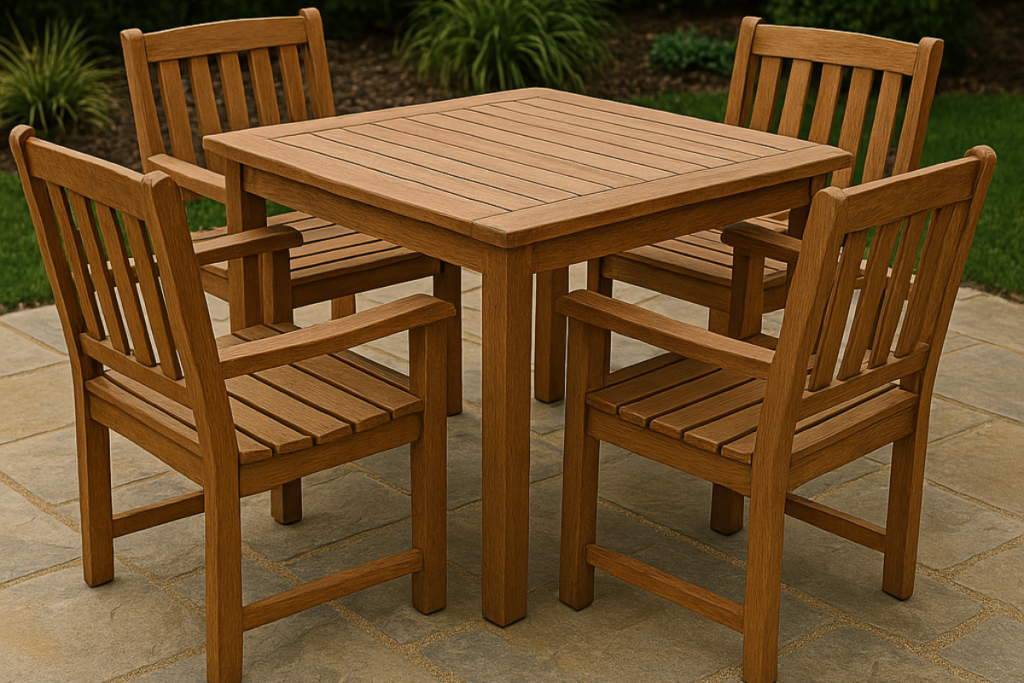
Natural Stone Paving

If you’ve used natural stone paving like sandstone or limestone (especially with Joint-It Simple for clean, seamless joints), opt for furniture with earthy, organic textures – like wood, rattan, or wrought iron. These materials echo the natural vibe and age beautifully outdoors.

Concrete or Porcelain Paving

Modern paving calls for sleek, minimalist furniture. Powder-coated metals, clean-lined teak, or modular lounge seating work brilliantly. Choose neutral tones like charcoal, slate, or soft grey to highlight the contemporary look.

Block or Brick Paving

Traditional paving pairs well with classic garden furniture — cast aluminium benches, bistro sets, or wooden dining tables. To avoid visual overload, keep your furniture’s design simple and timeless.

wooden patio furniture on natural stone patio
Wooden Furniture on Natural Stone Patio

2. Choose Complementary Colours

Use your paving’s colour palette to guide your furniture tones. Here’s how:

  • Warm-toned paving (yellows, tans, browns): Pair with creams, olive greens, or terracotta cushions and wood finishes.

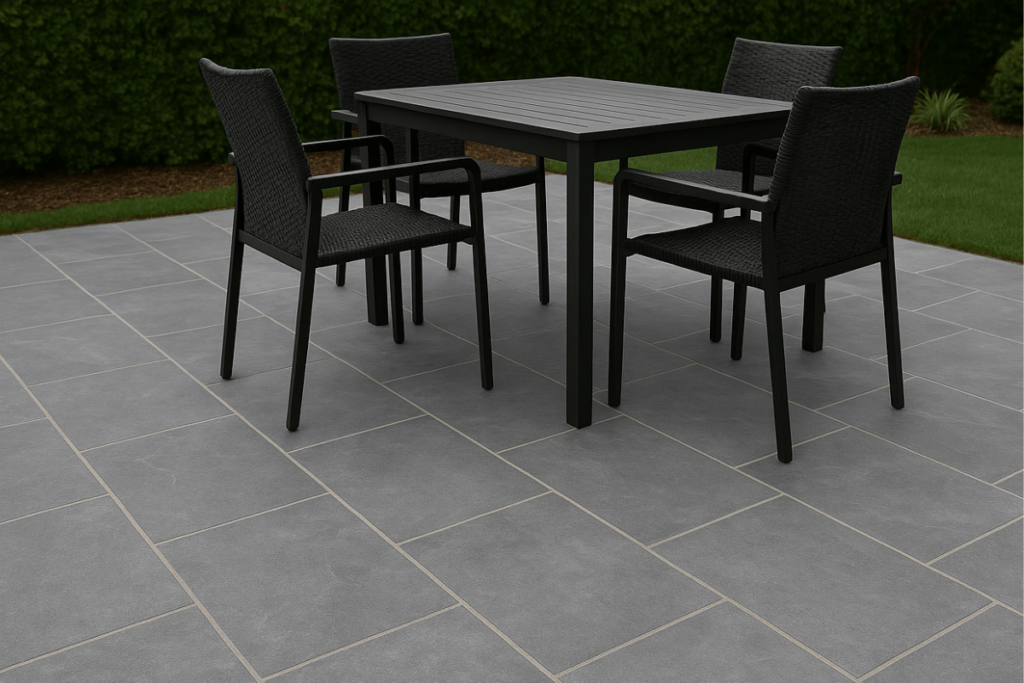
  • Cool-toned paving (greys, blues, charcoals): Go with black frames, navy cushions, and modern whites or soft pastels for contrast.

  • Mixed or patterned paving: Stick with neutral-coloured furniture to avoid clashing.

Want to highlight your joints? If you’re using Joint-It Simple (available in various colour options), match your accessories or furniture frames to your joint colour for a subtle design detail.

Grey Porcelain Patio Grouted with Joint-It Simple with Black Patio Furniture

3. Think About Scale and Space

Your paving layout defines the usable area — and the scale of your furniture should match the proportions. Some tips:

  • Small patios: Opt for folding or stackable chairs, a compact bistro set, or a bench with hidden storage.

  • Medium-sized areas: A corner sofa or L-shaped sectional makes the most of your space.

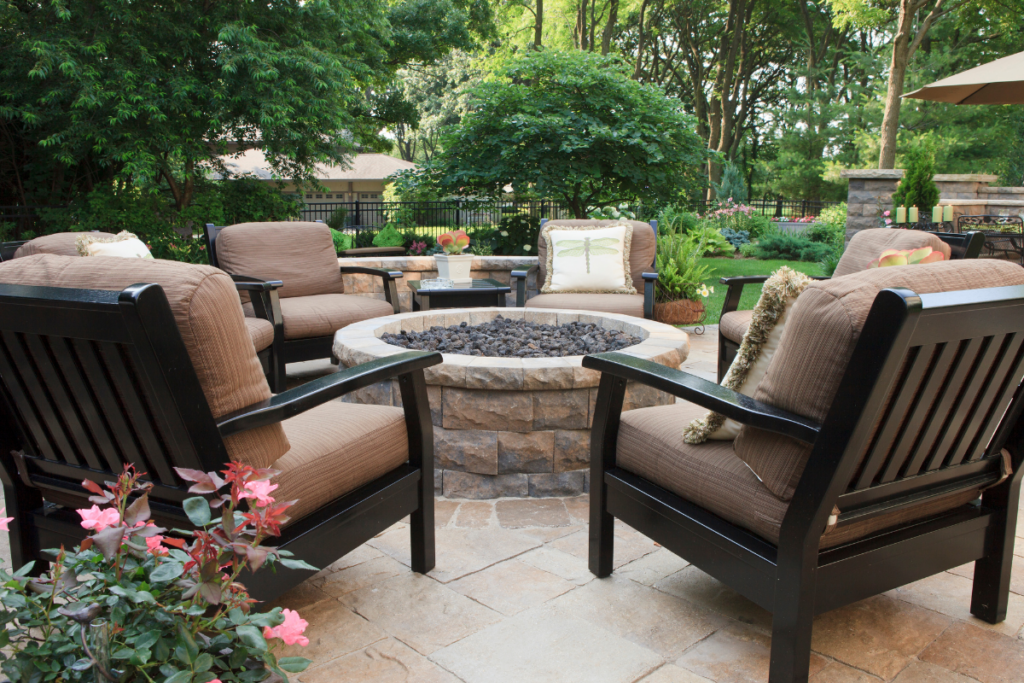
  • Large patios: Go bold with an outdoor dining table, fire pit seating area, and lounger zones.

Just remember to leave room to walk around freely — paving isn’t just for looks; it’s your main walking surface.

L-Shaped Patio Furniture on Natural Stone Patio
L-Shaped Patio Furniture on Natural Stone Patio Grouted with Joint-It Simple

4. Comfort Meets Durability

Style aside, outdoor furniture needs to withstand the elements — and it should sit well on your paving. Choose furniture with:

  • Non-slip feet or pads to avoid scratches or damage

  • UV-resistant, waterproof cushions

  • Easy-to-clean materials that won’t trap dirt in paving joints

Pro tip: Seal your paving with Joint-It Premium Seal to protect against moisture and stains — especially under furniture legs.

5. Add Accessories That Tie It All Together

The final touch? Accessories! Use rugs, lighting, cushions, and planters to bridge your furniture and paving for a finished, designer look.

  • Outdoor rugs soften hard paving and define zones. Kukoon rugs are an excellent choice for outdoor rugs.

  • String lights or solar lanterns add ambience.

  • Planters or raised beds bring colour and life.

These details can echo the colours of your paving or joints, creating a polished, layered outdoor feel.

sealing my patio

Bring Harmony to Your Patio

When you thoughtfully match your patio furniture to your paving, the result is an outdoor space that feels cohesive, intentional, and inviting. From material choices to colour coordination, every detail matters — and with the right combination, your garden becomes an extension of your home. If you are building a small patio, and want to make it look larger, read the article “Grout Colours That Make Small Patios Look Bigger and Brighter”

Start with a strong foundation — beautifully finished paving grouted with Joint-It Simple, then build upward with furniture that enhances both the look and the lifestyle of your outdoor area.

AI in Paving? How Technology Could Change the Way We Lay Patios

The paving industry is may be undergoing a quiet revolution. From robotic assistance to AI-powered design tools, technology is transforming the way homeowners, landscapers, and contractors might approach outdoor paving projects.

Whether you’re laying a new patio, updating a driveway, or designing a commercial outdoor space, staying ahead of paving innovations will save time, reduce costs, and deliver stunning, long-lasting results.

In this article, we explore the emerging technologies reshaping the paving landscape and how advanced jointing compounds like Joint-It Simple are leading the charge in smart paving solutions.

AR & 3D Design Tools for Smarter Planning

One of the most significant shifts in modern paving will be the use of 3D modelling and augmented reality (AR). Contractors will be able to map out entire paving projects using digital tools, helping clients visualise layouts before a single patio slab is laid. These systems will improve accuracy, reduce waste, and streamline the quotation process.

What would now take hours of hand-drawn sketches and on-site adjustments could be completed in a fraction of the time. AR apps will allow users to view lifelike overlays of paving designs directly onto their property using smartphones or tablets, enhancing communication between homeowners and professionals. This innovation will be particularly valuable for large or custom projects where precision and visual appeal are crucial.

Smart Materials: The Rise of Performance Jointing Compounds

stop patio going green Joint-It Simple

Gone are the days of sand and cement being your only jointing options. Today, smart materials like ready-mixed jointing compounds offer greater strength, weather resistance, and ease of use.

Joint-It Simple, for example, is formulated to work in wet weather conditions, resist weed growth, and endure foot and vehicle traffic. These innovations reduce the need for repairs and extend the life of your paving.

In addition to longevity, smart jointing materials of the future could enhance the visual consistency of a paved surface. Some products may include colour-matching technology, allowing the compound to blend seamlessly with various stone shades and textures. This would be ideal for homeowners seeking a premium, polished finish.

Robotics & Automation in Hardscaping

bricklaying machine

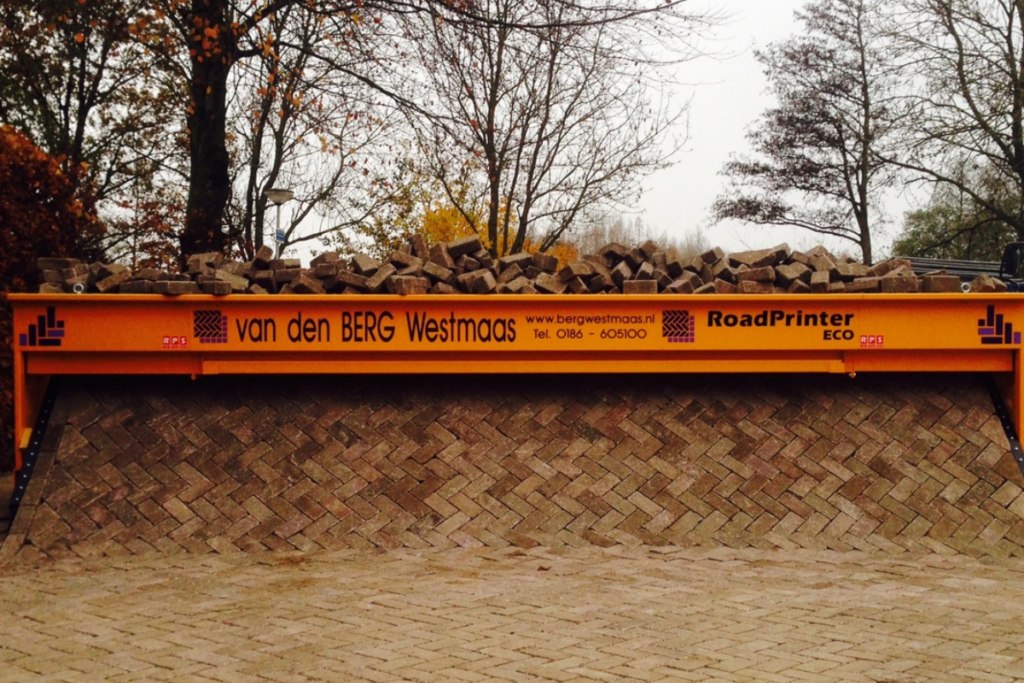
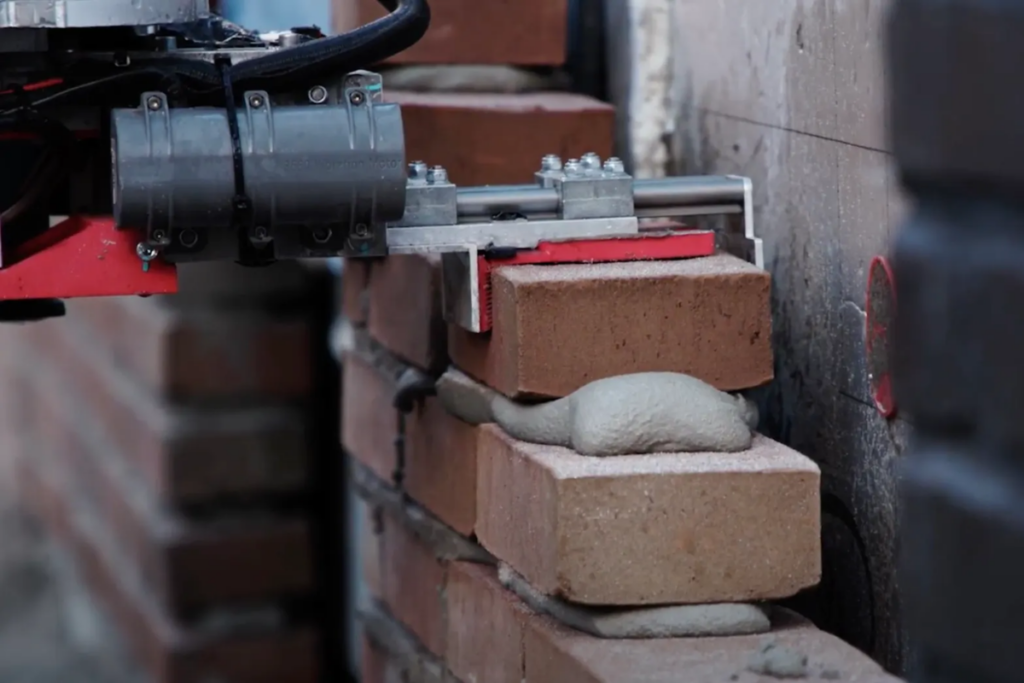
Automation isn’t just for factories. In paving, robotic systems are beginning to assist with slab placement and alignment in large-scale projects. While not yet common in residential work, the future could see robots handling more of the heavy lifting and precision work.

Some paving companies in Europe are already experimenting with robotic arms that lay bricks and slabs faster and more precisely than humans. These systems reduce worker fatigue, increase output, and improve long-term durability by ensuring uniform placement and compaction.

Imagine a future where robots handle the most labour-intensive tasks, allowing skilled tradespeople to focus on design and detailing. This integration of human and machine labour could drastically boost project efficiency and open the door to more complex custom work.

Sustainable Paving and Eco-Tech

As environmental concerns grow, paving technologies are also becoming more sustainable. Permeable paving systems allow water to pass through surfaces, reducing runoff and supporting groundwater recharge. Combined with eco-friendly jointing products, these solutions contribute to green building certifications and long-term environmental health.

In addition, sustainable jointing compounds often come in recyclable or reusable packaging, which helps reduce the overall carbon footprint of a paving project.

What This Means for Contractors and Homeowners

Tech-savvy paving offers clear advantages:

  • Faster project timelines

  • Improved durability and aesthetics

  • Reduced maintenance and rework

  • Better client communication and satisfaction

For homeowners, this could mean longer-lasting patios and driveways. It also opens the door to more custom and creative designs that hold up over time.

For contractors, it means staying competitive in a rapidly evolving industry. Embracing smart tools and materials won’t just improve efficiency—it positions a business as forward-thinking and environmentally conscious, both of which are important to today’s customers.

Smart paving isn’t science fiction—it’s already here. With tools like AR layout planning, weatherproof jointing compounds like Joint-It Simple, and a growing push toward sustainability, the paving industry is smarter, stronger, and greener than ever before.

As these technologies become more accessible, the possibilities for creative, durable, and eco-friendly outdoor spaces continue to expand. Whether you’re planning your next patio or quoting a large commercial project, now is the time to embrace the tech-driven future of paving. To learn more about different types of jointing materials read this article “Joint-It Dynamic vs. Joint-It Simple: Which Paving Jointing Product is Right for My Patio?”

How to Prepare your Patio for Spring

As the chill of winter recedes and the promise of warmer days approaches, it’s the perfect time to prepare your patio for spring. A well-maintained patio not only enhances your outdoor living experience but also adds value to your property. Here’s a comprehensive guide on how to prepare your patio for Spring.

1. Thorough Cleaning

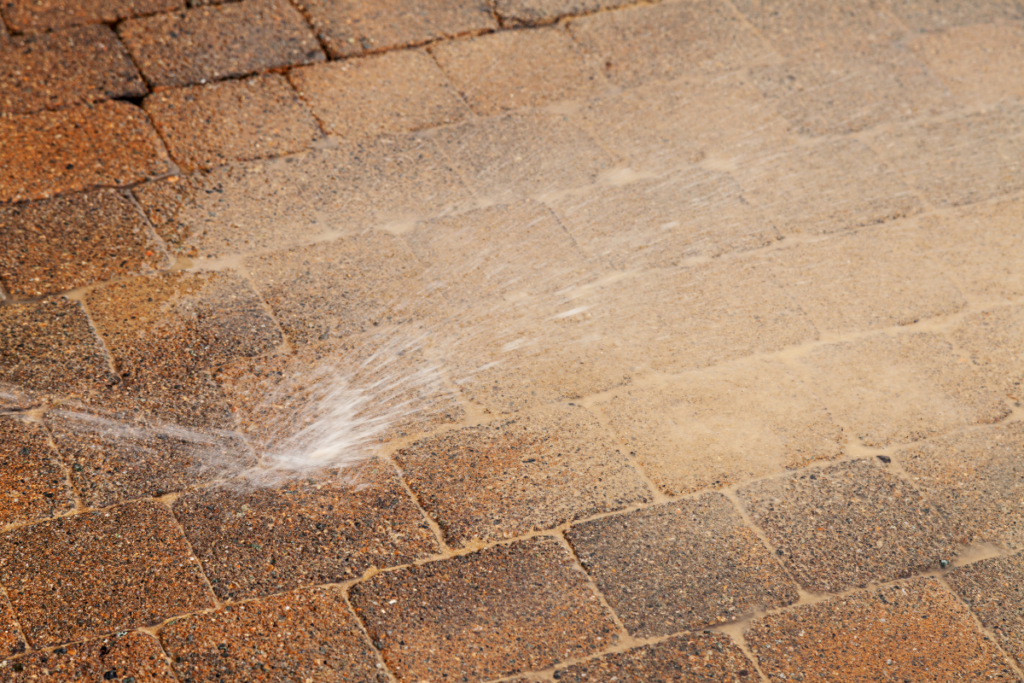
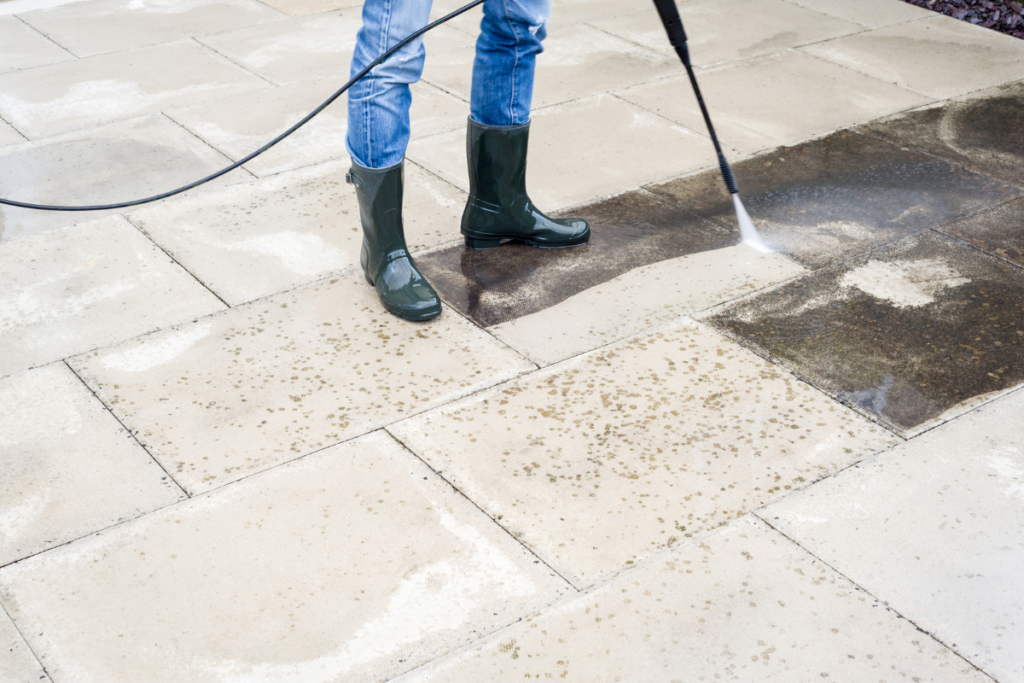
Start by removing debris such as leaves, twigs, and dirt that may have accumulated over the winter months. Using a pressure washer can effectively eliminate grime and moss, rejuvenating the appearance of your patio. If a pressure washer isn’t available, a stiff-bristled brush and a solution of mild detergent with water can also do the trick.

 
pressure washing porcelain patio

2. Inspect and Repair Joints

Over time, the joints between patio slabs can deteriorate, leading to weed growth and instability. It’s essential to inspect these joints for any signs of wear or damage. For durable and long-lasting results, consider using high-quality jointing compounds like Joint-It Simple, which are designed to withstand various weather conditions and prevent weed infiltration.

stop patio going green Joint-It Simple

3. Seal the Surface

Sealing your patio protects it from stains, weather damage, and general wear and tear. Products such as Joint-It Premium Seal offer a protective layer that enhances the natural colour of the stone while providing resistance against moisture and dirt. Regular sealing every few years can significantly extend the lifespan of your patio.


4. Address Algae and Moss

Damp conditions during winter often lead to the growth of algae and moss, making surfaces slippery and unsightly. To combat this, use specialised cleaners like Joint-It Algae Remover, which effectively eliminate these growths without harming the underlying surface. Regular maintenance ensures a safe and visually appealing patio.

clean patio slabs

5. Refresh Furniture and Accessories

Spring is an excellent time to inspect your outdoor furniture for any damage or wear. Clean cushions and surfaces, and consider applying a fresh coat of paint or sealant to wooden pieces. Introducing new accessories, such as vibrant cushions or an outdoor rug, can breathe new life into your patio decor.


6. Incorporate Greenery

Adding potted plants or flower beds around your patio can enhance its aesthetic appeal and create a seamless transition between indoor and outdoor spaces. Choose plants that thrive in your climate and consider incorporating a mix of perennials and annuals for continuous blooms throughout the season.


7. Ensure Proper Drainage

Proper drainage is crucial to prevent water pooling, which can damage patio materials and create slippery surfaces. Check that the patio slopes away from your home and that drainage channels are clear of obstructions. Addressing drainage issues promptly can prevent costly repairs in the future.


8. Prepare Your Patio for Spring: Shade and Comfort

As temperatures rise, having shaded areas on your patio becomes essential for comfort. Consider installing umbrellas, pergolas, or shade sails to provide relief from the sun. Additionally, incorporating outdoor lighting can extend the usability of your patio into the evening hours, creating a cozy ambiance.

 
patio furniture

By following these steps, your patio will be well-prepared to welcome spring, offering a comfortable and inviting space for relaxation and entertainment. Remember, regular maintenance not only enhances the beauty of your outdoor area but also ensures its longevity for years to come.

Top Patio Design Trends for 2025

Top Patio Design Trends 2025

As we move into 2025, patio design trends in the UK are evolving to reflect a seamless blend of sustainability, functionality, and aesthetic appeal. Homeowners are increasingly seeking outdoor spaces that not only enhance their lifestyle but also align with eco-friendly practices. Here are the top patio design trends shaping British gardens in 2025:


1. Sustainable and Eco-Friendly Materials

Sustainability continues to be a driving force in outdoor design. Recycled materials, permeable paving, and responsibly sourced natural stone are becoming more popular. Composite decking, reclaimed bricks, and timber from sustainable sources are also making their mark, offering both durability and reduced environmental impact. An excellent choice for an eco-friendly grouting solution is Joint-It Simple, a 97% natural grouting product.

sand betwen pavers jointing grout - Joint-It Simple

2. Seamless Indoor-Outdoor Integration

The concept of blending indoor and outdoor living spaces is gaining momentum. Homeowners are opting for bi-fold doors, matching flooring materials, and similar colour palettes to create a smooth transition between their home interiors and patios. This approach not only enhances the perception of space but also encourages year-round use of the garden.

3. Bold Geometric Patterns

Adding visual interest to patios with bold geometric paving patterns is a trend to watch. Herringbone, basketweave, and chevron designs are particularly favoured, providing a contemporary aesthetic that elevates outdoor areas. These striking layouts are perfect for modern gardens and urban spaces.

Patio Design Trends 2025

4. Green Drenching and Natural Landscaping

Taking inspiration from nature, homeowners are integrating more greenery into their patio designs. Living walls, vertical gardens, and a variety of potted plants create a lush, calming environment. Low-maintenance native plants and wildflower borders are also gaining traction, enhancing biodiversity while requiring minimal upkeep.

5. High-Quality, Durable Furnishings

Investing in high-quality outdoor furniture that withstands the British climate is becoming a priority. Weather-resistant materials such as rattan, teak, and powder-coated aluminium offer longevity and style. Cushions and soft furnishings in sustainable fabrics further enhance comfort while being eco-conscious.

6. Multifunctional Outdoor Spaces

With more people using their gardens for work, relaxation, and socialising, patios are being designed for versatility. Built-in seating, fire pits, and outdoor kitchens are increasingly popular, allowing homeowners to make the most of their space throughout the year. Covered pergolas and retractable awnings provide shelter, ensuring usability in all weather conditions.

7. Industrial Aesthetics

The industrial design trend is making its way into patios, featuring raw materials such as concrete, steel, and reclaimed wood. This style offers a minimalist yet striking appearance, appealing to those who appreciate a contemporary, understated look.


8. Enhanced Lighting Solutions

Strategic outdoor lighting is crucial in extending the usability of patios beyond daylight hours. LED fixtures, solar-powered pathway lights, and smart lighting systems allow homeowners to create an inviting ambience. Warm-toned lighting enhances relaxation, while motion-sensor lights provide security.

Patio Design Trends 2025 Lighting

9. Personalised Design Elements

Patios are becoming a reflection of individual style, with homeowners incorporating bespoke elements into their designs. Custom-built furniture, decorative tiles, and handmade planters add unique character to outdoor spaces. Water features, sculptures, and artistic paving further personalise patios to suit personal tastes.


10. Low-Maintenance Landscaping

Busy lifestyles have led to a preference for low-maintenance patio solutions. Porcelain paving, composite decking, and artificial grass offer durability with minimal upkeep. Automated irrigation systems and self-watering planters also ensure that gardens remain lush with minimal effort.


By embracing these trends, British homeowners can transform their patios into stylish, functional, and relaxing outdoor spaces. Whether planning a full renovation or a simple update, focusing on sustainability, comfort, and personalisation will ensure your patio remains timeless and inviting.

For premium-quality jointing compounds, sealers, and patio maintenance solutions, explore Joint-It’s range of high-performance products designed to enhance and protect your paving investment.

Common Patio Installation Mistakes and How to Avoid

common patio installation mistakes Joint-It

Paving installation is a crucial investment that enhances the aesthetic appeal and functionality of outdoor spaces. However, improper installation can lead to long-term issues such as uneven surfaces, cracking, and weed growth. To ensure a successful and durable paving project, it’s essential to be aware of common patio installation mistakes and how to prevent them.

1. Inadequate Site Preparation

Proper site preparation is the foundation of a long-lasting paved surface. Neglecting this step can result in shifting patio slabs, water pooling, and an uneven finish.

How to Avoid:

  • Clear the Area: Remove all plants, debris, and topsoil to create a stable base.

  • Excavate to the Correct Depth: Ensure you dig deep enough, taking into account the type of paving and expected load.

  • Plan for Drainage: Grade the area appropriately to allow water runoff and prevent standing water.

common patio installation mistakes - Joint-It

2. Using Substandard Materials

The quality of paving materials directly affects the durability and appearance of your paving. Cheap or inappropriate materials can lead to early degradation of your patio.

How to Avoid:

  • Choose High-Quality Paving Materials: Select materials suited to local weather conditions and intended use.

  • Use a Reliable Jointing Compound: Opt for high-quality jointing products like Joint-It Simple to ensure long-lasting, weed-resistant joints.

3. Incorrect Installation of Jointing Material

Incorrect application of jointing compounds can lead to weak joints, allowing weeds and moss to take hold.

How to Avoid:

  • Follow Manufacturer Guidelines: Always adhere to instructions for jointing products such as Joint-It Simple for best results.

  • Apply in Suitable Conditions: Some jointing materials require specific weather conditions to cure correctly.

brushing in jointing compound Joint-It Simple

4. Neglecting Edge Restraints

Without proper edge restraints, paving can shift over time, leading to an uneven and untidy surface.

How to Avoid:

Install Robust Edging: Use strong edge restraints, such as concrete, plastic, or metal, to maintain the integrity of the design.

5. Insufficient Compaction

Failing to compact the sub-base or patio slabs correctly can result in sinking and uneven surfaces.

How to Avoid:

Compact Each Layer Thoroughly: Use a plate compactor to compress the sub-base, bedding layer, and pavers for a firm, stable finish.

6. Ignoring Maintenance

Even a perfectly installed patio requires ongoing maintenance to keep it looking its best and prevent long-term damage.

How to Avoid:

  • Regular Cleaning: Use appropriate cleaning products, such as Joint-It So Clean, to prevent dirt build-up and stains.

  • Seal the Surface: Apply a protective sealant like Joint-It Premium Seal to guard against weather damage and extend the life of your paving.

If you are planning a patio installation, and want to learn which patio slabs are best for your job, read this article “Which Patio Slabs are Best?”

Are Porcelain Patio Tiles Slippery When Wet?

porcelain patio

Porcelain patio tiles have gained popularity as an excellent choice for outdoor spaces due to their durability, aesthetics, and low maintenance. However, one of the most common concerns among homeowners is whether porcelain tiles become slippery when wet. Understanding the slip resistance of these tiles is essential for ensuring safety, especially in high-moisture environments.

The Slip Resistance of Porcelain Tiles

Porcelain tiles are known for their non-porous nature, which means they absorb very little water. Unlike natural stone, which can develop moss and algae that create a slippery surface, porcelain tiles resist moisture penetration. Additionally, many outdoor porcelain tiles are designed with textured surfaces or anti-slip coatings to enhance their grip, even in wet conditions.

Slip resistance is typically measured using the R rating, which indicates the level of friction a tile provides underfoot. The scale ranges from R9 to R13, with higher numbers signifying better slip resistance. For outdoor applications, an R11 rating or higher is recommended, as it provides sufficient traction for safe walking in wet conditions.

Factors That Affect the Slip Resistance of Porcelain Tiles

Several factors influence how slippery a porcelain tile surface becomes when wet. These include:

Tile Finish

Porcelain tiles come in different finishes, including polished, matte, and textured. Polished tiles have a smooth, glossy surface, making them more prone to becoming slippery. On the other hand, matte and textured tiles offer better traction and are ideal for outdoor patios.

Surface Contaminants

Dirt, debris, fallen leaves, and algae buildup can create a slippery film on the surface of the tiles, even if they are slip-resistant. Regular cleaning can help mitigate this risk.

Slope and Drainage

A poorly drained patio can accumulate water, increasing the risk of slipping. Proper slope and drainage ensure that water flows away efficiently, keeping the surface drier and safer.

Type of Grout Used

The grout between tiles can also impact the overall slip resistance. Choosing a high-quality, water-resistant grout like Joint-It Porcelain Epoxy Grout helps prevent water retention and minimises the growth of algae or mold.

porcelain patio

How to Make Porcelain Patio Tiles Safer When Wet

Although porcelain tiles are designed to be slip-resistant, there are several proactive measures you can take to enhance their safety:

1. Choose the Right Type of Porcelain Tile

If you are installing a new patio, opt for R11 or R12 rated tiles with a textured surface. These provide extra grip underfoot, reducing the risk of slipping in wet conditions.

2. Keep the Surface Clean

Regularly sweeping and washing your tiles helps remove dirt, algae, and debris that can contribute to slipperiness. Use a mild detergent and a soft brush to maintain the surface without damaging the tiles.

3. Improve Drainage

Ensure that your patio has a proper slope to allow water runoff. If water tends to pool, consider installing additional drainage solutions such as French drains or channel drains.

4. Use Non-Slip Treatments

Non-slip sealers and coatings are available for porcelain tiles, providing an added layer of traction. However, it’s essential to choose a product that is compatible with porcelain and designed for outdoor use.

5. Install Outdoor Rugs or Mats

In high-traffic areas, using outdoor rugs or non-slip mats can help provide additional grip, especially near entrances, pool decks, or steps.

Patio Tools & Equipment | Joint-It

Why Porcelain Tiles Are Still an Excellent Choice for Outdoor Spaces

Despite concerns about slipperiness, porcelain tiles remain one of the best materials for outdoor patios due to their many benefits:

  • Durability: Resistant to weather changes, heavy foot traffic, and general wear and tear.

  • Low Maintenance: Unlike natural stone, porcelain does not require sealing and is resistant to staining.

  • Aesthetic Appeal: Available in a variety of colors, textures, and patterns to complement any outdoor design.

  • Water Resistance: Due to their low porosity, porcelain tiles do not absorb water, reducing the risk of damage and mold growth.

  • Frost and Heat Resistant: Suitable for all climates, porcelain tiles do not crack easily under extreme weather conditions.

To Conclude

Porcelain patio tiles are a stylish, durable, and practical choice for outdoor spaces. While concerns about slipperiness are valid, selecting R11 or R12 rated tiles, ensuring proper maintenance, and implementing additional safety measures can significantly reduce slip risks. By following these best practices, you can enjoy a beautiful and safe patio year-round.

For expert advice on choosing the right grout and maintenance products for your porcelain tiles, visit Joint-It and explore our range of outdoor solutions. Our Porcelain Epoxy Grout is specially formulated to provide long-lasting protection while enhancing the safety and durability of your outdoor tiles.