When to Grout Your Patio: The Best Timing for a Perfect Finish

when to grout patio | Joint-It patio grout

Grouting your patio at the right time is essential to achieving a durable, weed-free, and visually appealing finish. If done incorrectly or in unsuitable conditions, grout can crack, deteriorate, or fail to bond properly. Here’s everything you need to know about when to grout your patio for the best results.

Best Time of Year to Grout a Patio

1. Spring and Early Summer (Best Choice)

  • Why? The temperatures are generally mild, and rainfall is moderate.
  • Ideal Conditions: A dry spell of at least 24 hours after applying helps the grout set properly.
  • Best for: Most patios, especially natural stone and concrete.

2. Late Summer and Early Autumn (Good Alternative)

  • Why? The heat of mid-summer has passed, reducing the risk of grout drying too quickly.
  • Ideal Conditions: Choose a dry day with mild temperatures (10–25°C).
  • Best for: Areas with moderate temperatures and stable weather.

3. Winter (Avoid Freezing Conditions)

  • Why? Cold temperatures and excessive moisture can cause grout to crack or fail to set.
  • Risks: Water freezing in the joints before it can set.
  • If You Must Grout in Winter: Use a fast-setting, weather-resistant grout like Joint-It Dynamic, and work on a dry day above freezing.

Best Time of Day: When to Grout Your Patio

  • Morning (Best Choice) – Allows the grout to set gradually throughout the day with the sunlight.
  • Midday (Challenging in Very Hot Weather) – Can cause grout to dry too quickly.
  • Evening (Not Ideal) – Dew and overnight moisture in very cold temperatures can interfere with the curing process.

Weather Conditions to Consider

1. Dry Weather is Key for Certain Grouts

  • Grout needs at least 24–48 hours of dry conditions to fully cure with certain grouts.
  • Avoid grouting if rain is forecast within 4 hours. This does not apply if you are grouting with Joint-It Simple, which needs water for its application. 

2. Avoid Extreme Temperatures

  • Below 1°C: Grout may not cure properly in freezing conditions.
  • Above 30°C: Grout can dry too fast and cause discolouration.
  • Ideal temperature: 10–25°C for best results.
when to grout patio | Joint-It Simple patio grout

Using the Right Grout for the Right Conditions

1. Joint-It Simple (Best for General Use)

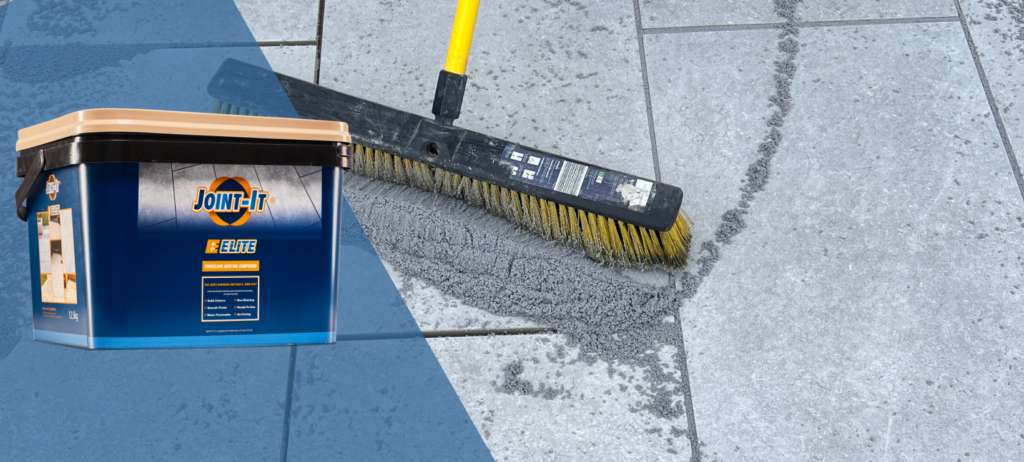
  • Ready-to-use, perfect for natural stone, concrete, and porcelain.
  • Ideal for all year round application.
  • Requires a damp surface to prevent discolouration.

2. Joint-It Dynamic (Best for Tougher Conditions)

  • A two-part resin system that works on both permeable and non-permeable beds.
  • Excellent for high-traffic areas and all-weather conditions.
  • Faster curing, making it a good option for cooler or unpredictable weather.

Final Tips for a Perfect Grouting Job

Check the forecast:
Plan your grouting when around the weather depending on the grout you are using.

Prepare the surface:
Ensure the joints are clean and free from debris.

Keep the area damp:
If using Joint-It Simple, wet the paving first to prevent staining.

Work in sections:
This prevents the grout from drying out before you finish.

Allow proper curing time:
Avoid walking on the patio until the grout is fully set.

By choosing the right time and conditions for grouting, along with high-quality products like Joint-It Simple or Joint-It Dynamic, you can ensure a professional finish that lasts for years.

For more information on the difference between these products, watch the video below.

Easy Patio Styling Tips for Every Season

A patio is an extension of your living space — a place to relax, entertain, and soak in the outdoors. But let’s be honest, sometimes patios can feel a little … blah. Whether it’s looking bare in the middle of winter or just uninspired in summer, it doesn’t have to be that way. With a few clever tweaks and seasonal touches, you can turn your patio into a brilliant retreat all year round!

Spring: Patio Styling Tips to Embrace the Blooms

Ah, spring! It’s time to shake off the winter blues and let nature shine. For your patio, think fresh flowers and greenery. Add colourful potted plants, hanging baskets, and bright cushions to give your space an instant lift. Daffodils, tulips, and primroses are perfect for adding cheerful pops of colour. A small herb garden in containers or an aromatic jasmine vine can also bring both beauty and fragrance to your outdoor oasis.

Quick Tip: Use light pastel-coloured cushions, throws, and table settings to keep it fresh and light. Think of it like dressing for a spring picnic — breezy and inviting!

Summer: The Ultimate Outdoor Hangout

Summer is all about relaxing and entertaining, so turn your patio into an extension of your indoor living room. Start with comfy seating — think lounge chairs, oversized cushions, and maybe even a hammock if you’ve got the space! Fairy lights or string lights are a must for creating a cozy vibe as the sun sets. Don’t forget to add some outdoor rugs for texture and warmth.

For plants, keep it tropical! Palm trees, bougainvillea, or even simple succulents can handle the heat and bring some vibrant, summery vibes. If you love to entertain, a bar cart with drinks and snacks is a fun addition to any patio.

Quick Tip: Try adding a cool-down station with a small fan or mister to keep guests refreshed during those hot summer days. Plus, an outdoor cooler or mini fridge is always a crowd-pleaser!

Autumn: Cozy and Warm Patio Styling Tips

When the air turns crisp and the leaves start to fall, your patio should feel like the perfect place to relax with a warm drink. Think cozy throws in rich, autumnal colours — like burnt orange, deep red, and mustard yellow. Add pumpkins (real or decorative) and autumn foliage in baskets or containers.

Lighting becomes key in this season, so go for soft, warm lights — lanterns, candles, or even fairy lights strung across your patio give off a welcoming glow as the nights get darker. For plants, try chrysanthemums, ornamental kale, and evergreens to bring colour and life into the cooler months.

Quick Tip: A fire pit or outdoor heater will keep you warm while you enjoy those crisp autumn evenings. Grab a blanket, a mug of something hot, and settle in for some stargazing!

Winter: A Winter Wonderland

Who says your patio has to hibernate in winter? With the right touches, it can still be a charming spot, even when the temperatures drop. Think twinkling lights on trees, evergreen wreaths on the door, and outdoor throws for a cozy touch. You can add a few winter-flowering plants like hellebores or pansies for colour against the dull backdrop of winter.

If you’re lucky enough to have a covered patio, add a few winterproof cushions and maybe a small portable heater for those days when you want to enjoy a hot cup of cocoa outdoors. And if you’re really embracing the winter vibe, consider a faux fur throw on your patio chairs for ultimate comfort.

Quick Tip: Add a flame-effect heater or fireplace if you want a warm and inviting focal point. You’ll never have to feel the cold when you’re wrapped up in winter warmth!

From Blah to Brilliant

Patio styling doesn’t have to be complicated or expensive — just a few simple touches can transform your outdoor space into a year-round haven. Whether you’re lounging in the summer sun, hosting a cozy autumn gathering, or enjoying winter nights by the fire, your patio can be the perfect spot for every season.

Patio Grout Challenges & Solutions: Troubleshooting Tips for Homeowners

A patio is a valuable addition to any home, offering a beautiful and functional space to enjoy the outdoors. However, maintaining its appearance and structural integrity requires attention, particularly when it comes to the grout between the slabs. Over time, various challenges can arise with patio grout. The good news is that with modern materials and a little know-how, these concerns can be tackled effectively.

We explore common grout challenges faced by some homeowners, and offer practical solutions, highlighting innovative methods that make maintenance easier and longer-lasting.

Cracking or Crumbling Grout

Cracks or crumbling grout often occur due to weather fluctuations. Outdoor patios experience expansion and contraction with temperature changes, which can stress traditional grout. Older cement-based grouts, in particular, may struggle to withstand these conditions.

Solution:

  • Opt for flexible, air-cured jointing materials that can accommodate natural movement.
  • Choose products that are easy to apply, such as brush-in compounds, which simplify the re-grouting process.

Weed Growth Between Slabs

Weeds can be a nuisance, often finding their way into even the smallest gaps in grout lines. This is typically caused by dirt or organic matter accumulating in the joints, providing a fertile environment for weeds to sprout.

Solution:

  • Regularly clean grout lines with a stiff brush to remove dirt and debris.
  • Consider using permeable jointing compounds, which allow water to drain through while resisting weed growth. These materials reduce the conditions that encourage weeds while maintaining a stable joint structure.

Discolouration and Stains

Over time, grout can lose its original appearance due to dirt, moss, or algae buildup. This not only affects the grout but can make the entire patio look unkempt.

Solution:

  • Use jointing materials with built-in resistance to staining and discolouration. Permeable compounds are particularly effective, as they reduce water pooling, which can otherwise encourage algae growth.
  • Seal the patio periodically to add an extra layer of protection against stains and environmental wear.

Loose or Missing Grout

If you find grout breaking away or slabs becoming loose, it’s often a sign that the original material wasn’t suitable for outdoor use or that installation techniques didn’t account for movement.

Solution:

  • Replace old grout with a durable, brush-in solution designed for patios. These materials are not only easy to apply but also ensure a strong, weather-resistant bond.
  • Before reapplying grout, clean the gaps thoroughly to ensure the new material sets properly and follow the grout manufacturer’s minimum joint depth and width guidelines.

Water Pooling on the Patio

Drainage is crucial for any outdoor area, especially patios. Poor drainage can lead to water pooling on the surface, which can weaken grout and lead to moss or algae buildup.

Solution:

  • Use a permeable jointing material to improve water runoff. These materials allow rainwater to pass through, preventing pooling and reducing the risk of grout erosion.
  • If necessary, adjust the fall of your patio or install additional drainage channels to manage water flow.

Why Choose Permeable, Brush-In Grouting Compounds?

Modern solutions like permeable, brush-in jointing compounds are transforming patio maintenance. Unlike traditional cement-based grouts, these materials are:

  • Air-Cured: They harden naturally, without requiring additional or specialised tools.
  • Effortless to Apply: Simply brush the compound into the joints, and it sets quickly, saving time and effort.
  • Weather-Resistant: Designed to withstand the harshest outdoor conditions, including freeze-thaw cycles.
  • Permeable: Allows water to drain through the joints, reducing the risk of pooling and weed growth.

By using these advanced products, homeowners can enjoy a patio that looks better for longer with minimal maintenance.

Preventative Maintenance Tips for Patio Grout

To keep your patio looking fresh and well-maintained, follow these simple steps:

  • Clean Regularly: Sweep the patio and use a mild cleaner to prevent dirt buildup.
  • Check Annually: Look for signs of wear in the grout and address any gaps or cracks promptly.
  • Seal the Surface: If your patio materials are prone to staining, a protective sealant can make cleaning easier.
  • Use Innovative Materials: Invest in high-quality, flexible, and permeable grouting solutions that are built to last.

Maintaining patio grout doesn’t have to be a chore. With the right materials and a proactive approach, you can ensure your outdoor space remains beautiful and functional year-round. Incorporating modern grouting solutions designed for ease of application and long-term durability is a game-changer for any homeowner.

If you’re ready to refresh your patio and protect your investment, start with these tips and enjoy a hassle-free outdoor space for years to come!

Building Stronger Client Relationships as a Landscaper

Building stronger client relationships as a landscaper goes beyond creating beautiful outdoor spaces; it’s about crafting an experience that resonates with your clients and leaves a lasting impression. When expectations aren’t clear or communication breaks down, even the most stunning gardens can fall short of a client’s vision. Effective communication is the foundation of any successful project, ensuring that what you deliver aligns with what your clients envision. By setting clear expectations, offering expert guidance, and maintaining transparency, you reduce misunderstandings, build trust, and foster long-term relationships that lead to repeat business and glowing referrals.

In this blog, we’ll explore some key strategies for building and maintaining strong, positive relationships with clients, ensuring long-term success for your landscaping business.

Set Clear Expectations from the Start

One of the most common reasons for client dissatisfaction in landscaping projects is miscommunication. It’s easy for expectations to differ when clients imagine one thing and landscapers execute something else. To prevent this, it’s crucial to be clear and transparent from the outset.

Actionable Tips:

  • Provide Detailed Quotes: Ensure your quotes are comprehensive, breaking down each part of the project (materials, labour, timeline, etc.). This will prevent confusion later and help clients understand exactly what they’re paying for.
  • Discuss Timelines and Milestones: Always outline project timelines, including how long each phase will take. Clients should know when you expect to start and finish, with built-in flexibility for potential weather delays or material shortages.
  • Agree on Materials and Design Details: Always go through the design with your client before starting work. If you’re using specific paving stones, jointing compounds, or cleaners, explain why these materials are being chosen and how they will enhance the final result.

Pro Tip: Consider creating a contract that details all of these factors. This can serve as a reference point if disputes arise during the project, and it demonstrates professionalism.

Offer Education and Expertise to Clients

Clients appreciate landscapers who go the extra mile to educate them about the project. Rather than simply executing a plan, being a resource for your clients shows that you care about the long-term success and beauty of their garden or patio. It also helps build trust and positions you as an expert in your field.

Actionable Tips:

  • Explain Material Choices: If you’re using a particular jointing compound or sealer, explain the benefits of each. For example, some products are specifically designed to resist weed growth, while others are better at withstanding UK and Irish weather. Providing this context gives clients confidence that you are making decisions with their best interests in mind.
  • Give Maintenance Advice: Many clients will want to know how to maintain their new patio or garden after the job is completed. Take the time to explain how to care for the materials you’ve used—how to clean and seal natural stone, how to remove weeds, and how to handle issues like moss buildup on paving slabs. This education helps clients appreciate the longevity and quality of your work.

Pro Tip: Provide a care guide or maintenance schedule after completing a job. This can be a simple handout or email that gives clients step-by-step instructions on how to maintain their outdoor spaces.

Maintain Consistent and Transparent Communication

One of the keys to a successful landscaping project—and to building lasting relationships—is communication. Clients want to feel that they are in the loop throughout the process, from the initial consultation to project completion. Ensuring that you are easily accessible and keeping clients informed goes a long way in building trust.

Actionable Tips:

  • Regular Updates: Keep your clients updated regularly, especially during longer projects. If there are delays due to weather, supply chain issues, or other factors, inform them as soon as possible.
  • Transparency in Changes: Sometimes, unforeseen issues arise during the project that require adjustments. For example, an unexpected drain problem could alter the scope of work. When changes occur, be transparent and discuss them with the client immediately, including any cost implications. Clients appreciate honesty and are more likely to trust you when you’re upfront about challenges.

Pro Tip: Use project management apps to stay organised and communicate with clients. These kinds of tools allow you to share progress, timelines, and even pictures with clients in real-time.

Offer Exceptional Aftercare Services

The work doesn’t end once the patio is laid, the plants are in place, and the job is “finished.” Offering aftercare services and check-ins is a powerful way to build long-term relationships with your clients. It demonstrates that you care about the longevity of their investment and that you’re available for help, should they need it.

Actionable Tips:

  • Check-In After Completion: After a week or two, follow up with your clients to ensure they are happy with the completed work and to address any minor issues that may have come up.
  • Offer Maintenance Plans: For clients who want to keep their garden or patio looking great year-round, offer ongoing maintenance services. This could include seasonal cleanings, re-sealing, or checking the integrity of the jointing compound between paving stones.

Pro Tip: Consider bundling services with aftercare, such as a discount for a yearly maintenance package. This will not only keep the client happy but also secure repeat business.

Go Above and Beyond

It’s the little touches that make a big difference. To truly stand out from the competition, consider going above and beyond what the client expects. This could be as simple as delivering an extra service or ensuring the site is cleaner than when you arrived.

Actionable Tips:

  • Small Acts of Kindness: If you’re working in a residential area, consider trimming an overgrown hedge next door or cleaning up your client’s driveway after completing the work. These small gestures show that you care and can make a big impact.
  • Ask for Feedback: Once the project is finished, ask your clients for feedback. Not only will this help you improve your service, but it also gives clients a chance to voice any concerns, making them feel heard and valued.

Pro Tip: Always follow up with a request for a review or testimonial once the work is completed. Positive reviews help build your reputation and credibility.

Building Trust One Project at a Time

Client relationships are the foundation of a successful landscaping business. By setting clear expectations, educating clients, maintaining consistent communication, and offering exceptional aftercare, landscapers can create a loyal client base that results in repeat business and positive referrals.

As you continue to develop your craft and refine your client management skills, remember that a happy client is your best advertisement. Take the time to nurture these relationships, and you’ll see the rewards in the long term.

Do I Need to Leave a Gap Between Paving Slabs?

When planning a paving project, one question that often arises is whether it is necessary to leave a gap between paving slabs. While it might seem tempting to place slabs tightly together for a seamless look, leaving gaps is essential for both functionality and longevity. Here’s everything you need to know about why gaps matter and how to get them right.

Why Gaps Between Paving Slabs Are Necessary

Leaving a gap between paving slabs isn’t just a design choice; it’s a practical necessity. Here’s why:

Preventing Damage from Expansion and Contraction

Paving materials expand and contract with temperature changes. Without adequate gaps, this natural movement can lead to cracking, chipping, or lifting of slabs.

Facilitating Proper Drainage

Gaps allow rainwater to drain effectively, reducing the risk of pooling and water damage. This is especially important for outdoor areas exposed to the elements.

Improved Stability

Properly filled gaps provide structural integrity by locking the slabs in place and reducing the risk of movement over time.

Weed and Pest Resistance

Filling gaps with a high-quality jointing material prevents weeds from growing and deters pests like ants from nesting.

Factors That Determine Gap Size

The size of the gap you leave between paving slabs depends on several factors:

Type of Slabs

  • Natural Stone Slabs: Natural stone slabs (like sandstone, limestone, or slate) are often irregular in size and shape. They require slightly wider joints, typically 8-15 mm, to accommodate their uneven edges.
  • Concrete Slabs: Manufactured concrete slabs are more uniform in size, so a smaller joint of 3-5 mm may be sufficient. However, if they are large format slabs, slightly wider joints might be necessary to account for movement.
  • Porcelain Slabs: Porcelain paving is highly precise and usually installed with narrow joints, often between 2-5 mm. 

Purpose of the Paving

  • Driveways: Smaller gaps (2-4 mm) ensure stability under heavy loads.

  • Patios and Paths: Wider gaps (4-10 mm) can enhance the design while maintaining functionality.

Jointing Material

Using a durable jointing compound, like those offered by Joint-It, can influence the gap size. Joint-It products are designed to work with specific widths for optimal performance.

Local Climate

In areas with extreme weather conditions, slightly larger gaps may be needed to accommodate more significant expansion and contraction.


How to Fill Patio Gaps Correctly

Follow these steps to ensure your paving slabs have the ideal gaps:

  1. Plan Your Layout: Measure and mark the gaps to ensure consistency.

  2. Use Spacers if Needed: For uniform gaps, use spacers between slabs during installation.

  3. Fill the Gaps with Joint-It Compound Apply the chosen jointing material using a brush, ensuring it fills the gaps completely.

  4. Compact and Clean: Use a rubber mallet or compactor to settle the slabs and brush away excess material.

  5. Cure the Jointing Material: Allow the compound to set according to the manufacturer’s instructions for a long-lasting finish.

Leaving a gap between paving slabs is essential for structural stability, drainage, and long-term durability. Using high-quality jointing compounds like Joint-It products ensures these gaps are not only functional but also enhance the aesthetic appeal of your paving project. By planning carefully and using the right materials, you’ll create a surface that stands the test of time.

For more information about Joint-It products and to find the ideal jointing solution for your project, visit Joint-It’s product guide.

What is the Ideal Gap Between Pavers?

gap between pavers Joint-It Fine

Creating a durable and visually appealing paver project requires careful planning and attention to detail. One critical factor that often gets overlooked is the gap size between pavers. So, what is the ideal gap between pavers? Let’s explore the factors that influence this decision and why choosing the right gap is crucial for the success of your project.

Why Gap Size Matters

The gap between pavers plays a vital role in both the functionality and aesthetics of your surface. It affects the following:

1. Structural Stability

Proper gaps allow for jointing materials to fill the space, which helps hold the jointing compound in place and prevents shifting over time.

2. Drainage Efficiency

Appropriate gaps facilitate water drainage, reducing the risk of water pooling and subsequent damage to your installation.

3. Aesthetic Appeal

Uniform gaps create a clean and professional look, enhancing the overall appearance of your paving project.

4. Accommodating Expansion and Contraction

Pavers expand and contract due to temperature changes. Adequate spacing prevents cracking or other damage caused by this natural movement.

Factors to Consider When Determining Gap Size

Several factors influence the ideal gap size for your paver project:

1. Paver Type and Shape

Some pavers come with built-in spacers to ensure consistent gaps. For others, you’ll need to measure and set the spacing manually. Irregularly shaped pavers may require wider gaps to accommodate their design.

2. Purpose of the Surface

The intended use of the paved area can dictate gap size. For instance, driveways will need narrower gaps for added stability, while garden paths can accommodate wider gaps for aesthetic reasons.

3. Jointing Material

The type of jointing material used impacts the gap size. Materials like Joint-It Simple or Joint-It Porcelain Epoxy Grout require specific gap widths to ensure proper application and durability.

4. Local Climate

In regions with extreme temperature fluctuations, slightly larger gaps may be necessary to accommodate expansion and contraction.


Recommended Gap Sizes

While the exact gap size depends on the factors mentioned above, here are some general guidelines:

  • Concrete Pavers: 3-6 mm

  • Natural Stone Pavers: 3-5 mm

  • Irregular Pavers: 5-10 mm (depending on shape and design)


Filling the Gaps: Why Joint-It Products are Ideal

Once you’ve determined the appropriate gap size, it’s essential to use a high-quality jointing material to fill those gaps. Joint-It jointing compounds are designed to provide a durable, weed-resistant, and aesthetically pleasing finish. Here’s why they’re the ideal choice:

1. Durability and Weather Resistance

Joint-It products are specially formulated to withstand harsh weather conditions, ensuring long-lasting results.

2. Weed and Pest Prevention

The strong bond created by Joint-It compounds prevents weeds from taking root and deters pests.

3. Ease of Application

Even DIY enthusiasts can achieve professional results with Joint-It jointing compounds, thanks to their easy application process.

4. Versatile and Aesthetic

Available in various finishes and colours, Joint-It products complement any paver design, enhancing the visual appeal of your project.

The ideal gap size between pavers depends on several factors, including the type of paver, the jointing material, and the project’s purpose. Choosing the right gap size and filling it with high-quality jointing compounds like Joint-It grouts ensures a stable, durable, and visually appealing surface.

For more information about Joint-It products and to find the perfect solution for your project, visit Joint-It’s product page.

What is the Difference Between Cement and Concrete?

cement concrete

When planning to create or renovate a patio or driveway, you may hear the terms cement and concrete used interchangeably. While they are closely related, they are not the same. Understanding their differences is essential for selecting the right materials for your project. Let’s break down the roles of cement and concrete in paving and patio construction.

What Is Cement?

Cement is a fine powder made from a mixture of limestone, clay, shells, and silica sand, which is heated in a kiln and then ground into a powder. When mixed with water, it forms a paste that binds materials together as it hardens. Cement is an ingredient, not a standalone material for building patios or paving surfaces.

Common Types of Cement Used in Construction

  1. Portland Cement: The most common type used in concrete.
  2. Masonry Cement: Designed for mortar or stucco work.

In short, cement is the “glue” in construction projects. However, by itself, it lacks the durability and strength needed for patios or paving.

cement

What Is Concrete?

Concrete is a composite material made by mixing cement with aggregates (such as sand, gravel, or crushed stone) and water. As the mixture cures, it forms a hard, durable substance. This combination of materials makes concrete much more suitable for building large, load-bearing surfaces like patios, driveways, and walkways.

Key Components of Concrete:

  1. Cement: Acts as the binding agent.
  2. Aggregates: Provide bulk and improve strength.
  3. Water: Initiates the chemical reaction (hydration) that hardens the mix.

In essence, concrete is the final product used in most outdoor projects, with cement playing a supporting role.

concrete

Concrete vs. Cement for Patios and Paving

Feature
Cement
Concrete
Primary Use
Binding agent in mixtures
Structural material for patios and paving
Durability
Brittle and prone to cracking
Strong, long-lasting, and weather-resistant
Cost
Lower initial cost
Higher cost due to added materials
Ease of Use
Requires mixing with other materials
Ready-mix options available for convenience
Maintenance
Rarely used alone in outdoor projects
Minimal if sealed and installed correctly

Why Choose Concrete for Patios and Paving?

Strength and Longevity

Concrete is much stronger and more durable than cement alone. A properly installed concrete patio or driveway can last for decades, withstanding heavy foot or vehicle traffic and weather changes.

Design Versatility

Modern concrete offers numerous decorative options, such as:

  • Stamped Concrete: Mimics the look of stone, brick, or wood.
  • Colored Concrete: Custom shades for aesthetics.
  • Exposed Aggregate: Highlights the natural texture of stones.

Low Maintenance

Concrete surfaces require little maintenance beyond occasional cleaning and resealing. Cement-based structures, by contrast, would crumble under prolonged exposure to the elements.

To Cement Our Point

Cement and concrete are related but distinct materials, each suited to specific tasks. Cement serves as the foundation for concrete, but it’s concrete that shines when it comes to paving and patio construction. Its strength, versatility, and durability make it the material of choice for creating surfaces that stand the test of time.

Before beginning your project, consult with professionals to determine the best type of concrete mix and ensure proper installation. Whether you’re envisioning a sleek modern patio or a rustic walkway, concrete can bring your outdoor space to life.

Looking for a Patio Joint Filler? Try Joint-It Elite

Natural Stone: Origins, Characteristics, and Why It’s Perfect for Patios

natural stone patio Joint-It

Natural stone has been a cornerstone of construction and design for centuries, valued for its aesthetic appeal, durability, and versatility. From ancient monuments to modern architecture, its appeal remains timeless. But where does natural stone come from, and what makes it such a great choice for patios? Let’s explore its origins, unique qualities, and benefits for outdoor spaces.

The Origins of Natural Stone

Natural stone is formed deep within the earth over millions of years through geological processes such as cooling of molten rock, compression of minerals, and crystallisation. Each type of stone has a unique formation story:

  • Granite forms from the slow crystallisation of magma beneath the earth’s surface, resulting in a hard, dense material.
  • Limestone originates from the accumulation of shell, coral, and algae in shallow seas, giving it a soft, warm aesthetic.
  • Sandstone is created from layers of compressed sand and minerals, often showcasing striking natural patterns.
  • Slate is formed through the compression of clay and volcanic ash, yielding a material that splits into thin, durable layers.

These stones are quarried worldwide, with major sources including the United States, Italy, India, Brazil, and China. Each region’s unique geology produces stones with distinctive colors, textures, and patterns.

What Makes Natural Stone Special?

Natural stone’s enduring popularity is due to its remarkable properties and unique appeal:

  1. Durability
    Many natural stones, such as granite and slate, are incredibly durable and can withstand the elements for decades without significant wear. This makes them ideal for outdoor applications.

  2. Aesthetic Variety
    No two pieces of natural stone are exactly alike. Veining, color variations, and patterns make each stone uniquely beautiful, allowing for truly personalized designs.

  3. Eco-Friendliness
    Natural stone is a sustainable building material. It requires minimal processing compared to manufactured materials and is fully recyclable.

  4. Low Maintenance
    Properly sealed natural stone resists stains, scratches, and weathering, requiring only occasional cleaning to maintain its appearance.

  5. Timeless Appeal
    The natural beauty of stone never goes out of style, blending seamlessly with both traditional and modern designs.

Why Choose This Type of Stone for Patios?

A patio is an extension of your living space, a place to relax, entertain, and connect with nature. Natural stone is a fantastic choice for patios for several reasons:

  1. Slip Resistance
    Stones like sandstone and slate often have a naturally textured surface, providing excellent traction even when wet.

  2. Weather Resistance
    Natural stone can handle extreme weather conditions, from freezing winters to scorching summers, without cracking or fading.

  3. Heat Regulation
    Certain stones, like limestone, stay cool underfoot, making them comfortable for use in sunny areas.

  4. Design Versatility
    Natural stone is available in a range of colours, shapes, and finishes, allowing for endless design possibilities. Whether you prefer a rustic, earthy vibe or a sleek, modern look, there’s a stone to match.

  5. Seamless Integration with Nature
    Using natural stone enhances the connection between your patio and its surrounding landscape, creating a harmonious outdoor environment.

Did You Know?

  • The Great Pyramid of Giza is made of limestone and granite, showcasing the stone’s longevity.
  • The Taj Mahal in India, made of white marble, is a stunning example of the stone’s timeless elegance.
  • Some varieties of natural stone, like travertine, feature fossilised remains of ancient marine life.

Natural stone’s journey from deep within the earth to your patio is one of remarkable transformation. Its unmatched beauty, durability, and eco-friendly nature make it a premier choice for outdoor spaces. By choosing natural stone for your patio, you’re not just investing in functionality and aesthetics—you’re also bringing a piece of the earth’s history to your home. For grouting, sealing and cleaning products that are suitable for natural stone, please see our product range here.

How to Pick the Perfect Patio Furniture For Your Garden

Creating a welcoming and stylish outdoor space is a dream for many homeowners. With the right patio furniture, your back patio can become a favourite spot for relaxation, entertaining guests, or simply enjoying the summer. At Joint-It, we understand the importance of a well-maintained patio, which is why we offer high-quality grouts, cleaners, and sealers to keep your outdoor space looking its best. In this guide, we’ll help you choose the perfect patio furniture to complement your home and lifestyle.

patio-furniture

1. Assess Your Space

Before you start shopping, take a good look at your patio. Measure the area to understand how much space you have and consider the layout. Think about the following:

  • Size and Shape: Is your patio large or small? Is it a regular shape or more irregular? These factors will influence the type of furniture that will fit best.
  • Purpose: What will you use your patio for? Dining, lounging, or a combination of both? Knowing this will help you choose the right pieces.

2. Consider the Weather

The British and Irish climates can be unpredictable, so it’s essential to choose furniture that can withstand various weather conditions.

  • Material: Opt for materials that are durable and weather-resistant. Aluminium, teak, and synthetic rattan are excellent choices. Aluminium is lightweight and rust-resistant, teak is sturdy and ages beautifully, and synthetic rattan is both stylish and weatherproof.
  • Cushions and Fabrics: Look for cushions made with quick-dry foam and covers that are UV-resistant and water-repellent. This ensures they won’t fade or get damaged easily by rain.

3. Comfort and Style

Your patio should be a comfortable and inviting space. When choosing furniture, consider both comfort and aesthetics.

  • Seating: Ensure that chairs and sofas have comfortable cushions and supportive backrests. Modular furniture can be a versatile option, allowing you to rearrange pieces to suit different occasions.
  • Tables: Choose a table that fits your space and needs. A small bistro table might be perfect for a compact patio, while a larger dining table is ideal for entertaining guests.
  • Colours and Design: Select colours and designs that complement your home’s exterior and garden. Neutral tones are versatile and timeless, while bright colours can add a pop of vibrancy.

4. Maintenance

Just like any item that is left outside at the mercy of the elements, patio furniture needs to be cleaned and maintained. We recommend choosing furniture that has removable cushions to take indoors when it is wet to prevent mould formation.

5. Sustainability

Consider choosing eco-friendly patio furniture made from sustainable materials. Recycled plastic, responsibly sourced wood, and eco-friendly manufacturing processes are all factors to look for. Not only will you be helping the environment, but you’ll also enjoy the peace of mind that comes with making a responsible choice.

6. Budget

Finally, set a realistic budget for your patio furniture. Quality furniture is an investment, and while it might be tempting to opt for cheaper options, they may not last as long or provide the same level of comfort and style. Look for reputable brands and check reviews to ensure you’re getting good value for your money.


Conclusion

Choosing the perfect patio furniture for your back patio involves considering space, weather, comfort, style, maintenance, sustainability, and budget. At Joint-It, we’re dedicated to helping you create a beautiful and functional outdoor space with our range of grouts, cleaners, and sealers. With the right furniture and our expert products, your patio will be the perfect place to enjoy the great British outdoors.

For more tips and to explore our range of products, visit our products page.

Do I Need To Seal My Patio? A Guide From Joint-It

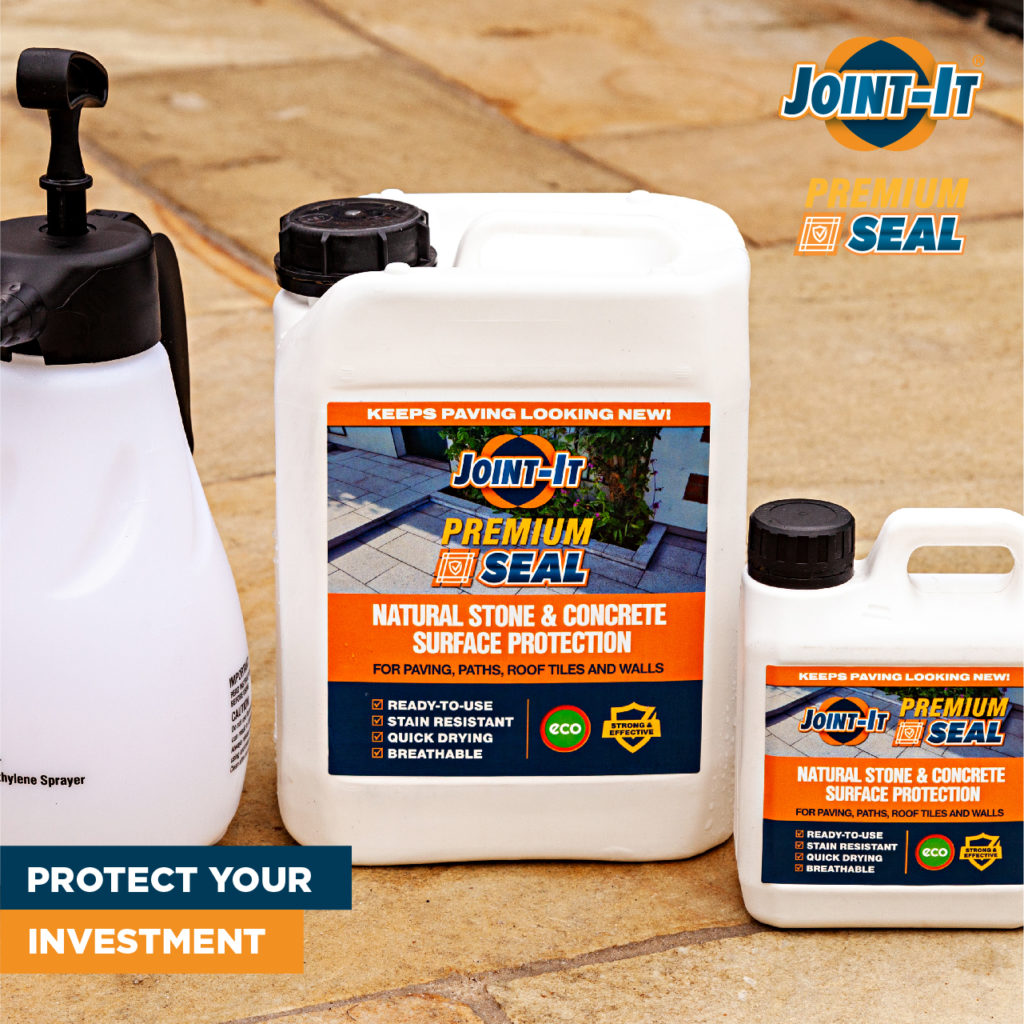
Deciding whether to seal your patio depends on the materials you’re using and the finish you are looking for. At Joint-It, we provide you with all the information you need to make an informed decision about sealing your paving slabs, including the benefits of using our Joint-It Premium Seal.

Applying a Patio Sealer

Deciding whether to seal your patio involves considering how, when, and with which products. While we offer general guidance here, always follow the instructions on your chosen sealer. Our Joint-It Premium Seal comes with comprehensive instructions and a video guide, ensuring optimal results. Some paving grouts might specify sealing requirements based on the materials used, so always refer to those guidelines.


Why Seal Your Patio?

Sealing your patio isn’t absolutely mandatory, but many homeowners choose to do so for several reasons:

  • Protection from Stains: Prevents spills, efflorescence, salt residues, iron residues, and organic stains.
  • Enhanced Appearance: Improves the colour and finish of your paving slabs.
  • UV Protection: Stops stones from fading due to sun exposure.
  • Water Resistance: Prevents water absorption.
  • Ease of Cleaning: Makes future cleaning simpler.

Certain natural stones like limestone, granite, or slate are particularly recommended for sealing to avoid future stains.


Which Paving Slabs Should Be Sealed?

Natural stones and some manmade paving slabs can be more prone to stains and residues. Professional landscapers often advise sealing the following materials:

  • Limestone (including black limestone)
  • Sandstone
  • Granite
  • Slate
  • Concrete paving
  • Honed Black Granite

Always check the product label and do a spot test to ensure you achieve the desired finish.


When to Seal a New Patio

The timing of sealing your new patio depends on your paving materials and grout. For porous stones like slate, granite, or limestone, pre-sealing is highly recommended before grouting. Otherwise, it’s typically advised to wait 3-6 months post-installation to allow any efflorescence to appear and be cleaned away.

Avoiding Efflorescence

Efflorescence is caused by salts evaporating through the paving slabs. Prevent it by ensuring paving slabs are set on a full-contact mortar bed, free of voids and gaps. Use a slurry primer on the underside and edges of each slab to secure them and prevent movement.

Preparing Paving Slabs Before Sealing

Clean paving slabs thoroughly before sealing. Sweep away dirt, debris, and remove any weeds. Use Joint-It So Clean on your patio to remove any residues and dirt. 

Considerations and Maintenance

Sealing your patio does come with costs and maintenance. Our Joint-It Premium Seal typically requires reapplication every 5 years, depending on the type of stones and sealant used. Before resealing, clean the patio to avoid trapping stains, dirt or residues.

While sealing is an additional step, the benefits are significant. Sealing not only enhances the look of your patio but also protects it from stains and makes ongoing maintenance much easier.

Check out Joint-It Premium Seal for your new or existing patio and keep your patio looking in tip top condition!